
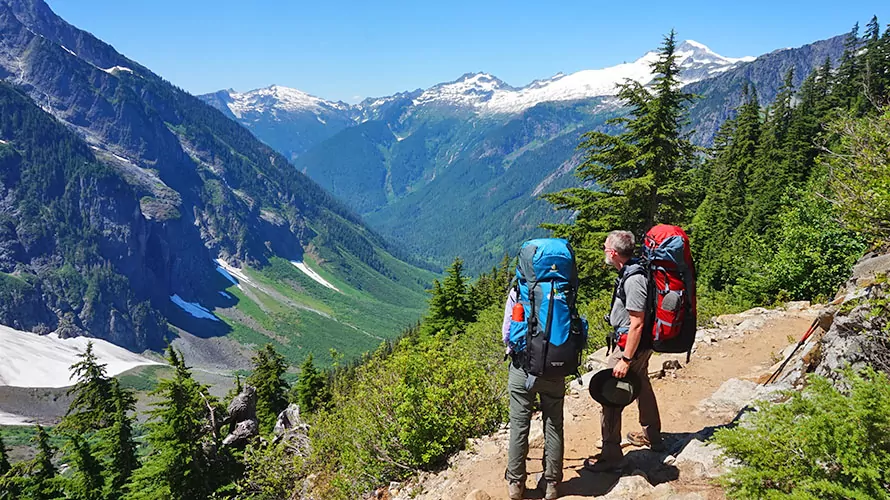
How to Start Backpacking: Everything Beginner Backpackers Should Know

Photo by Andrew Peluso on Unsplash
On my first “backpacking trip”, my dad took me to Timothy Lake in Oregon. I was a young kid — maybe five or six. We hiked barely a mile into a campsite by a lake — all my little legs could handle. I wore a small, external frame pack that my brother used before me; my dad probably hauled in his cast iron. My main memory from the trip was when my childhood dog wore my little backpack to carry his food. Somewhere along the trail, he lost the pack — an inevitability of a dog carrying human gear. We spent the trip making s’mores and playing in the water.
After that trip, I didn’t go backpacking again until college. But in the backpacking world, a lot had changed since the ‘90s. New trail systems, shiny, high-tech gear. Entering the outdoor community for the first time on my own, I had absolutely no idea how to start backpacking.
When you’re planning a backpacking trip, there’s so much to consider. What gear do you need? Where should you hike? How far should you hike? When you’re just getting started, it can all feel incredibly overwhelming.
But it’s okay to take it slowly. Rent, borrow, or find used gear. Learn from friends, from books, from guides. Over time, it will all come together. And trust me — the feeling you get from being in the backcountry, with everything you need on your back and beautiful views and experiences at every turn? It’s 100% worth it.
So how do you embark on your first backpacking trip? This guide will help you break down how to start backpacking, including what gear to bring, what to eat, and where to hike.
Why Backpacking?
The payoffs of backpacking are huge. Spending days (or even weeks) in the backcountry connects you to the natural world. You can experience many health benefits, create strong relationships, and develop personal confidence.
One thing I love the most is the feeling of self-sufficiency when you’re carrying everything you need on your back. Through this process, I’ve learned that you don’t need anything more than what you have. Life becomes very simple; it’s just you, the trail, and the views.
go Backpacking with Award Winning Guides
Your First Backpacking Trip: Guided or Independent?
One major consideration for your first backpacking trip is should you choose a guided backpacking trip or just venture out on your own?
Guided Trips
Joining a guided backpacking trip is a fantastic way to start off on the right foot, and at the same time, experience an impressive wilderness adventure.
Guided trips are a great way to learn skills quickly and boost your confidence in the backcountry. Backpacking guides are incredible sources of knowledge about both the areas they guide in, and the outdoors in general. If you show any interest in learning, they will happily take you under their wing and show you the ropes so that next time, you can set out on your own.
Also, if planning your trip is so overwhelming that you never do it, a guided trip might be the perfect opportunity for you to get your feet wet without getting overwhelmed. Choosing a guided trip takes most of the stress off of you. All you have to do is show up with your personal belongings. Food, permits, gear—all of that is taken off of your shoulders. It’s a great way to explore beautiful places and start backpacking without the stress.
If you choose a guided trip, make sure the company you want to go with is highly-rated and reputable. Follow their packing lists closely, and once you’re on the trip, pay very close attention to how the guides do everything. Ask the guide if they’d be willing to teach you how they do things, and if the company is a quality one, the answer will be a resounding “yes.” Of course, we’re biased, but Wildland Trekking has been running trips since 2005 and can offer you expert guidance on world-class backpacking routes across the USA and the world.
Diy Backpacking
On the other hand, if you’re excited by the planning process, and feel the drive to do things yourself, you can totally start backpacking without a guide. You can find a lot of great information and resources on the internet and in books. So, if you’re someone who loves learning and teaching yourself things, it’s reasonable to plan an independent backpacking trip, even if you’ve never backpacked before.
Of course, it’s always helpful to learn from friends who have backpacking experience, so the first step would be to see if you can find friends to go with for your first time.
-
Deeper Dive: Who to Go Backpacking With
-
FINDING A MENTOR
One of the best ways to get into backpacking is to find an experienced person who will mentor you and show you the ropes. But, before you convince your neighbor who went backpacking a couple of times in their 20s to head into the wilderness with you, it’s important to keep a couple of things in mind.
First, there are radically varying levels of skill when it comes to backpacking. It’s best to find someone who has formal training, such as through the National Outdoor Leadership School, Outward Bound, or from a backpacking guide company like Wildland Trekking. Learning the wrong way can easily get you into trouble, and — at the very least — can lead to some unenjoyable experiences.
Second, be sure the person who teaches you the art of backpacking understands Leave No Trace principles. The world’s remaining wild places are dwindling in size and simultaneously being heavily impacted by a burgeoning population with a growing interest in the outdoors. Those of us who venture into the wilderness must be educated about how to preserve it for future generations.
Finally, be sure you know this person well and trust them.
If you can find someone who fits these criteria, it’s worth reaching out to them and simply asking if you can join them on a trip. Many people love sharing their passions with others. Let them know you’re a beginner. If you go the DIY route, be prepared to either rent gear or spend some hefty cash on gear and clothing so you’re well-outfitted for the trip.
BACKPACKING WITH YOUR PARTNER
Another option of who to go with is your romantic partner. Venturing into the wilderness with your partner can be a deeply meaningful way to bond with them and get into the sport. Start with small, manageable trips – overnights or long weekends – and work your way into longer, more ambitious routes.
BACKPACKING WITH GROUPS OF FRIENDS
If you have adventurous friends who are up for new experiences, then getting them all out on a backcountry trip can be incredibly fun. (It can also be a complete mess, depending on how much experience the group has and how prepared people are.) Pro Tip: If you go with friends, it can be tempting to turn a backpacking trip into a rager, but we advise against this idea. A drink or two in the evenings is fine, but heavy drinking in the backcountry can be very dangerous. Help is many hours away, and cell phone service is often nonexistent.
BACKPACKING WITH STRANGERS
Finding strangers to backpack with is an option. Meeting people through mutual friends, meetup groups, or even out on the trail, can be a way to meet new people who like to backpack. Tread lightly and cautiously with this solution, and carefully feel out whether you can trust anyone before setting off into the wilderness with them.
BACKPACKING BY YOURSELF
Backpacking by yourself is another option, although we only recommend it for experienced hikers. If you plan to go out solo, you may want to invest in wilderness first aid training. You should make conservative decisions and take an emergency-communication device. The statistics on outdoor accidents that happen to people on their own vs. people in groups is staggering. People on their own are more likely to get into serious trouble if anything goes wrong, and they’re more likely to have things go wrong. If you decide to go this route, start with short, very manageable trips. Be sure you’re prepared with the right gear, food, water, and clothing. Move slowly into more ambitious trips. Always let people know where you’re going, when you’ll be back, and what to do if you don’t return.
Choosing a Backpacking Destination
Deciding where to do your first backpacking trip is a big deal. You may hope that your first backpacking trip takes you into a remote wilderness area. In this case, we recommend hiring a guide and flying to the destination of your choice!
Or, you may just want to learn the ropes in the forest near your house. It can seem overwhelming to pick a destination, but you can find a lot of great resources for backpacking trips for beginners online. Most people can find a state park, federal land, or public land within a half day’s drive of where they live. Try to Google “your location” + “beginner backpacking trips” (or, check out our deep dive section below!) You can also talk to a friend who has more backpacking experience, or head to a bookstore, gear shop, or library to find a book on backpacking or hiking trails.
Time of Year
The time of year definitely matters when you’re getting started backpacking. Depending on where you want to go, the best time of year also changes — in the desert, spring and fall are the best times, whereas summer is typically the best season for mountainous regions. For a beginning backpacker, you want to have a good time. If you don’t have much experience hiking in the snow, aggressive heat, or rainstorms, make sure to choose a moderate time of year wherever you choose for your first backpacking destination.
No matter where you go, you should research and prepare for the region’s average temperatures — both daytime and nighttime. Then, choose the time of year based on temperature and weather considerations, like rain or snow. Rain can make or break a first backpacking trip: if it does rain, there’s nowhere to go. You’re stuck either hiking in the rain or hanging out in a very small tent. (Not the best situation for your first backpacking trip!) However, once you gain more experience, you can plan trips with more variable weather as you learn to prepare for hiking in the rain.
Seasons in the Mountains
Mountain weather can be volatile any time of year, so make sure to always prepare for the worst. Bring plenty of layers and rain gear, even if the forecast looks clear.
- Spring:: Spring in many mountainous regions often still has plenty of snow, and the weather can be unpredictable. However, spring can be a decent time to go backpacking because popular areas can often be less busy than the summer. If you decide to head into the mountains in springtime, be prepared for potential snow on your route. Or, choose a lower elevation hike and avoid high alpine terrain.
- Summer: Summer is pretty much the best time of year to backpack in the mountains. In some areas, you may have to watch out for monsoon seasons which bring afternoon storms. But for the most part, summer in the mountains is dry, sunny, and often brings the most beautiful wildflowers! Just make sure to still check the forecast for the area you are visiting and prepare for anything. In mountainous regions like Colorado, stay aware of afternoon thunderstorms and descend from high peaks before the clouds roll in.
- Fall: Fall can be a great time to backpack in the mountains, especially in an area with trees turning colors (the yellow aspens of the Rockies and the larches of the PNW are some of the most beautiful fall trees!). In early fall, temperatures can still be pleasant and the weather dry, but make sure to be prepared for an early snow or rainstorm. As it gets later in the year, you should be prepared for drastic weather swings and freezing nightly temps.
- Winter: Winter in the mountains pretty much guarantees snow, which is possible to backpack in, but it’s not the safest or best way to get started since you’ll need lots of extra specific winter camping gear and avalanche knowledge. We don’t recommend this for beginner backpackers.
Seasons in the Desert
If you’re planning a backpacking trip to somewhere other than the mountains, like the desert, you will want to go during the fall and spring, since the summer is often far too hot. Even on the humid East Coast, you may want to avoid the hottest days of summer.
- Spring: Spring is one of the most perfect times to be in the desert. Daytime temperatures can sit anywhere between 50-80 degrees and you may even be lucky enough to see desert flowers — and cacti — blooming. Make sure to plan for cold nights, which may still be below freezing!
- Summer: Summer in the desert can reach over 100 degrees! This is far too hot for most beginning backpackers. It’s also challenging to find water sources on many desert backpacking trips, so you may have to pack in all your water — a big task when the temperature is that hot! While some experienced backpackers do hike in the desert in summer, it’s not the most comfortable time of year to backpack in the desert. If you do choose to take a summer desert trip, hike with a guide who can help you determine the best times of day to hike.
- Fall: Fall can be an incredibly beautiful and pleasant time to be in desert regions. Trees are turning yellow, and the temperatures can be perfect. Still, be prepared for short days and cold nights. Once the sun goes down, much of the heat in the desert dissipates.
- Winter: Winter is a special time to be in the desert. It’s not a popular time, so if you’re craving solitude, and can deal with the cold, it’s a great time to visit. Despite popular belief, it does get cold and even snow in many desert areas, so make sure you’re prepared if you decide to go backpacking this time of year.
Selecting a trail
For your first backpacking trip, you’ll want to find a trail with relatively low mileage and elevation gain. For most beginner backpackers, a one or two-night trip will be perfect. So one option is to choose a day hike that has a camping destination (like your favorite backcountry lake!) If you’ve done the hike before, even better. This way, you can focus on the new aspects of backpacking without worrying about where you’re going.
Look for a trail that allows you to hike between five and eight miles per day without a ton of elevation gain. Remember that, unlike day hiking, you’ll be carrying everything you need on your back. Your pace will be slower, so plan accordingly; it’s going to take you longer to hike than usual.
More Resources
If you need some help deciding where to go for your first trip, we have a few resources for you:
- 11 Best Beginner Backpacking Trips in the U.S.
- Best Beginner Backpacking Trips in California
- Best Beginner Backpacking Trips in Washington
- Best Beginner Backpacking Trips in the Southwest
- Best Beginner Backpacking Trips in Colorado
- Best Beginner Backpacking Trips in New England
-
Deeper Dive: Where to Go Backpacking in the U.S.
-
If you would like to start with a high-quality destination, then we recommend the following as good options. Keep in mind, they very well may require travel. If you’re backpacking for the first time as part of a guided trip, traveling to a destination is a great option. However, if you’re starting off on your own, you may want to test the waters by sticking close to home in case you run into any troubles.
COLORADO
The Colorado Rockies offer tremendous opportunities for backpacking. The state is centrally located with several major airports that you can easily fly into. Additionally, Colorado has black bears but not grizzly bears, which is great for beginners. Most areas will have plenty of water, and if you’re there in the summer, the temperatures will probably be pretty manageable. (However, consider afternoon thunderstorms!) Finally, the biggest reason to start in Colorado is the stunning beauty of the Rockies. Check out our list of the best beginner backpacking trips in Colorado.
The options are nearly endless, but we recommend starting with a trip below the treeline because of afternoon thunderstorms. Or, if you want to venture into the alpine, we recommend going with a guide service. Wildland Trekking offers a variety of Colorado backpacking trips in the Flat Tops Wilderness and Rocky Mountain National Park.
Explore Colorado with Award Winning Guides
NORTH CAROLINA, Tennessee, & Virginia
The East Coast has some fantastic hiking destinations, but North Carolina is a fantastic place to go backpacking. It is home to many beautiful mountain areas with hundreds of acres of backcountry. Also, a sizable percentage of Americans live a day’s drive or closer to these mountains. Great Smoky Mountains National Park is an obvious place to look at for your first trip. But there are also many other areas in North Carolina to consider including the Roan Highlands, the Nantahala National Forest, Uwharrie National Forest, and Pisgah National Forest. Check out some of our favorite backpacking trips on the East Coast.
Guided backpacking trips are available in two stunning destinations: the Great Smoky Mountains and the Blue Ridge Mountains around Asheville.
Explore North Carolina with Award Winning Guides
WASHINGTON STATE
The Pacific Northwest is ripe with an almost infinite number of options for backcountry hiking and camping. With many national parks like Olympic, Mount Rainier, and the North Cascades plus amazing, abundant forest service lands, Washington is world-class. It’s also relatively easy to fly into Seattle and get to these places. A few things to keep in mind: these mountains are big, the forests are thick, and the weather can be unpredictable. Some also are home to small populations of grizzly bears. Do your homework and be sure you’re prepared.
Guided trips are available in these areas. Wildland Trekking offers Washington backpacking trips to Olympic National Park and North Cascades National Park. Of these two options, Olympic lends itself more to beginners.
Explore Washington with Award Winning Guides
ARIZONA
Arizona is another state with incredible amounts of backcountry that’s great for exploring on foot. The thing to keep in mind with Arizona is that many of the areas are deserts or high deserts, so you’ll have to consider how to hike in the desert. Scarce water, heat, and flash flooding are serious considerations. Popular backpacking trips in Arizona include Grand Canyon National Park, the Havasupai Waterfalls, areas around Sedona, and areas around Tucson.
Guided Arizona backpacking trips are available. At Wildland Trekking, our trips focus primarily on Grand Canyon, the Havasupai Waterfalls, and Sedona.
Explore Arizona with Award Winning Guides
MONTANA AND WYOMING
Montana and Wyoming offer tremendous backpacking opportunities. Most of these areas are prime grizzly habitat and can have dramatic fluctuations in weather. Be prepared and understand what you’re getting into in the Northern Rockies.
Some ranges and areas to consider exploring in these states include the Snowy Range, Wind River Range, the Tetons, the Wyoming Range, Absarokas, Beartooths, Yellowstone National Park, the Crazy Mountains, the Bob Marshall Wilderness, and Glacier National Park.
We strongly recommend people new to backpacking join guided trips in these states. Understanding how to stay safe in grizzly country takes time, and this is big country with big mountains. Wildland Trekking offers Yellowstone backpacking trips and many other trips in Montana and Wyoming.
Explore Montana and Wyoming with Award Winning Guides
CALIFORNIA
California is another major backpacking destination because of its premier beach hiking and mountain destinations. With Yosemite, Mount Lassen, Joshua Tree, Death Valley, the Lost Coast, Mount Shasta, the Trinities, Lake Tahoe area, Sequoia-Kings Canyon National Parks, and the entire John Muir Trail and Sierra Nevada Range, it’s almost endless. Check out some of the best beginner backpacking trips in California.
Guided California backpacking trips are available. At Wildland Trekking, we offer award-winning trips to most of the areas listed above. Yosemite is our most popular destination in California, but all of the others (Lost Coast, Sequoia-Kings Canyon, Joshua Tree, Death Valley, the Eastern Sierras) are fantastic as well and loved by our guests.
Explore California with Award Winning Guides
The Northeast
The northeastern United States has plenty to offer beginner backpackers! In fact, one of the most famous trails—the Appalachian Trail—starts in Maine. From coastal hikes to serious mountain treks, this region has a lot for hikers to explore. Check out some of our favorite beginner backpacking trips in the Northeast.
Wildland trekking offers backpacking and hut-to-hut options in New Hampshire in the stunning White Mountains.
Explore New Hampshire with Award Winning Guides
UTAH
The last destination we’re covering is Utah, which is incredible. Utah boasts towering mountains, low deserts, high deserts, and the most beautiful canyon country in the United States. It offers year-round options, all of which will take your breath away. Be wary of summer trips in the deserts and canyons of Utah, as heat and lack of water are serious considerations. Again, Utah offers a lot of remote desert destinations, but you must know how to travel through them. If you’re inexperienced with desert hiking, we recommend going guided for your first desert backpacking trip.
Great Utah backpacking trips can be found in the Wasatch Mountains, the Uinta Mountains, the La Sal Mountains, the Henries, Canyonlands, Capitol Reef, Grand Staircase, Grand Gulch and many other amazing areas around the state.
Backpacking Gear: The Essentials
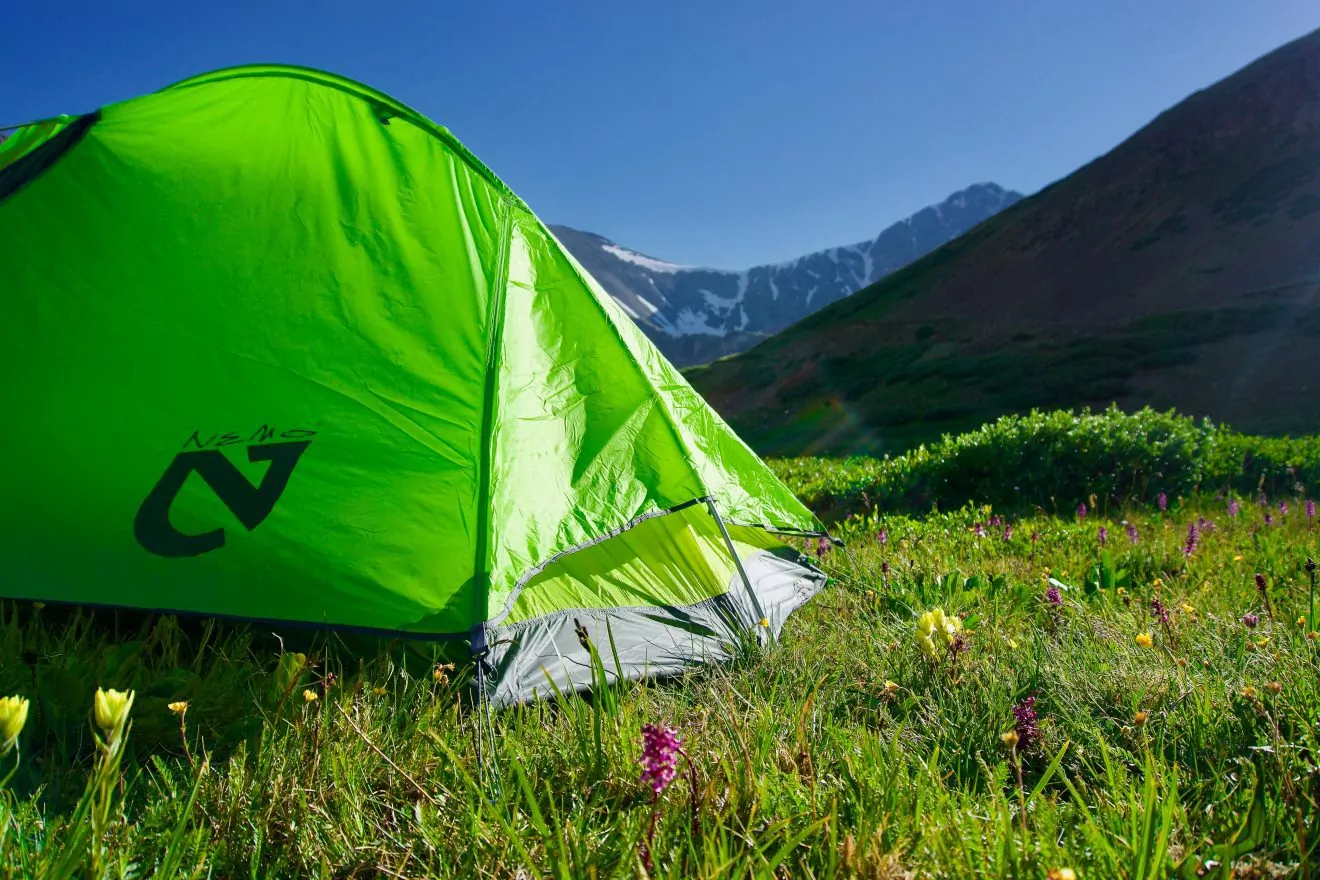
Photo by Matt Gross on Unsplash
What gear do you need to go backpacking? Gear is one of the most complicated (and expensive) parts of getting started backpacking. If you take a guided trip, most of the backpacking gear—like backpacks, sleeping bags, and tents—is provided. You can test out these products and see if you like them before investing in your own.
When you’re ready to buy your backpacking gear, you can find a lot of backpacking gear secondhand, or on sale, if you know where to look. Online gear resale platforms like Rerouted and Requipper can help, or look up used gear stores in the area you live.
Here is our recommended list for beginner backpackers:
- Multi-day backpack: Look for a high-quality backpack specifically designed and manufactured for backcountry use. Recommended brands include Deuter, Osprey, Mountain Hardware, Kelty, and Gregory. Capacity should be 3800-5000 cubic inches. Here are some of our favorite backpacking packs.
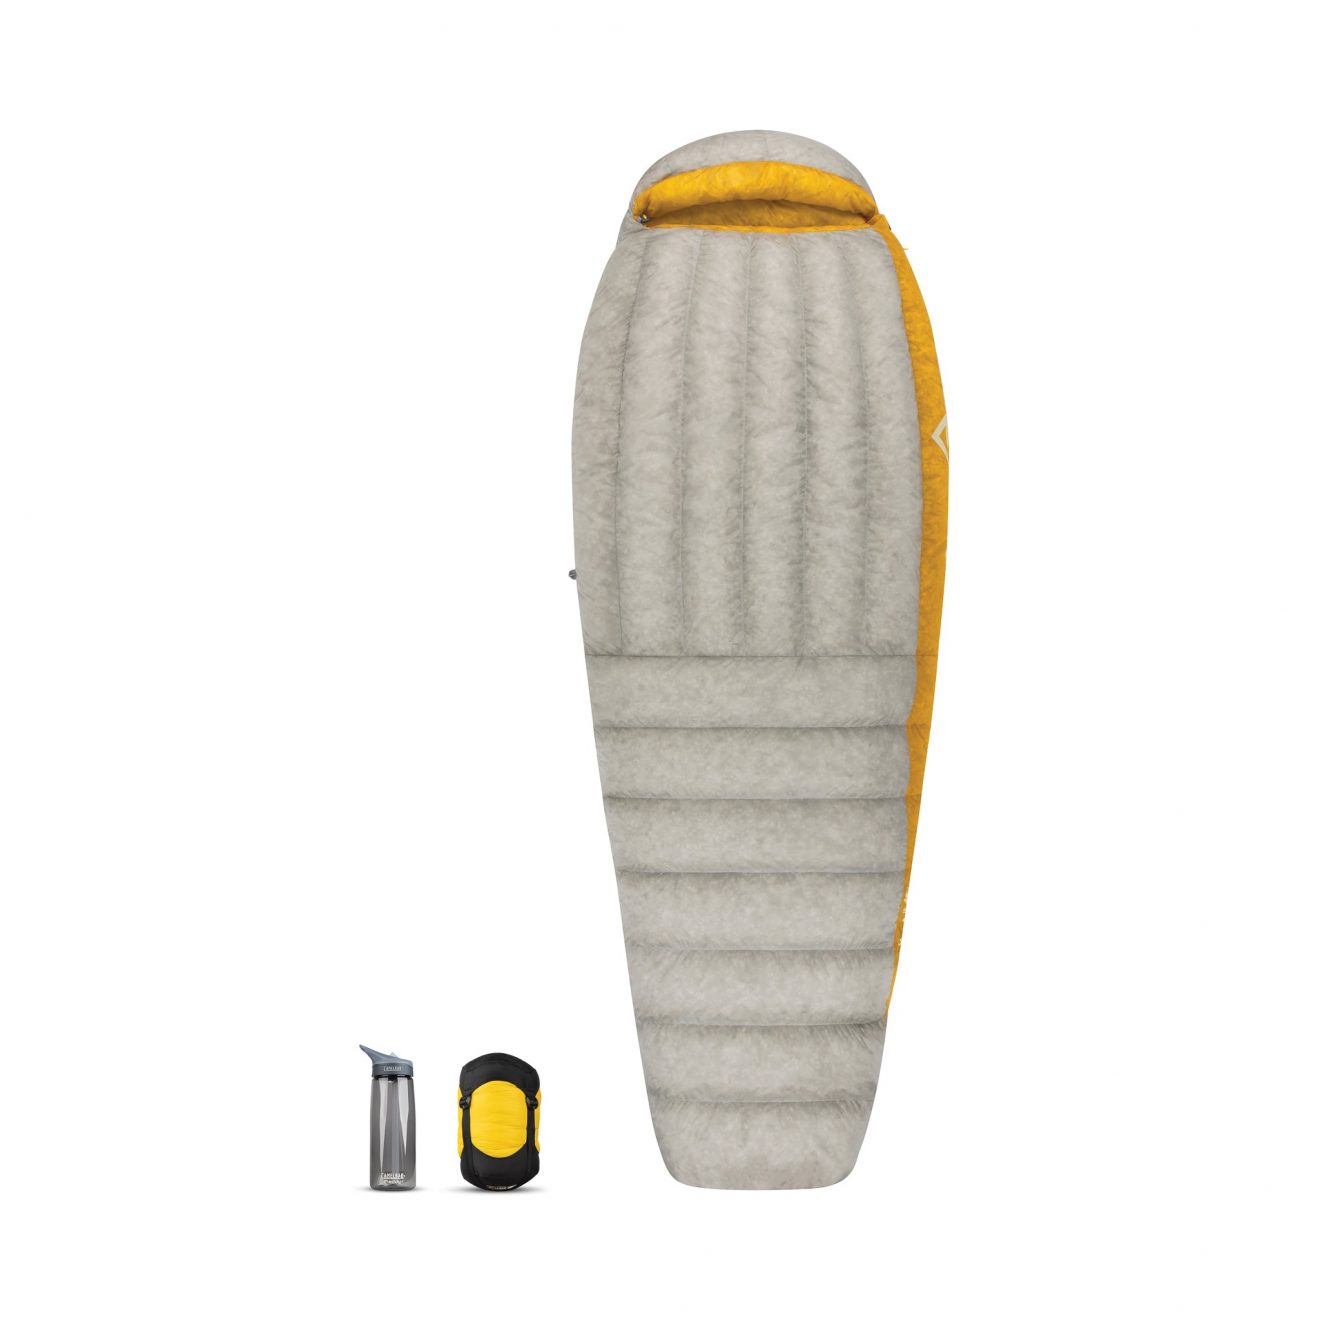
- Sleeping bag: Just like your backpack, don’t skimp on your sleeping bag. Buy a good one. Dependable brands include Marmot, Sierra Designs, Mountain Hardware, Western Designs, and Kelty. If you’d like a good year-round bag (and don’t plan on doing winter trips in the mountains or summer trips in the desert,) a temperature rating of 15-20 degrees is great. Winter bags should be 0 degrees or below, and desert bags should be in the 40-50 degree range. Here are some of our favorite sleeping bags for backpacking.
- Sleeping pad: A sleeping pad is a critical piece of gear because not only does it keep you comfortable, but it keeps you warm at night. Here are some of our favorite sleeping pads for backpacking.
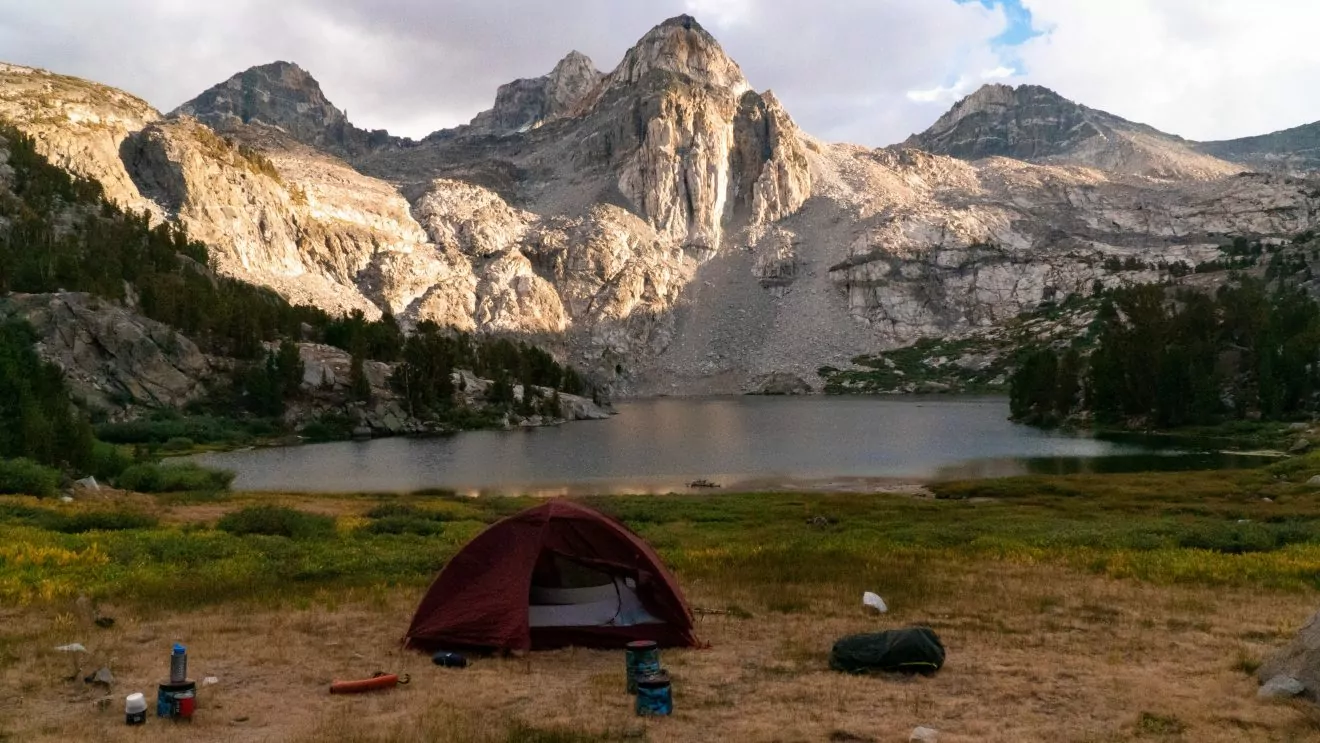
- Tent: A good tent is critical. Focus on finding a lightweight, high-quality tent. The tent shouldn’t weigh more than 2.5 pounds per person (unless it’s a one-person tent and you’re backpacking solo.) Good brands include Big Agnes, Kelty, and Mountain Hardware. Unless you’re going to be backpacking in the mountains in the winter, a 3-season tent is adequate. We’ve reviewed some backpacking tents to help make your decision easier.
- Backpacking stove and cook set: You’ll need a stove and cookware if you want to eat more than bars on your backpacking trip! Stoves and cookware come in a variety of styles, so check out some of our favorite backpacking stoves or read the deep dive below for extra considerations.
- Trekking poles: We recommend trekking poles; they are a game changer while you’re carrying a big pack. There are many great brands out there, and almost all are fully adjustable. Try them out in the store, make sure they feel good, and then go ahead and buy them. You’ll be glad you did.
- Stuff Sacs: You’ll want three to five stuff sacs, some of which need to be waterproof. These help to keep things organized and also protected from the weather. Put your sleeping bag and clothes in the waterproof ones.
- First Aid Kit: Purchase a comprehensive, medium-sized first-aid kit. Most of these are pretty standardized these days. The smallest kits are usually missing important items, and the largest ones have more than what you’ll most likely need. Shoot for something in the middle. The most important items (and the bare minimum you should take with you) are a variety of bandages, athletic tape, antibacterial ointment, antihistamines (like Benadryl), anti-inflammatories (like Ibuprofen), blister treatment, alcohol wipes, and a first-aid field guide.
- Headlamp and extra batteries: A headlamp is a necessary item because it allows you to have light and also have your hands free. You can hike, set up a tent, or cook at night without skipping a beat.
- Emergency communication device: This is an optional but recommended item. There are many GPS tracking and emergency communication devices on the market today to choose from. Many require that you purchase a monthly subscription in addition to the device. You may be able to lease one locally from an outdoor shop as well.
- Orientation tools: Having either a map and compass (and knowing how to use them) or a GPS device for orienting where you are on your route are critical. It’s not a bad idea to have a map and compass, regardless of whether you have a GPS device. They’re so light and take up very little room in a pack. Plus, a GPS device can run out of battery power and leave you without an orientation resource.
- Repair kit: Some outdoor companies produce general repair kits with equipment to repair everything from tent poles to backpacking stoves to leaky sleeping pads. This is a wise purchase if you’re going on longer trips. If you’re focused on shorter, weekend trips then it’s not as necessary.
- Biodegradable soap and toiletries: Having eco-friendly, biodegradable soap is important for washing yourself and your dishes. Dr. Bronners is a popular, dependable brand. Be sure to use soap at least 200 yards away from any water source, like a lake or stream.
- Bear safety items: If you’re hiking in bear country, you will want to have the appropriate safety equipment. In black bear habitat, you may need bear canisters for your food or a bear hang rope (and the know-how to set it up.) You also might want to bring bear spray for your protection, especially if you’re backpacking alone. If you’re in grizzly country, each member of your group will want to have bear spray readily available, and you should (and must, in some locations) hang your food. So, bear hang equipment is a requirement.
More Resources
If you want to dive deeper into backpacking gear, check out these resources:
- What To Wear Hiking for Beginners
- What to Pack for a Backpacking Trip
- Wildland Gear Guide
- How to Buy Secondhand Gear for Any Outdoor Adventure
-
Deeper Dive: Backpacking Gear Considerations
-
Backpack
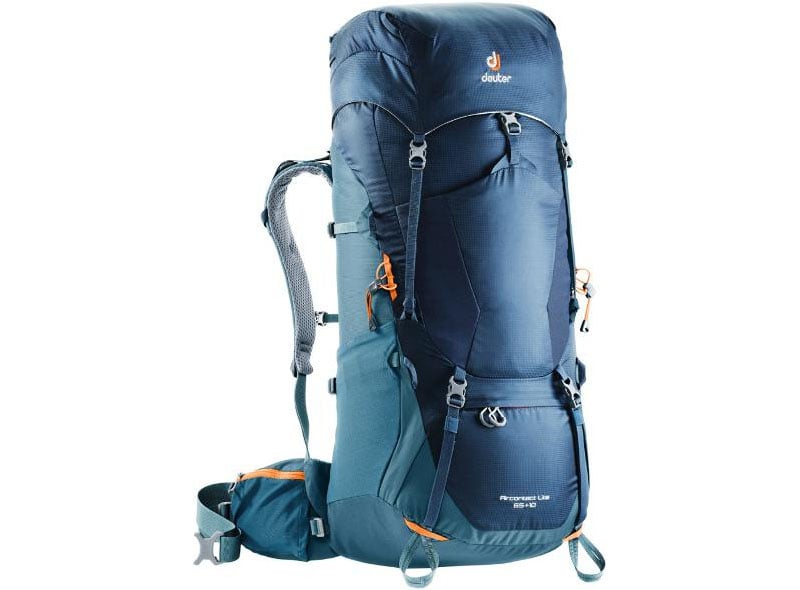
Unfortunately, no, you can’t just use your school/work backpack for backpacking. Having a quality backpacking pack that fits you properly will make or break your trip. You will not have a fun time if your back, feet, or neck hurt the entire time. Trust me, I’ve been there. It sucks.
So, make sure to find a backpack that fits you. It should also provide enough space for all the gear you’ll need on your trip. For your first backpacking trip, you’ll probably want a backpack with at least 50L of space. The nature of backpacks is that you will always fill the space you have. So if you have a 65L backpack, you’ll probably bring that much stuff, which is automatically going to be heavier.
But when you’re just getting started, it’s hard to know what the perfect line between weight and comfort is. You will probably overpack for your first few backpacking trips because you’re still learning exactly what you need. That’s okay, it’s part of the process.
The longer the trip, the more space you’ll need, mostly for food. But a backpack between 50-70L will be good for pretty much any backpacking trip you’ll go on.
Your Sleep System
Going backpacking means camping! So, just like any other camping trip, you’ll need a sleeping bag and a sleeping pad to keep you comfortable. There’s nothing worse than getting a bad night of sleep and then having a long day of hiking ahead of you.
The main difference between car camping and backpacking for your sleeping bag and sleeping pad is that you have to carry it with you everywhere. So, weight matters. Of course, if you already have a sleeping bag and sleeping pad that aren’t too heavy, just use that. Unless you know you’re ready to invest in super lightweight backpacking gear, it’s better to just use what you have.
But if you are looking for your first sleeping bag and sleeping pad for your backpacking trip, look for lightweight options. If your sleeping bag could be less than 2 pounds and your sleeping pad can be less than 1 pound, your back and feet will thank you. However, lightweight gear is always more expensive than heavier weight gear. If that doesn’t fit your budget, go with whatever does and just try to get as light as possible.
Down sleeping bags are lighter and more packable than synthetic insulation but can be more expensive. Plus, they are not great in wet conditions, so if you know you’ll be camping in lots of wet conditions, synthetic insulation may be better for you.
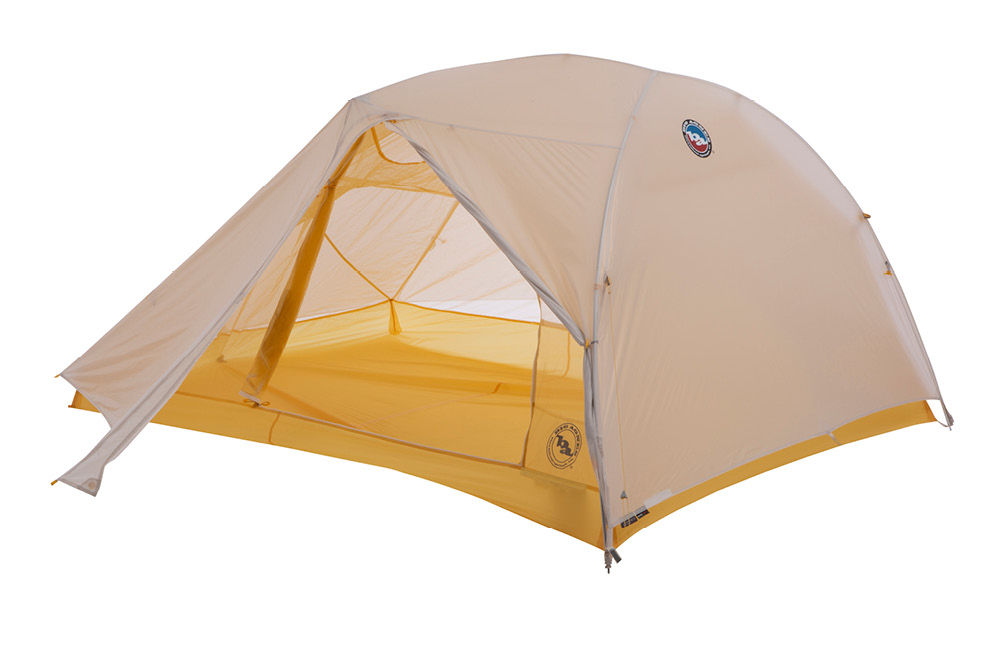 Tent
TentAgain, the biggest thing to think about with your tent is weight. Sure, you could bring your 6-person car camping tent, if you can carry it. But you’ll be a lot happier with a smaller lightweight tent.
Choose a tent that fits the number of people sleeping in it. If you want extra space or plan to spend a lot of time in the tent, go just a little bigger (backpacking tents tend to run small). But if you’re just going to have tw0 people on your trip, bringing a 4-person tent is overkill.
The general rule of thumb is that you should not exceed 2-3 pounds of tent per person. You can always split up a tent between both of your backpacks, lightening the load for everyone.
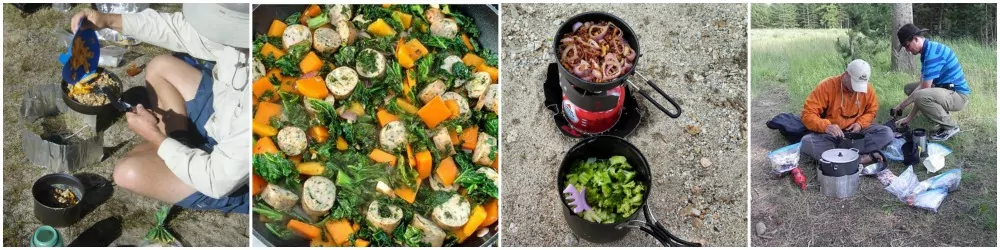
Stove/Cooking Essentials
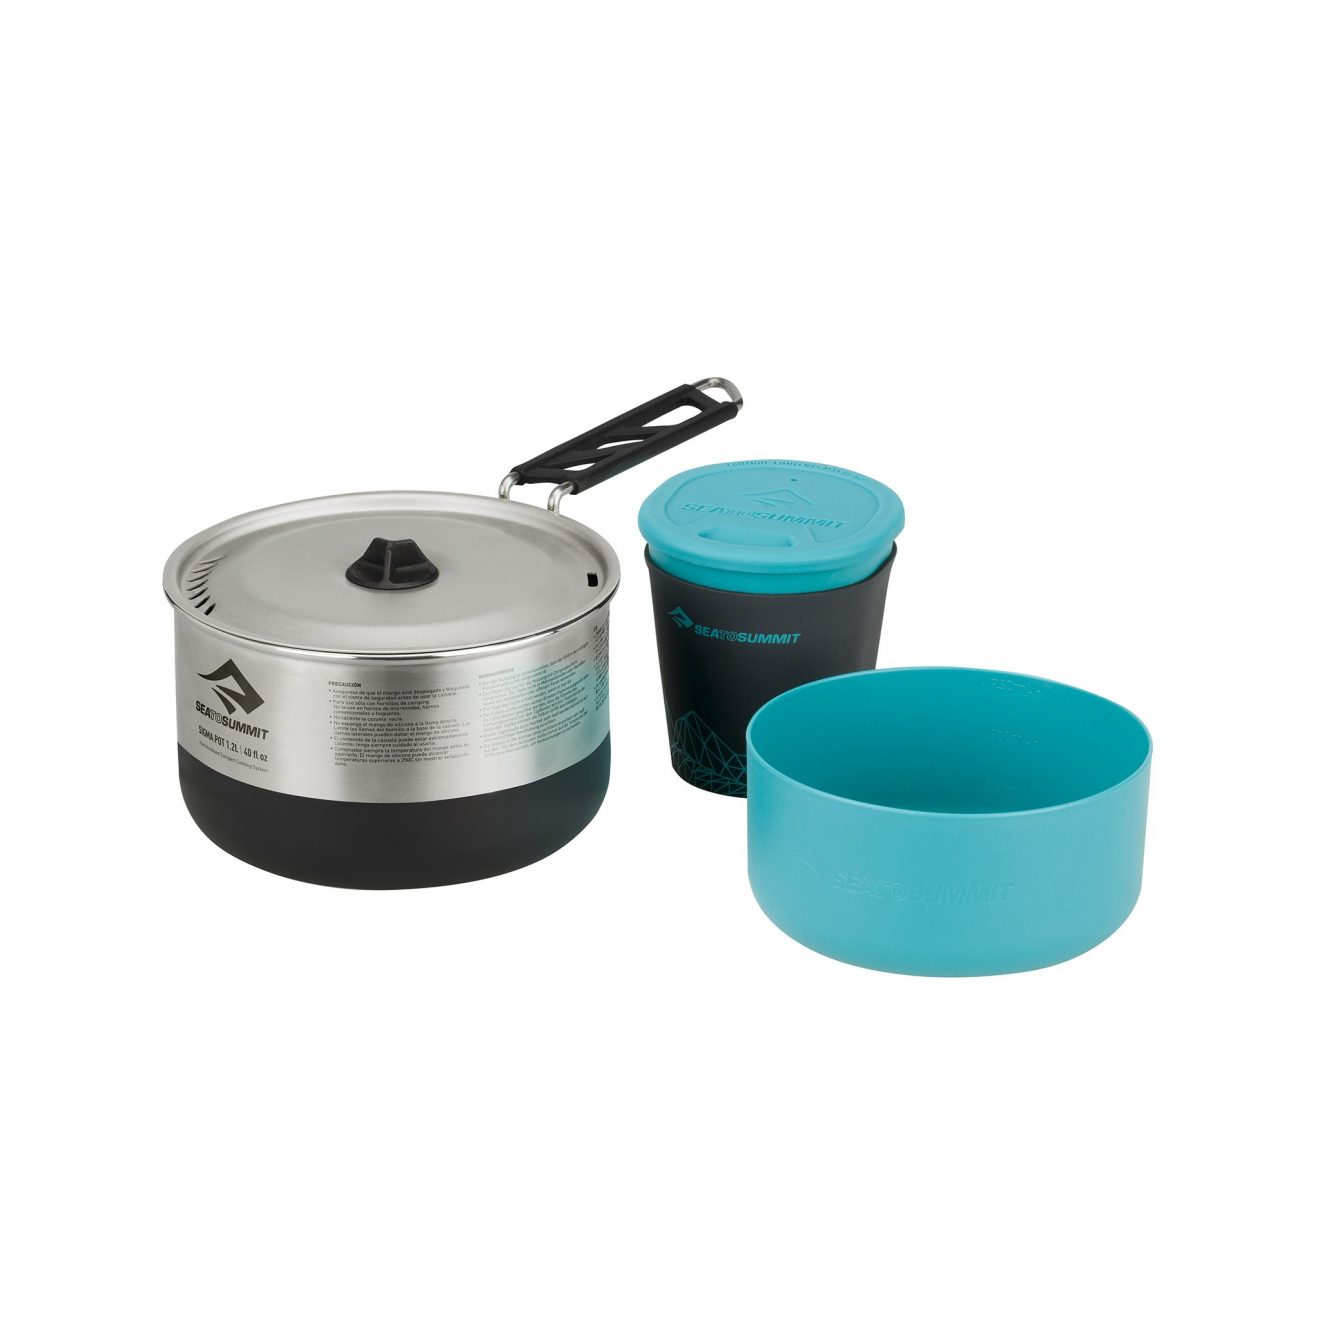
A backpacking stove is essential for your backpacking trip. On some trips, you may be able to just cook on a fire. But, this takes a decent amount of skill. Sometimes it can be hard to start a fire, and, more increasingly, fires are not allowed due to burn bans from wildfire conditions. So having a lightweight, small backpacking stove is key.
There are a couple of different types of popular stoves.
- A foldable style like a Pocket Rocket, which packs away easily for travel but also allows you to adjust the heat and use a pot or a pan with it.
- A JetBoil cooking system, which only allows you to boil liquids, but heats up very quickly and efficiently. This provides you with all you need to make boil-in-a-bag meals or anything else where you just need to add water. For people who like to simplify meals, this is a perfect backpacking system.
- A white gas stove that allows you to refill the fuel container. MSR (Mountain Safety Research) makes the most reliable white gas backpacking stoves. The Dragonfly is an excellent choice because you can easily simmer your food with it. If simmering isn’t important to you, then the Whisperlite is a great option.
Along with your stove, you’ll need things to bring cookware (unless you have a JetBoil which comes with the attached pot). A pot and some cooking and eating utensils are typically all you’ll need for most meals but consider what you want to bring when you plan your backpacking meals (see below for food help). Go as light as you can, but make sure the cook set you choose will accommodate the number of people you plan on going with. Also, don’t forget the fuel that powers your stove! Finally, a stove repair kit is a good idea and doesn’t add much weight. And don’t forget your matches or a couple of lighters, and put them in Ziploc bags in case it rains.
My personal setup: I usually carry a small Pocket Rocket stove, a pot that has an attached lid that doubles as a smaller pot, a bowl or cup, and a spoon.
 Clothes
Having the right layering system while hiking is important for feeling good on the trail — and at camp. But you probably need fewer clothes than you think for your backpacking trip.
Bringing one full outfit of versatile clothes is probably all you need. Here’s a sample packing list for backpacking clothes:
- 1x pants/shorts for hiking
- 1x t-shirt for hiking (you can increase this if its a longer trip)
- 1x long-sleeved, baselayer shirt
- 1x mid-layer or sweatshirt
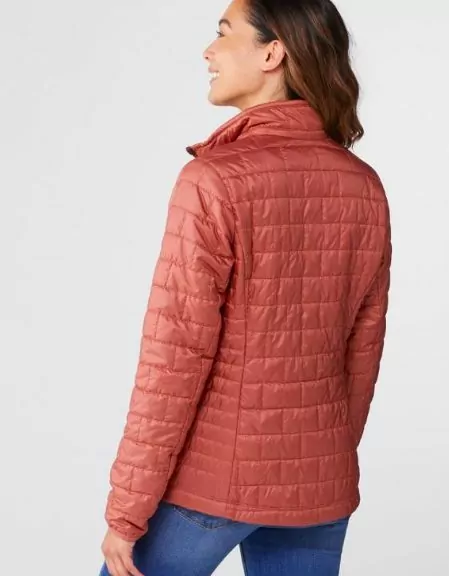
- 1x warm jacket (down or synthetic but packable)
- 1x warm hat
- 1x rain jacket
- 1x rain pants (if you’re expecting rain)
- 1x long underwear for camp/sleeping
- 2x socks (one for hiking, one for camp — increase to 3 if you’ll be out more days, but you probably shouldn’t bring much more than that!)
- Underwear (as many as days you’ll be out, or bring materials to wash away from water sources if you use soap.)
Of course, this could change based on your personal needs and what works best for you. I generally bring one day-outfit and one night-outfit. My day outfit can get sweaty while hiking, while I put on my night outfit (long underwear, clean socks) after hiking, and it’s always cozy and ready for me to put once I set up my tent.
Backpacking Food
There are so many ways to think about backpacking food, so we created an entire post to guide you. We’ll keep it brief here: customize your backpacking food to fit your needs and gear.
Some people like to dehydrate their own and create elaborate concoctions, others like to prep everything ahead of time. Some like to prepare everything on the trail with fresh ingredients, while others just pick up a pre-made dehydrated meal at a gear store.
Whatever is easiest and most enjoyable for you, especially for your first few trips, is the way to go. The easiest thing to do is to buy a pre-made dehydrated meal like Mountain House. Today, you’ll find countless companies that make all sorts of backpacking meals, so it’s easy to find something delicious and nutritious for your hiking trip. But you don’t need to buy backpacking-specific meals, as they can get expensive. If you’re going for easy and cheap, go-tos like mac and cheese, ramen, and dried mashed potatoes remain staples for a reason. They’re easy to find at most grocery stores, don’t take up a lot of space or weight (repackage boxed goods into plastic bags for even more space savings!), and will taste awesome after a long day on the trail.
If you love cooking at camp or plan to have a lot of downtime, you may opt to make your own meals. In that case, you can prepare everything ahead of time or hike in fresh ingredients. (On our guided trips, our expert guides take care of all of that for you!)
More Resources
- Best Foods to Eat While Hiking
- The Best Ways to Make Camp Coffee
- 10 Real Food Hiking Snacks to Fuel Your Next Adventure
Water While Backpacking
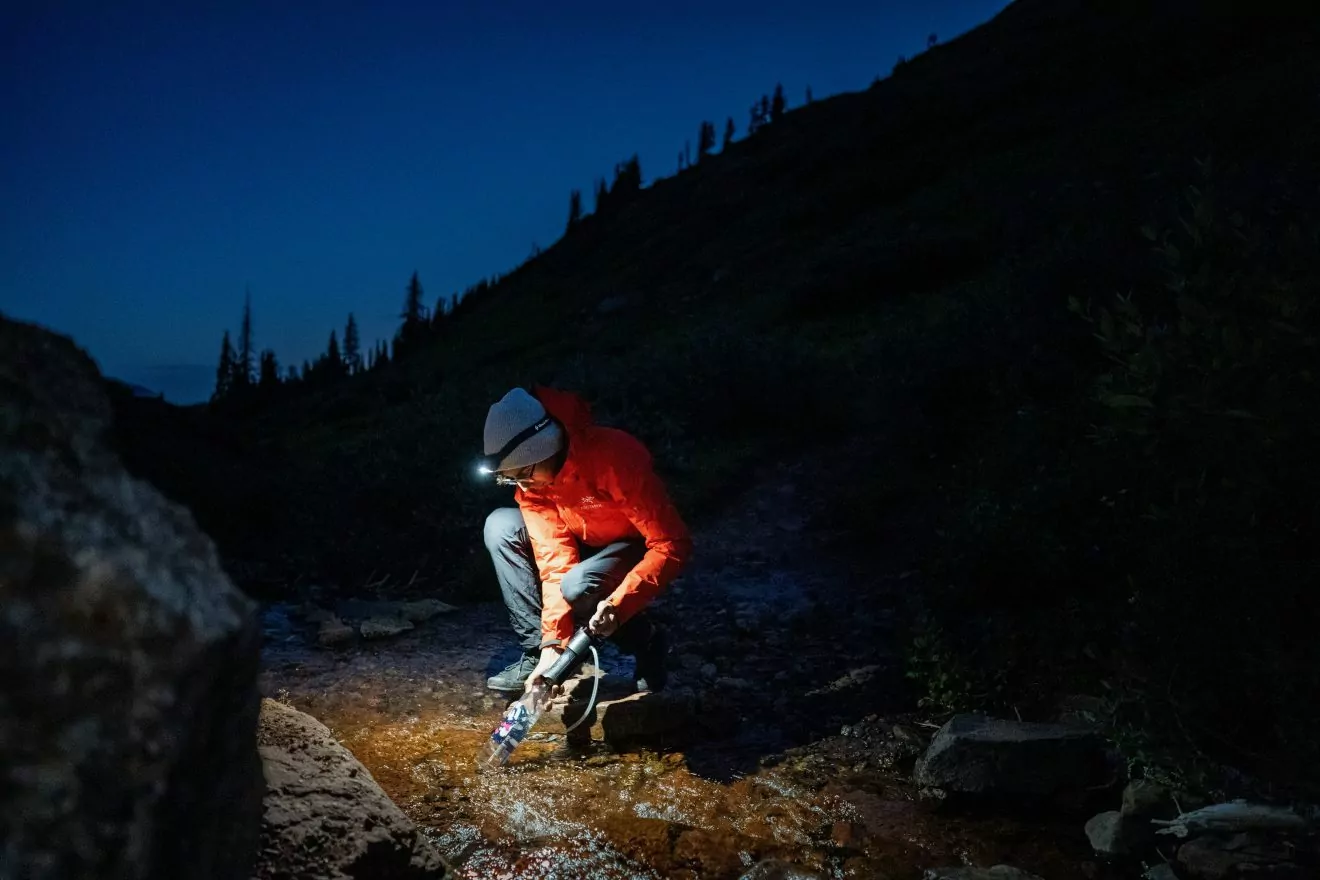
Photo by Robert Ritchie on Unsplash
More important than even your gear, water while backpacking is a necessity.
On a backpacking trip, you must be able to treat water sources and effectively carry enough water with you until you reach the next source. In the mountains, this is normally not a problem, but in the desert water is a serious route-planning consideration.
For treating water, we recommend using a water filter. Ceramic can filter out almost everything, but it is heavier than the plastic alternatives. You’ll find water filters in a variety of styles. My personal favorite is a squeeze bottle, like the Lifestraw Peak Squeeze Bottle, for small group trips of 2 – 3 people. If you’re backpacking with a group, I recommend using a gravity filter system to cut down on filtering time at camp. These systems can passively filter liters at a time.
If the area you’re in could have viruses in the water, then you will want to filter and also treat with chemicals. There are many chemical water treatments on the market that you can choose from. We recommend going with a chlorine-based one (like Aquamira) vs. iodine due to taste.
On all backpacking trips, I bring both Aquamira and either a squeeze bottle or a gravity system. This way, you’ll have a backup if your filter malfunctions.
Finally, how you are going to carry your water presents many options. We will cut to the chase and tell you what we recommend. A two-liter hydration bladder (such as Camelbak) and a one-liter water bottle. This system allows you to easily drink while hiking, and if your bladder fails, you have a backup. (Are you sensing a theme here?) If you’re hiking in the desert, you may need to carry much more than three liters, so having extra water bottles or a dromedary may be necessary.
More Resources
Training for Backpacking
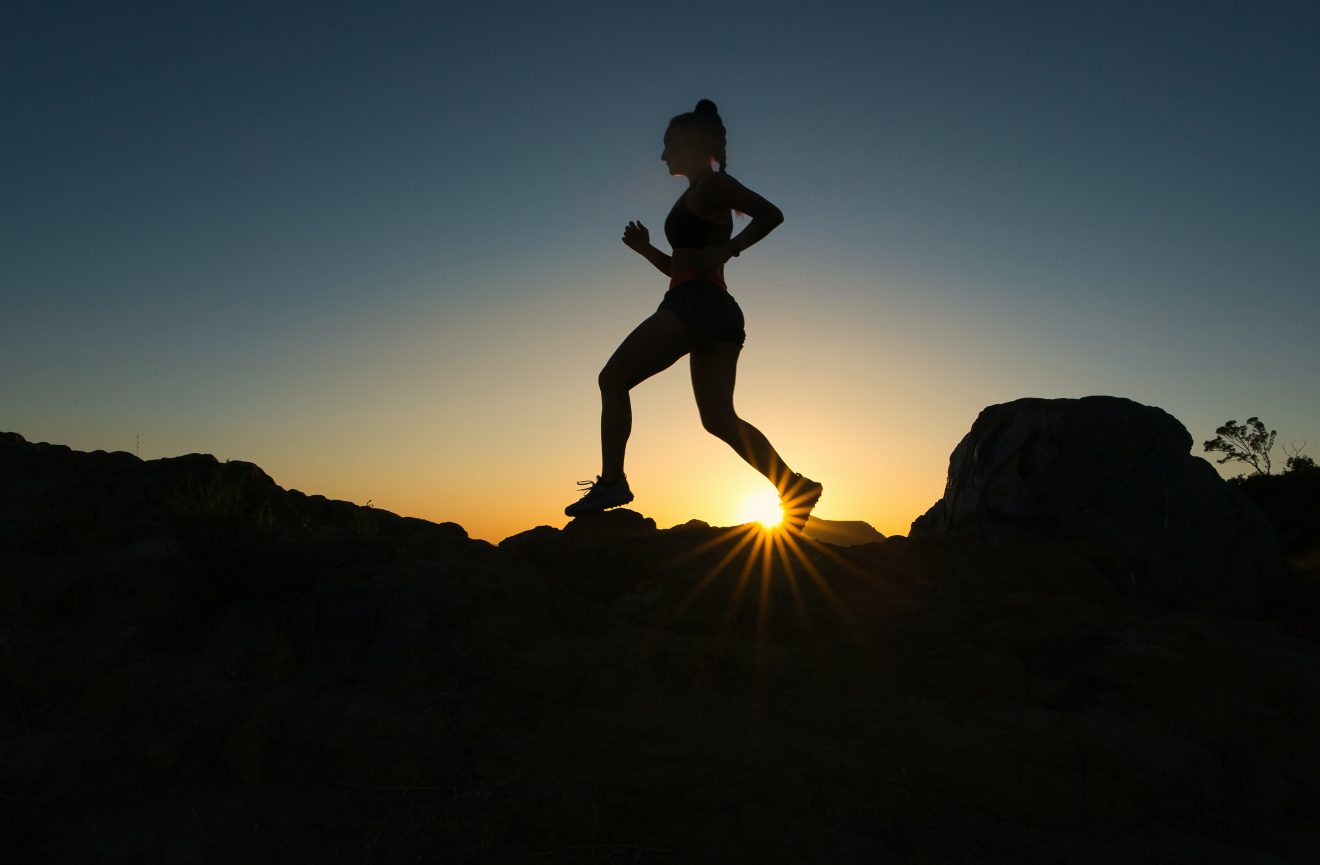
Photo by Venti Views on Unsplash
It’s important to consider both physical and mental ability when you head out on your first backpacking trip. You may encounter tough terrain that will make for slow travel, especially with a large, loaded backpack.
While being in decent physical condition can make backpacking more enjoyable, it’s also okay to go slow and plan trips that won’t take you too far too quickly. Know your limits, and plan accordingly. Easing into it is a great way to get started backpacking. There’s always more time to push yourself once you’re more comfortable with the gear and logistics, but it’s dangerous to be at your physical limits when you’re first gaining backpacking skills.
If you’re trying to train for your backpacking trip, hiking with a pack is the best way to do it. In the months leading up to your trip, go on day hikes and carry your backpacking pack loaded with gear or water. If you don’t have access to trails, you can go to the gym and hit the stair stepper or treadmill on an incline with a weighted pack. While it’s hard to replicate the challenges of a trail without going outside, this will prepare your large leg muscles for the uphills.
But, of course, you’ll always encounter unexpected obstacles on the trail. Rain, mud, snow, rocks, and creek crossings are all things you could find on your hike. So, it’s important to train your stabilizing muscles so you’re comfortable on uneven terrain. Additionally, mental strength is just as important to get you through your backpacking trip safely and having a great time.
more Resources
Training is complex, so check out these resources for our specific training guides:
- Training for Extreme Elevation Gain
- Training for a Grand Canyon Hike
- Build Your Hiking Skills: Tackling Tough Terrain
- Hike Strong: Mental Training for Long Days on the Trail
Leave No Trace While Backpacking
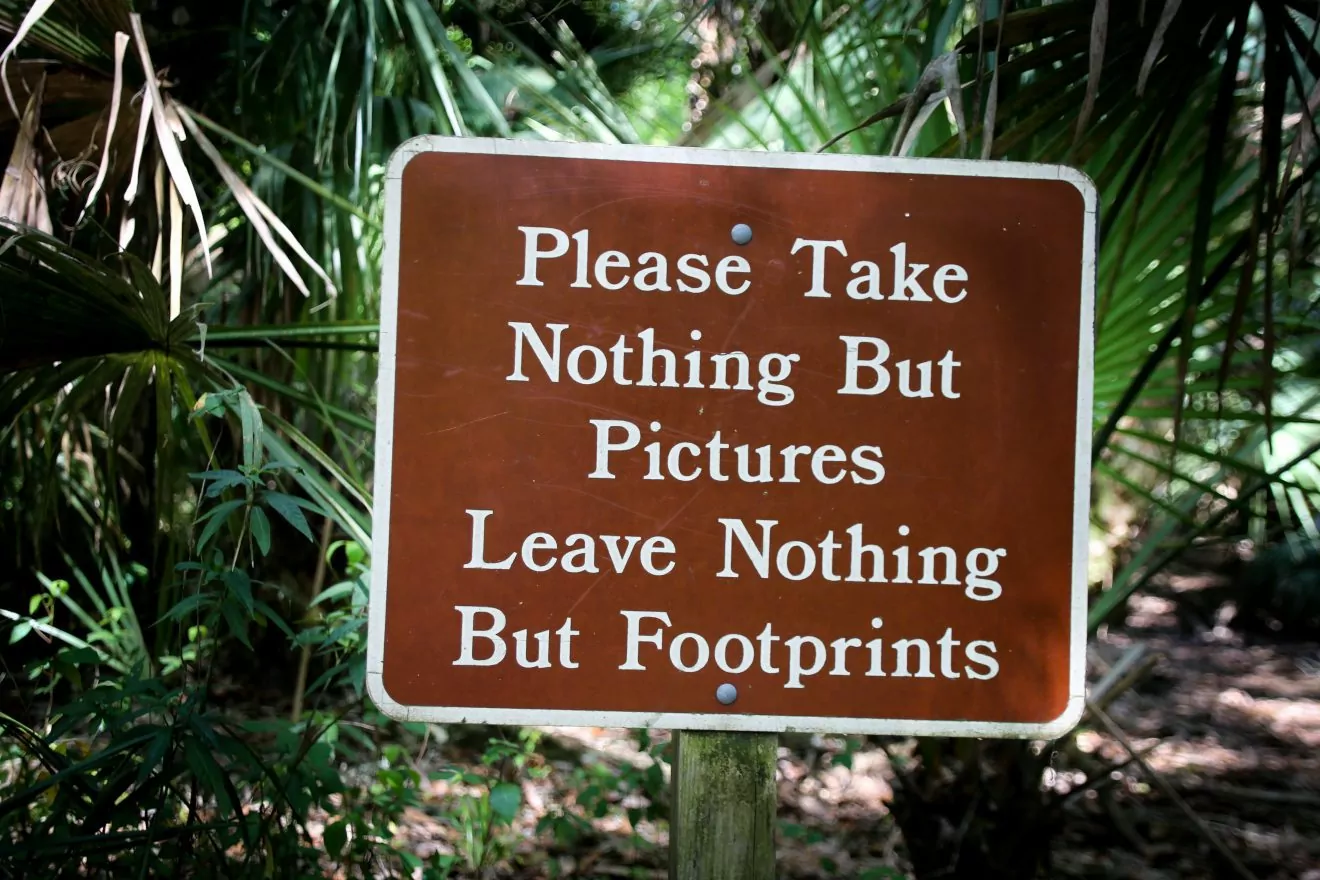
Photo by www.Florida-Guidebook.com on Unsplash
One last important piece of getting started backpacking is taking care of the places you visit. Leave No Trace (LNT) guidelines can help you leave the places you love better than you found them.
The Leave No Trace Principles are:
- Plan ahead and Prepare: Preparing before you go out is the best way to have a safe trip for you and the land you travel on.
- Travel and Camp on Durable Surfaces: You should only use designated trails or campgrounds unless dispersed camping is required in your area. If you do travel off-trail, try to travel on durable surfaces like rocks or in sandy washes.
- Dispose of Waste Properly: This includes human and dog waste, as well as any garbage you bring in. Pack it in, pack it out. For human waste, follow the instructions of the local land management. Some places provide backcountry toilets, other places you have to pack it all out. Low-waste backpacking techniques can help you minimize the amount of trash you bring into the backcountry in the first place.
- Leave What You Find: Keep natural items, like rocks, in their place—they serve a purpose and may provide habitat for critters! This is especially important in well-traveled areas, and it is crucial when you encounter cultural artifacts.
- Minimize Campfire Impacts: If you build a campfire, make sure it is in a designated spot and is 100% out before you walk away. Check with local land management for information on burn bans.
- Respect Wildlife: Stay at least 100 yards from wildlife like bison and bears. If they’re on the trail you’re traveling, give them a wide berth or wait until they move out of the area. Remember, this is their home, not yours. Additionally, do not feed any wildlife—including squirrels and birds. When you feed these critters, you’re training them to rely on human food rather than find natural food sources.
- Be Considerate of Others: While you should be respectful of wildlife and the land, you should also be considerate of other hikers. Don’t play music out loud (headphones are fine) while on the trail, and brush up on trail etiquette—like uphill hikers have the right of way.
More Resources
Do your part to keep our backpacking destinations healthy! Keep reading:
- Feminine Hygiene while Backpacking
- The Ultimate Guide to Sustainable Adventure Travel
- 12 Low Waste Backpacking Tips
If In Doubt, Go Guided!
Learning how to start backpacking is a gamechanger for being able to explore deeper into spectacular landscapes. The feeling of carrying everything you need on your back is empowering — you can go anywhere you desire.
However, if getting started feels overwhelming, check out one of Wildland Trekking’s guided backpacking trips. It’s a great way to take the next step towards feeling confident on your own in the backcountry.
