15 Best Beginner Backpacking Trips in the U.S.
If you’re new to backpacking, you may have a lot of questions, like what to pack, what to eat, and — most excitingly — where to go. In the US, you have dozens of beginner backpacking trips at your fingertips. Whether you want to plan an epic hiking vacation to your favorite national park or you want to hit the trails closer to home, you’ll have options.
When planning your first backpacking trip, you can either, 1) choose a trip within your comfort zone and go with family, friends, or a partner or 2) join a guided trip so you can learn new skills, develop friendships, and take on a more difficult challenge. Some people try to fit too much into their first backcountry trip and end up ditching the pack for good after their adventure is over. Or, they don’t set their sights high enough and end up underwhelmed, wondering why anyone would willingly lug 30 pounds of gear into the backcountry.
We know that if you’re backpacking, you want to escape the crowds, take in stunning views, and put in some effort. So, we want to help you plan a trip that will make you fall in love with the sport so that every time you dust off your backpack, a smile spreads across your face. If you’re looking for inspiration for your first backpacking trip (or your second, third, or seventieth), we’ve compiled a list of 15 beginner-friendly backpacking trips and trails across the United States that will immerse you in wild environments and challenge you just the right amount.
Explore Your World with Award Winning Guides
how to choose an appropriate trail
While each new backpacker is entering into the sport with a different set of skills and fitness levels, we’ve crafted a list of trips with all beginner backpackers in mind. These trips fit a few criteria:
- You’ll hike relatively low-mileage for the length of the trip.
- The trails don’t have extreme elevation gain for the region.
- They travel on well-maintained trails and avoid tricky terrain like boulder fields.
- You’ll get a lot of bang for your buck, whether in the form of peaks, alpine lakes, or lush meadows.
However, backpacking is never easy (or else we’d never do it!) — so, if you want to maximize your fun, be sure to train for your backpacking trip.
1. Point of Arches, Olympic National Park
Mileage: 8 miles out-and-back | Length: 2 – 3 days | Elevation Gain/Loss: 200 feet
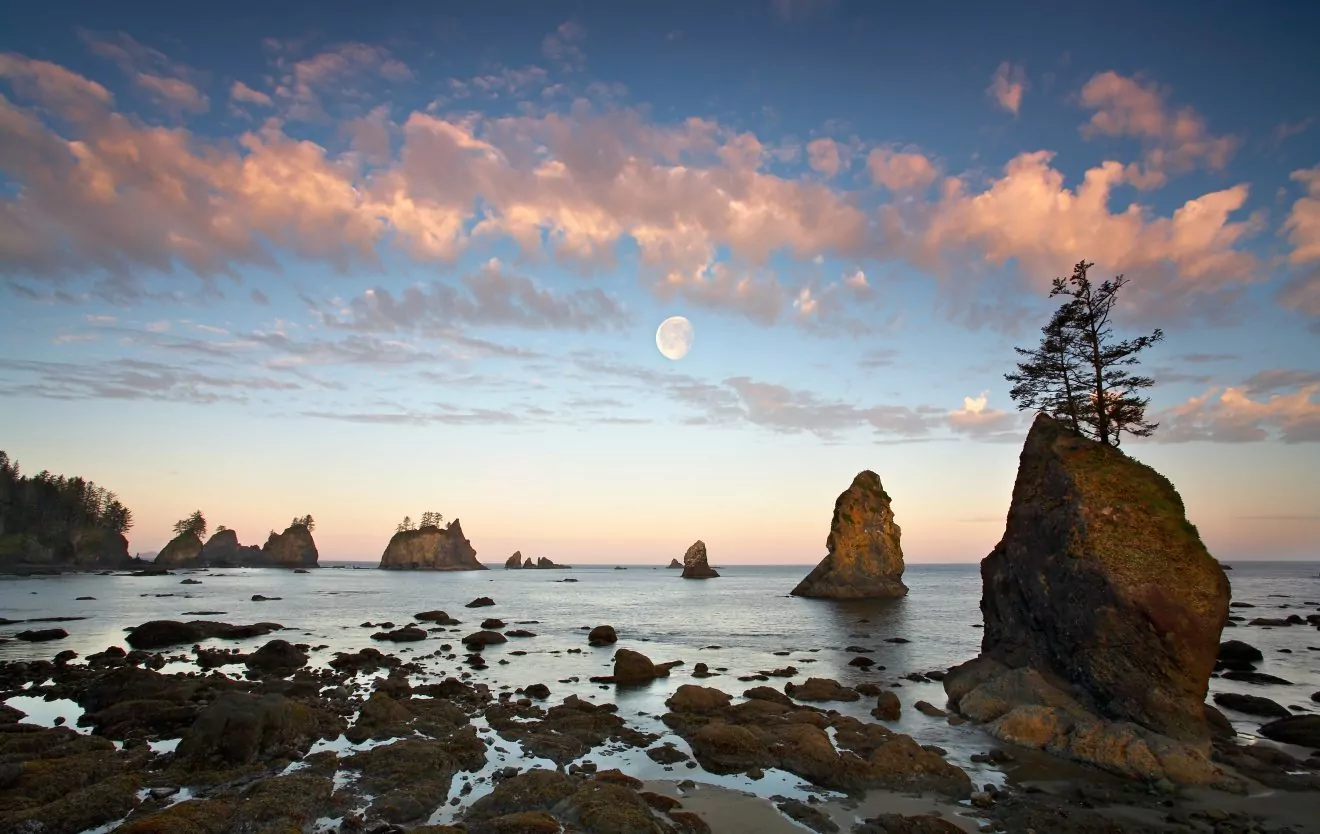
Point of Arches is a perfect beginner backpacking destination on the edge of Olympic National Park, accessed via the Makah Reservation. You can hike this trail as an overnight, but if you have a third day to spare, you won’t be disappointed by the abundance of tidepools to explore and wildlife to observe. The sea-stack studded coastline is complemented by lush forests, which are home to banana slugs, Roosevelt elk, and black bears. Each night, as the sun sets over the Pacific Ocean and you fall asleep to the sound of crashing waves, you’ll start scheming up your next trip.
Why is it great for a beginner?
This relatively-flat trail gives you quick access to a stunning beach environment, without much hard hiking or elevation gain. In fact, we offer this as a family-friendly trip option. You’ll get the pay-off of a bigger backpacking trip, but without all the work. So, pack a chair and relax on the beach as seals play in the coastal waters and eagles fly along the bluffs hunting for fish.
Unlike many beach destinations, the campsite near Point of Arches sits along a creek, so you don’t have to pack in water for your whole trip — just a water filtration device.
logistics and permits
You’ll need to secure two permits to make this trip a reality. First, you’ll need to pick up a Makah Recreation Pass; it costs $10 and is good for an entire year. You can get one in Neah Bay at the marina, the general store, the mini-mart, and the tribal center, among other areas. Also, as this trail enters into Olympic National Park, you will need a Wilderness Camping Permit for any overnight stays in the park. Make sure you reserve this in advance. However, if you join a guided trip, we take care of all permits and reservations for you!
As of February 2021, this trail is closed due to COVID-19, as are many of the coastal areas of the park because they are on tribal lands. If you’re looking for an alternate route in Olympic National Park, the Seven Lakes Basin backpacking loop is a great — yet more difficult — alternative.
Guided Trip Options
Wildland Trekking offers this trip as a guided backpacking adventure package with expert guides, gear, meals, transportation and more all included! Click here to learn more!
2. Shining Rock Wilderness, North Carolina
Mileage: 22 miles roundtrip | Length: 4 days | Elevation Gain/Loss: 2,300 feet with backpacking packs (plus 1,700 ft with a day pack)
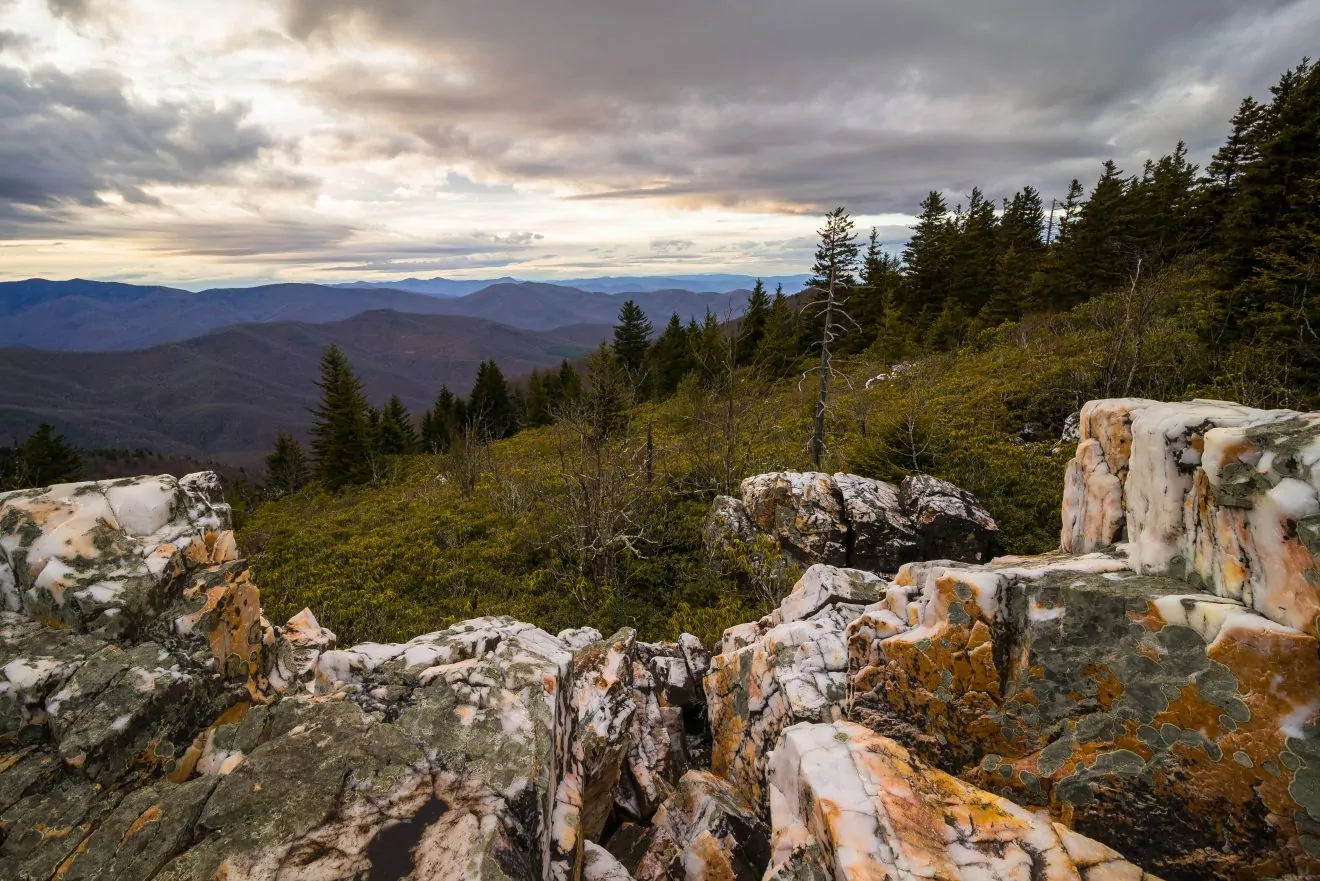
The Shining Rock Wilderness in the Blue Ridge Mountains of North Carolina is one of the most spectacular East Coast backpacking destinations. The name comes from a unique geologic outcropping of quartzite rock that guards the summit of Shining Rock. Not only will these rocks dazzle you with their beauty, but they also provide a great perch to look out across the sweeping views of the surrounding peaks. On your trek, you’ll hike past cascading waterfalls and swimming holes that are perfect for a dip in the right season.
Why is it great for a beginner?
Relatively short-mileage days lead to exciting destinations. And while many beginner-friendly backpacking trails are packed with crowds, you can find mountain solitude in the Shining Rock Wilderness. Plus, a two-night backcountry basecamp lowers the number of miles you need to hike with a full pack. One of the hardest parts of backpacking is fine-tuning your pack packing routine, so you’ll appreciate the layover day when you get to leave your tent set up.
logistics and permits
You don’t need to obtain a permit to backpack in Pisgah National Forest. However, due to the prevalence of black bears in the area, you must carry all your food and scented items in bear canisters.
This trail is in a wilderness area, so as with all backpacking trips, please leave no trace and minimize signs of human impact. We recommend first hiking in this area with a guiding company because the trails are not signed or blazed, unlike more popular destinations such as Great Smoky Mountains National Park. However, if you do choose to backpack alone in this region, carry and map and compass so you can navigate the trails.
Guided Trip Options
Wildland Trekking offers this trip as a guided backpacking adventure package with expert guides, gear, meals, transportation and more all included! Click here to learn more!
3. Golden Cathedral, Grand-Staircase, Utah
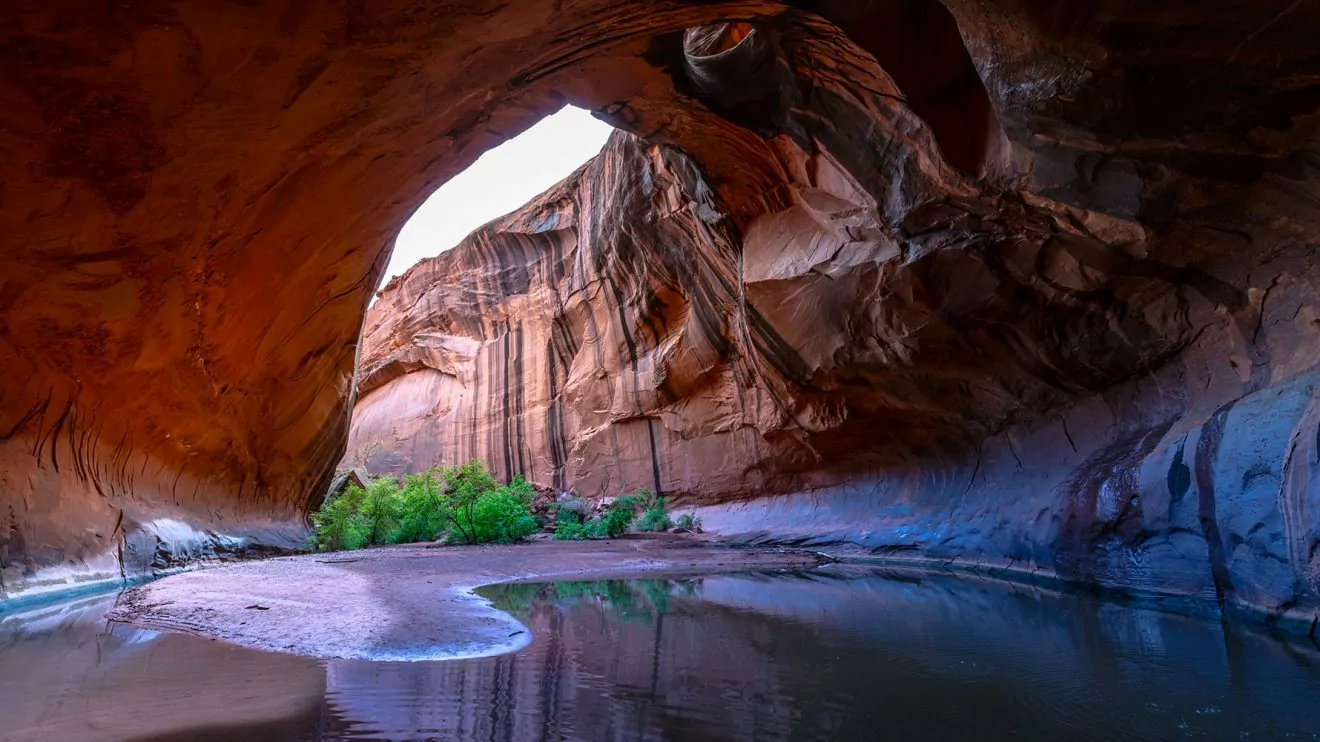
Mileage: 10 miles roundtrip | Length: 3 – 4 days | Elevation Gain/Loss: 1.100 feet
The Golden Cathedral is a stunning display of geologic processes set in Neon Canyon. On this trip, you set up a basecamp along the Escalante River so you get to enjoy both the lush desert oasis and impressive slickrock features, like the pothole arch pictured above. While camping is not permitted in Golden Cathedral to protect the fragile environment, you’ll enjoy your sandstone surroundings as you explore the labyrinth of canyons during the days. Plus, southern Utah is known for its endlessly dark night skies. So as you peer out of your tent at night, be sure to gaze up between the canyon walls to see a smattering of stars.
Why is it great for a beginner?
This low-mileage trip is doable as a day hike, but spending the night between the narrow canyon walls in red rock country is quite the experience. You’ll carry a pack on the first and last day of your trip, setting up basecamp once you arrive in the canyon. Then, on your layover days, you’ll have time to explore slot canyons and washes without the weight of your pack. Unlike some desert hikes, this destination has plenty of water, so while you’ll need to stay hydrated, you won’t weigh your pack down with a trip’s worth of H20.
logistics and permits
While this is a great first beginner backpacking trip with a guiding company, it can be a challenging trail to navigate on your own. However, if you plan to go solo, follow the cairns (piles of rocks) and keep your senses engaged so you don’t get lost. Don’t forget the map and compass!
Stop by a ranger station to obtain a free backcountry permit. Study up on desert leave no trace procedures, as this unique environment requires that you travel mindfully.
Also, check the forecast before you go because flash floods can be an incredible danger in canyon country. During certain times of the year, you may need to wade through thigh-deep water in the canyons. Bring along a pair of hiking sandals and trekking poles to make the journey more fun!
Guided Trip Options
Wildland Trekking offers this trip as a guided backpacking adventure package with expert guides, gear, meals, transportation and more all included! Click here to learn more!
4. Tuolumne Meadows area, Yosemite
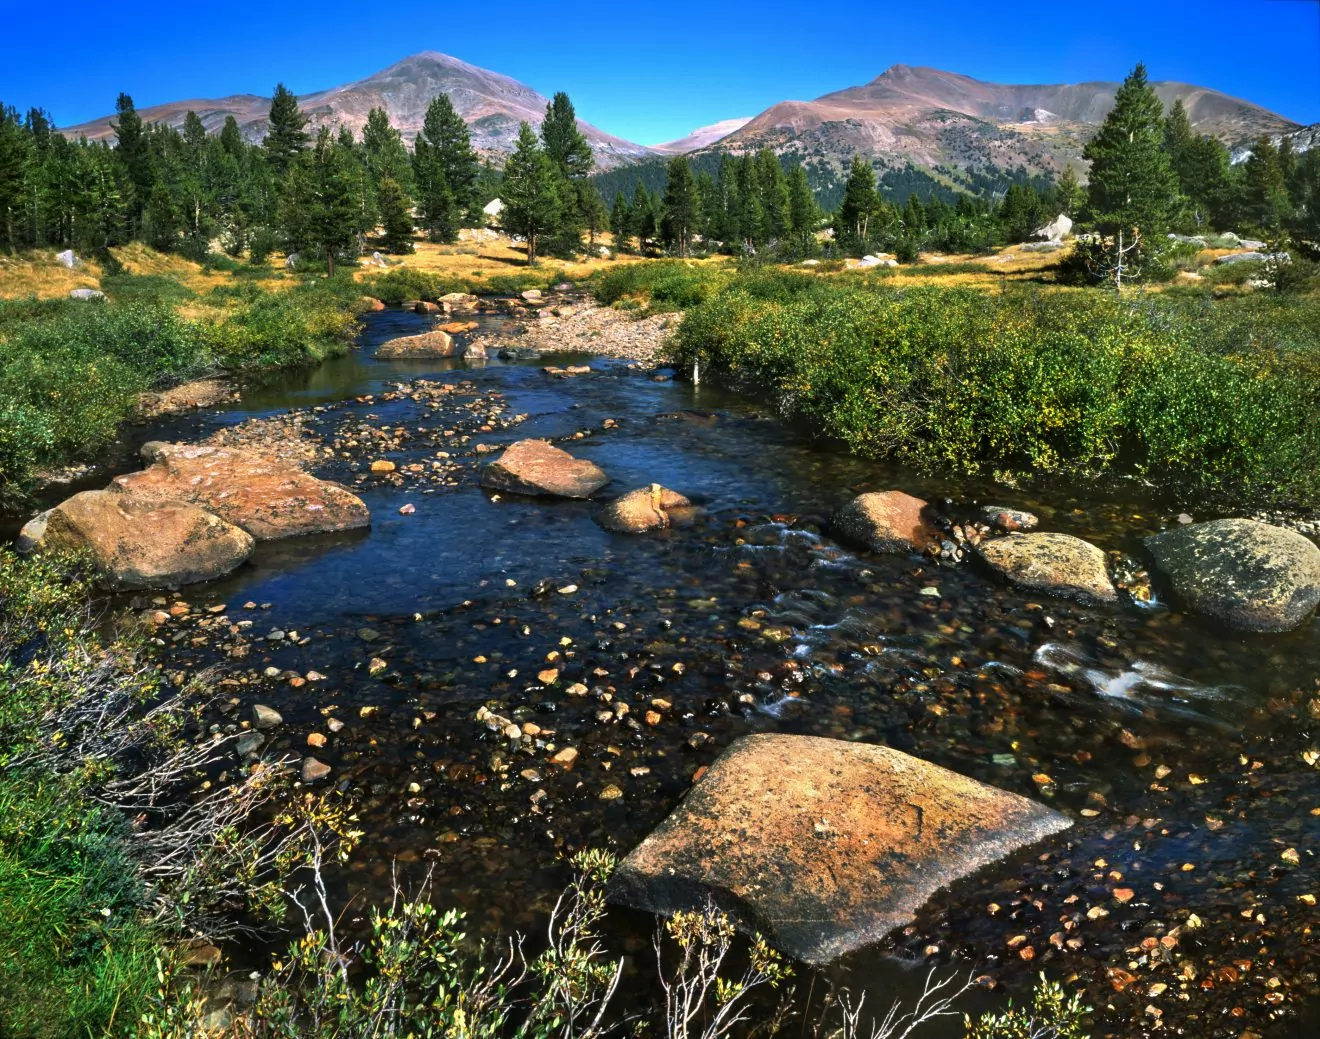
Mileage: 20 miles roundtrip | Length: 3 – 4 days | Elevation Gain/Loss: 1,300 feet with a pack ( + 1,700 as a day hike)
The Tuolumne region of Yosemite National Park is defined by expansive green meadows, dome-shaped mountains, and the pinnacle spires of the Cathedral Range. Water flows freely through the Grand Canyon of the Tuolumne, where you can witness cascades tumbling down silver slabs of granite. On our Yosemite Alpine Meadows and Waterfalls Trek, you can see some of the best that it has to offer on a moderate trip.
Why is it great for a beginner?
Unlike the Yosemite Valley, Tuolumne Meadows has high-elevation trailheads with relatively flat relief landscapes and far fewer crowds. Water is plentiful and the views are outstanding. Up in Tuolumne, wildlife is less accustomed to humans, so you’ll have fewer concerns about a hungry bear sneaking into camp.
The campsite along this route (where you’ll stay for two nights) has treated water and solar-powered outhouses for ultimate backcountry comfort. Plus, unlike many areas in Yosemite National Park, you’ll have access to bear boxes at camp, so you won’t have to carry bear canisters which are heavy and inconvenient.
logistics and permits
You’ll need to obtain a permit to stay overnight in the backcountry of Yosemite National Park. We recommend you reserve a permit in advance, however, some first-come-first-served permits are available if you visit the ranger station the morning before your intended trip. If you’re traveling during the weekends or holidays, don’t expect to get a last-minute permit.
Guided Trip Options
Wildland Trekking offers this trip as a guided backpacking adventure package with expert guides, gear, meals, transportation and more all included! Click here to learn more!
5. Havasupai Garden, Grand Canyon
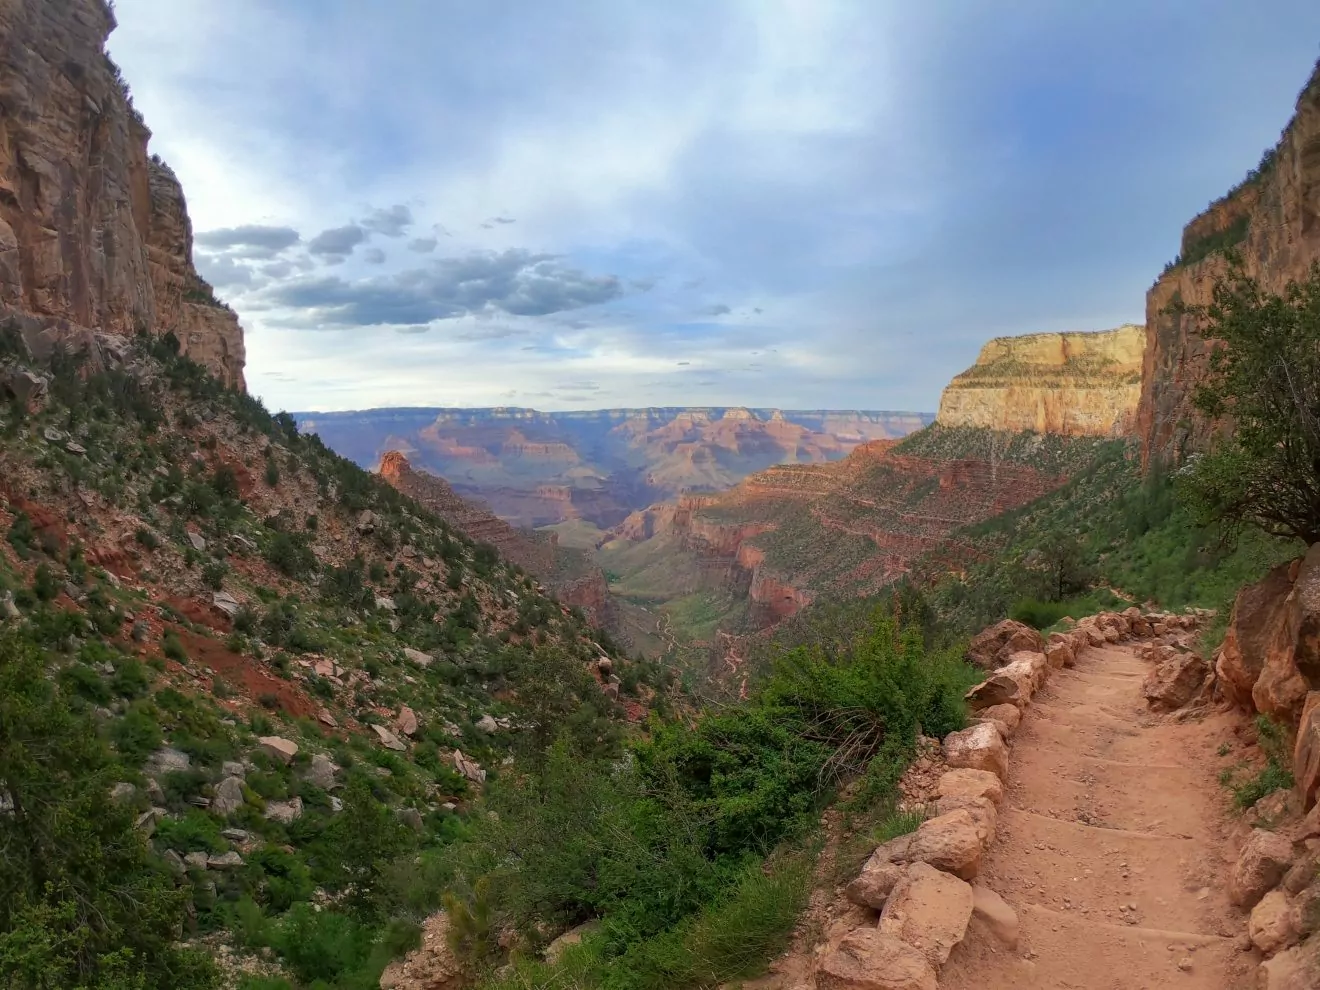
Mileage: 15 miles roundtrip | Length: 3 days | Elevation Gain/Loss: 3,000 feet with a pack ( + 1.500 ft as a day hike)
Okay, no backpacking trip in the Grand Canyon is exact beginner-friendly because of the nature of the terrain. However, if you’re set on hiking Arizona‘s Grand Canyon for your first backpacking trip, the Havasupai Garden backpacking trip is a solid choice. Instead of backpacking to the bottom of the canyon, you’ll hike down the iconic Bright Angel Trail and stay at Havasupai Garden (a lush oasis with plenty of shade). The next day, you’ll hike down to the Colorado River without a big pack on your back. This three-day excursion allows you to experience the canyon beyond the rim — something not a lot of visitors can say. And as you enjoy dinner and panoramic views at Plateau Point, you’ll feel glad you put in the effort.
Why is it great for a beginner?
Havasupai Garden is a bit of an oasis, offering hikers more shade and water than other areas along the canyon. Potable water is available year-round to hikers. These qualities are important because heat and dehydration are two of the most dangerous factors for visitors. Additionally, this trail has less elevation gain and loss than other Grand Canyon trips. You’ll still get the expansive views and magic feelings that come along with an overnight stay in the Grand Canyon, without the knee-pounding descent to the bottom. Plus, this campground has toilets, so you don’t have to worry about properly burying or packing out your waste.
logistics and permits
You must reserve and obtain a permit to backpack in Grand Canyon National Park. Because of the popularity of this park, these permits can go quickly! A few permits for Corridor campgrounds (including Havasupai Garden) are available for walk-ups at the Backcountry Information Center in the park.
Just because the Havasupai Garden Campground is more accessible than many backcountry campsites doesn’t mean you shouldn’t take it seriously. Anytime you’re hiking below the canyon rim, you need to carefully consider the conditions, your water capacity, and your fitness level. In the hot seasons, start early to avoid mid-day heat; this is an unforgiving climate and many hikers have died by setting out unprepared. Hiking with a guide can ensure that you have the tools you need to successfully backpack in the Grand Canyon.
Guided Trip Options
Wildland Trekking offers this trip as a guided backpacking adventure package with expert guides, gear, meals, transportation and more all included! Click here to learn more!
6. White Mountain Hut to Hut, New Hampshire
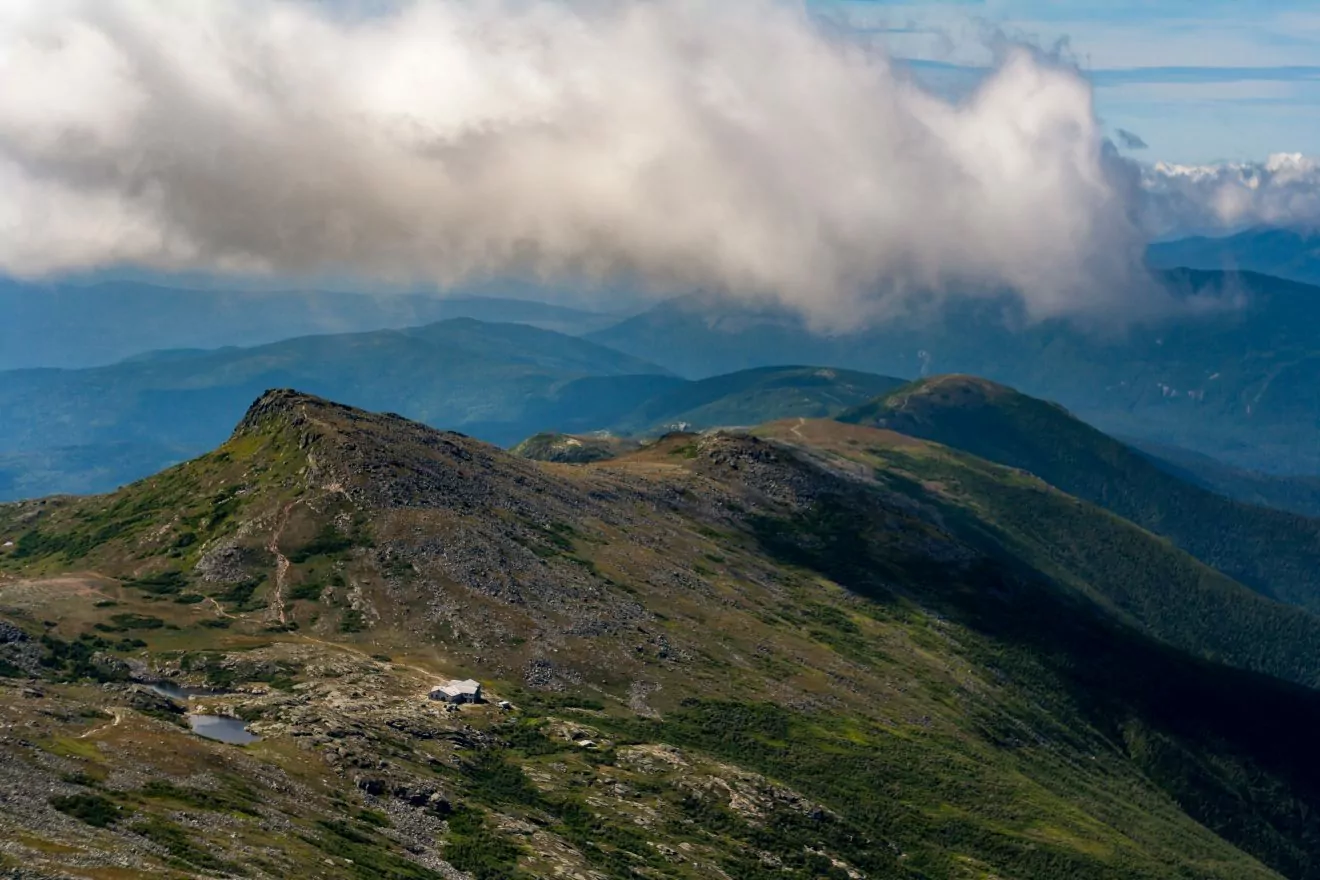
Mileage: 15 miles point-to-point | Length: 3 – 4 days | Elevation Gain/Loss: 3,600 feet
Traversing an alpine ridgeline and staying at high mountain huts — you expect that in Europe, but not in the U.S., right? But in the White Mountains of New Hampshire, you can enjoy the luxury of backcountry accommodations with the adventure of the alpine. Similar to the popular Presidential Peaks Traverse but less daunting, the High Peaks of the Pemigewasset Hut to Hut Trek offers the same appeal for a fraction of the difficulty. Staying along the Appalachian Trail (AT), you’ll bag peaks during the day and settle into cozy mountain huts at night. These trails offer a sense of camaraderie that is often hard to find when backpacking. As travelers from all over the world stay at the mountain huts, you’ll be able to chat about your hike over dinner.
Why is it great for a beginner?
On a hut-t0-hut trek, you’ll get to leave the tent and sleeping pad behind, shedding some of the heavy weight required for backpacking trips. If you’ve always wanted to spend the night in the backcountry, but aren’t ready to give up the luxuries of a bed, toilets, and running water, this will be a great introductory trip.
Also, you’re hiking above treeline for most of your trek, so the views per mile are exceptional. But, the terrain is a bit rougher than some of the other trails on this list.
logistics and permits
Because this trek takes place primarily above the treeline, you should check the forecast, have good decision-making skills, and stay aware of thunderstorm conditions. The White Mountains are notorious for their erratic weather, so make sure to be prepared for some wild winds and weather.
You should book your stays in the AMC huts in advance. If you plan a point-to-point traverse, check out the shuttle system to ensure you can get back to your car at the end of your journey. The Appalachian Mountain Club strongly recommends reserving your shuttle; walk-ons are only accepted when space is available.
Guided Trip Options
Wildland Trekking offers this trip as a guided backpacking adventure package with expert guides, gear, meals, transportation and more all included! Click here to learn more!
7. Lake Blanche, Wasatch Range, Salt Lake City
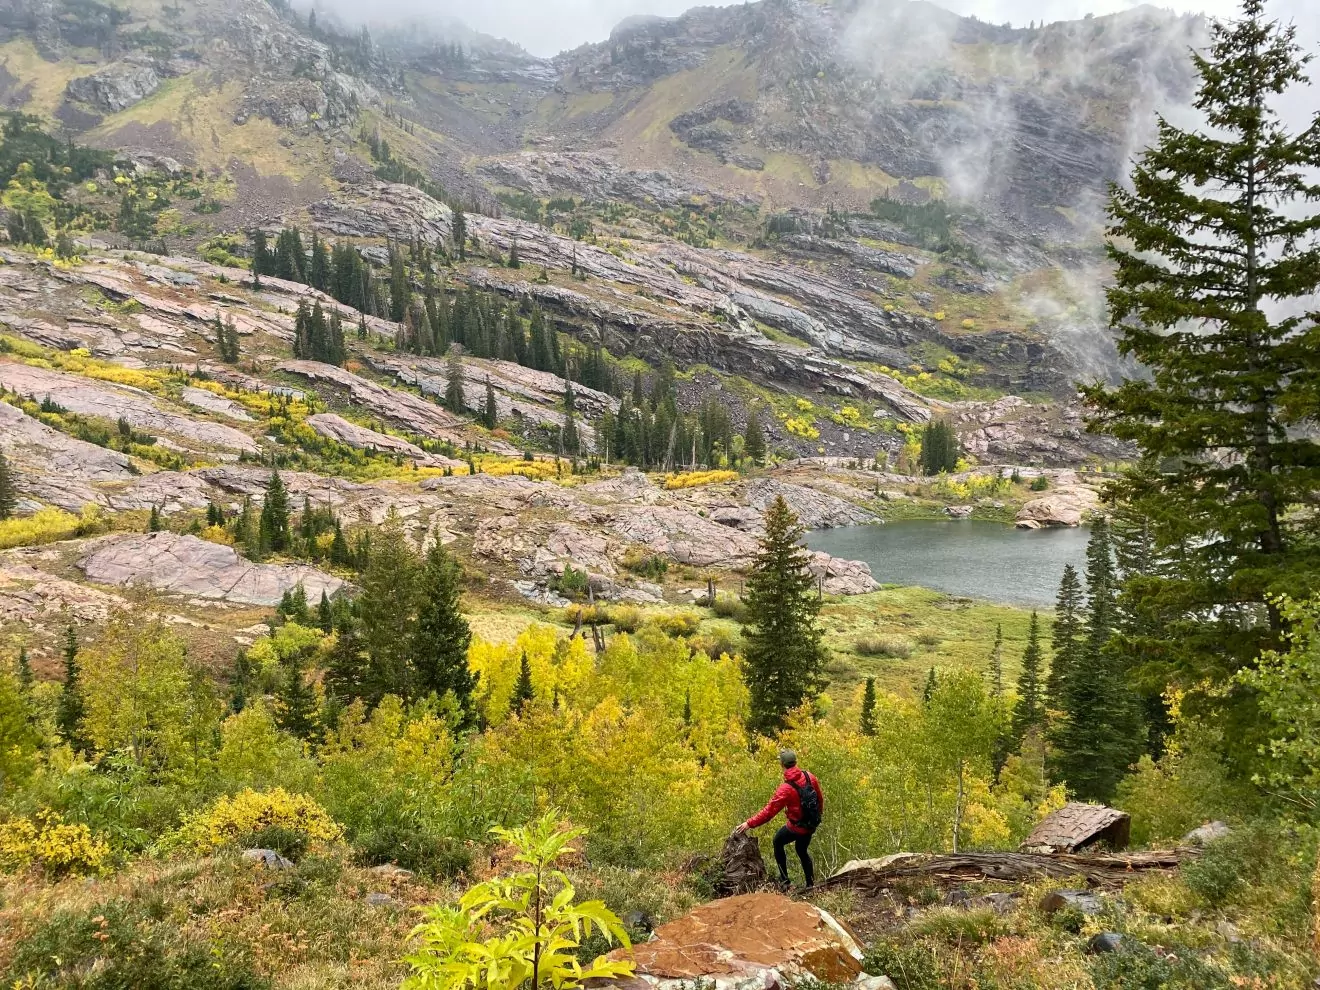
Mileage: 7 miles out-and-back | Length: 2 days | Elevation Gain/Loss: 2,700 feet
Lake Blanche is a popular day hiking destination in Big Cottonwood Canyon outside of Salt Lake City. Those that pack a bag to spend the night near the lakeshore (well, 200 feet from the water’s edge) will be rewarded by dwindling crowds and dazzling alpenglow on Sundial Peak. As you approach the photogenic basin, keep an eye out for moose grazing on aspens. Once you’ve set up camp, hike the spur trail to explore Lake Florence and Lake Lillan.
Why is it great for a beginner?
This backpacking trip can be completed as a quick overnight, as it is incredibly accessible from Salt Lake City, Utah. While the trail has a fair amount of elevation gain, the low mileage (3.5 one-way) makes this trip achievable for most first-time backpackers. Once you set up camp, you’ll have access to water. Also, while solitude can be desirable, you probably won’t be alone if you camp near Lake Blanche. Some first-time backpackers may feel reassured at the presence of other humans.
logistics and permits
You do not need any permits for this backpacking trip. Check out the Uinta-Wasatch-Cache National Forest backcountry regulations before you go.
However, no swimming or campfires are allowed. Respect the watershed and don’t wash your dishes in the lake.
All-inclusive Backpacking Adventures
8. Heart Lake and Mount Sheridan, Yellowstone
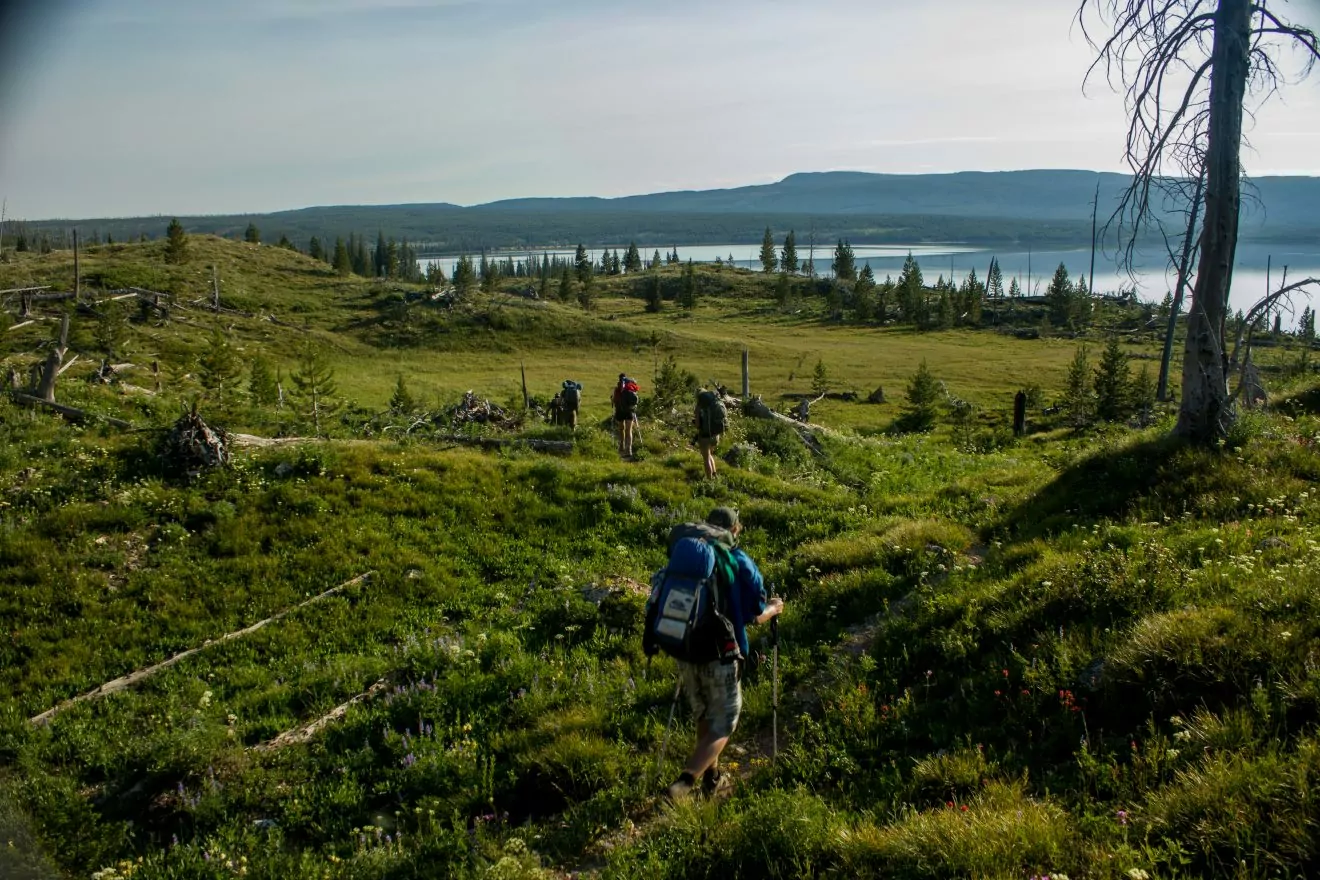
Mileage: 23 miles roundtrip | Length: 3 days | Elevation Gain/Loss: 900 feet (+ 1,800 as day hike from camp)
This remote region of Yellowstone is teeming with wildlife, rolling meadows, expansive lakes, and geothermal features. So what more could you ask for? Well, when you backpack to the shores of Heart Lake, you won’t want to miss Mount Sheridan. Adding on a summit attempt to an already fantastic hiking trail really elevates this itinerary. This area is so classically Yellowstone that you’ll fall in love with the subtleties, like a pine marten running through the trees, the feeling of the wind as you approach the ridgeline, and the rising steam of the hot springs along Witch Creek.
The Heart Lake Trailhead in Yellowstone National Park is a great jumping-off point for many backpacking trips, including our Heart Lake and Mount Sheridan and Heart Lake/Snake River trips. While they are both great options for a new backpacker, the Heart Lake/Mount Sheridan trip doesn’t require a shuttle, making it easier to execute for non-guided hiking parties.
Why is it great for a beginner?
You’ll set up a basecamp for two days near Heart Lake. There, you’ll get to relax along the lakeshore in the evenings. On your layover day, you’ll hike into the alpine during your summit attempt of Mount Sheridan. If you make it to the top (and even if you don’t), you’ll get sweeping views of the Absaroka Range, the Tetons, and Yellowstone Lake.
The rewards are big for a relatively flat 8-mile hike in to camp. This itinerary gives you plenty of downtime to enjoy the leisurely pleasures of backpacking, while also ensuring you work hard to get a well-rounded experience in Yellowstone.
logistics and permits
When it comes to the Greater Yellowstone Ecosystem (Yellowstone, into the Tetons and beyond), you’ll have one big safety consideration when backpacking. Grizzly bears. This not-so-small detail is one of the only reasons this isn’t an ideal beginner trip. However, the elevation gain and mileage are very achievable by most beginners. So, if you like the idea of this trip but aren’t keen on hiking in grizzly country, join us on a guided trip and we’ll help you build the skills you need to travel with confidence.
If you do decide to hike in grizzly country without a guide, be sure to read up on safety protocol, hike smart, carry bear spray, and keep a bear-safe camp. You’ll also need to be prepared to hang all of your food at the designated bear hangs in the Park. We’ve written all about in this blog post.
If you want to stay overnight in Yellowstone National Park, you’ll need to obtain a permit. Heart Lake is one of the more popular backpacking destinations in the park, so you should make an advanced reservation. However, permits are also available for walk-ups up to two days before your trip date. If you do decide to chance your trip with a last-minute permit, you should have a backup itinerary in place in case you can’t secure your ideal campsite.
Guided Trip Options
Wildland Trekking offers this trip as a guided backpacking adventure package with expert guides, gear, meals, transportation and more all included! Click here to learn more!
9. Ancient Lakes, Eastern Washington
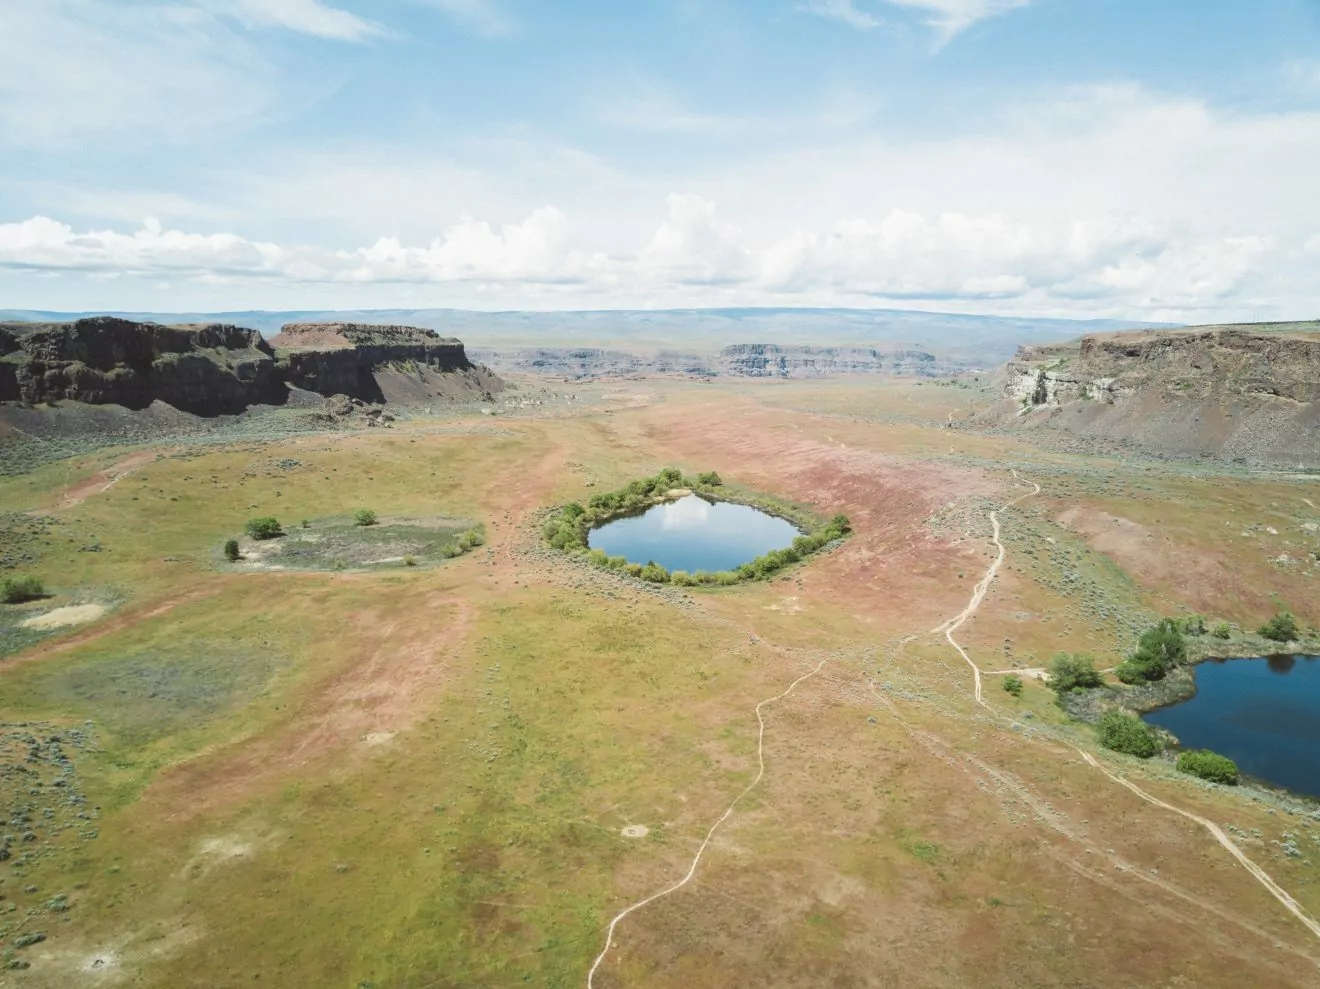
Mileage: 4 miles out-and-back | Length: 2 days | Elevation Gain/Loss: minimal
If you’re searching for the perfect early-season overnighter, look no further than Ancient Lakes near Quincy, Washington. This desert oasis is close enough to Seattle that you can squeeze in a quick weekend trip even if you only have Saturday and Sunday to play. As you wander among the columnar basalt rocks, you’ll watch waterfalls splash over the edges and create green streaks of life on the walls. Once you arrive at the lake, you’ll find many paths to explore the area. And nearly every campsite you can find has great views of the dark night sky.
Why is it great for a beginner?
Low-mileage and minimal elevation gain make this a great trip for beginners, kids, and the pup. While you do need to pack in all your water, you shouldn’t be deterred because you only have a 2-mile hike to the lake.
logistics and permits’
Pack in all the water you’ll need for your overnight trip! Even though you are hiking to lakes, all of the water is irrigation water from nearby farmlands. Agricultural runoff pollutes these water sources, so you’re better off bringing potable water from home. Also, you may want to avoid this one during the hot summer season. If you do backpack in this area during the summer, keep an eye out for rattlesnakes.
You do not need a permit to camp overnight in the Quincy Wildlife Recreation Area. However, you’ll need a Discover Pass to park at the trailhead.
10. Superior Hiking Trail, Minnesota
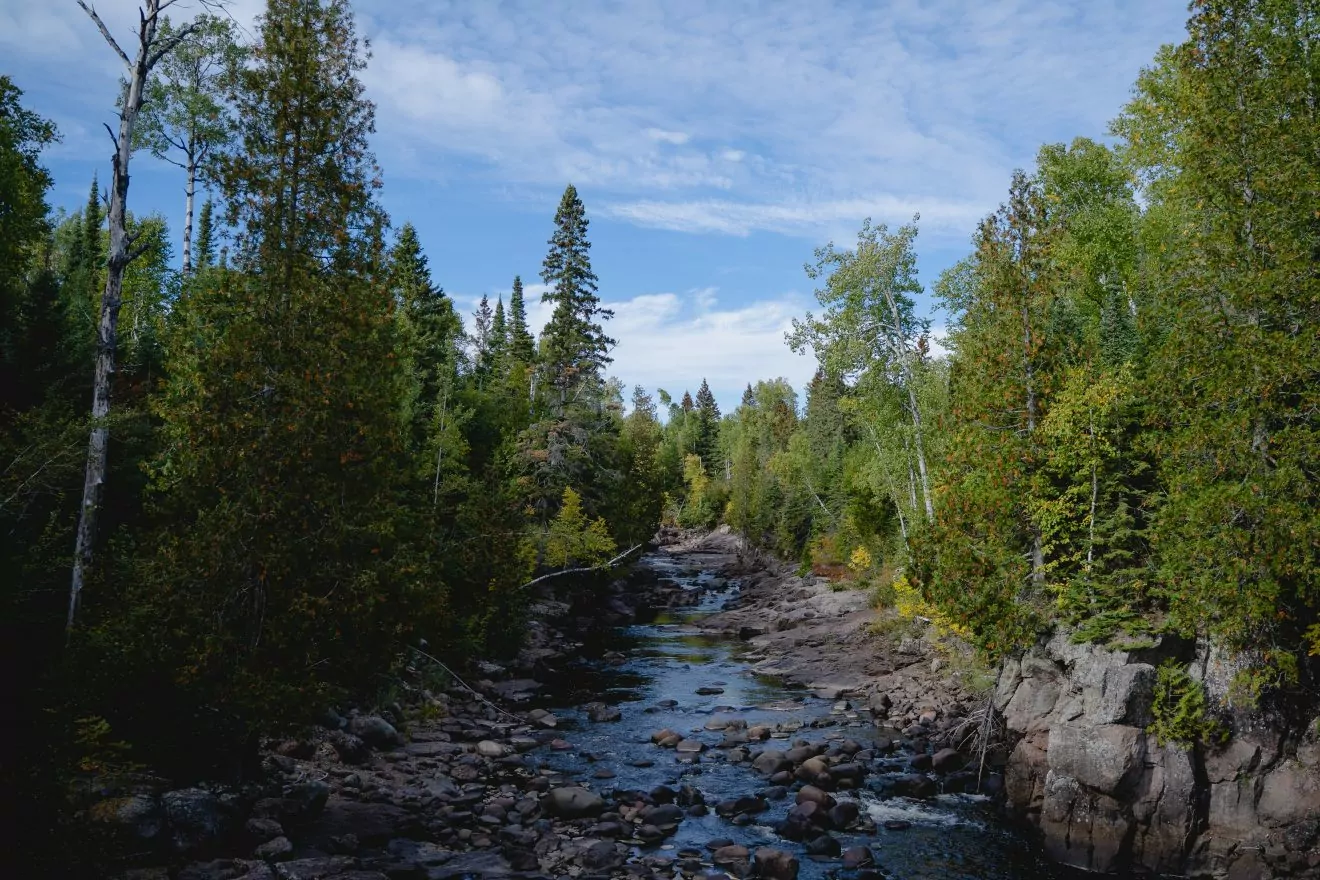
Mileage: varies (10+ mile one-way) | Length: varies (2+ days) | Elevation Gain/Loss: varies
We’re not recommending that you hike all 310 miles of this thru-hike for your first backpacking trip (not that we’d stop you…), but the Superior Hiking Trail (SHT) in Minnesota has many trail sections that you can complete in a weekend or on a three-to-four-day trip. Weave in and out of deciduous forests as you follow the shore of Lake Superior. You’ll cross deep gorges, pass fairytale-esque waterfalls, and even find your fair share of swimming spots. In the autumn, you’ll hike to vistas to see a sea of reds, oranges, and yellows. While the entire trail is stunning, some standout sections are from Caribou Falls State Wayside to Lutsen and from Two Harbors to Silver Bay.
Why is it great for a beginner?
The SHT hiker’s shuttle makes it easy to customize your route for your timeline and hiking ability, without having to do an out-and-back hike. Just choose one of 50 different trailheads and hike north or south! Most hikers travel from south to north. The trails are well-marked with a blue blaze.
When you’re on the trail, you encounter designated campsites very frequently. So, you never have to hike far to find a place to rest your head (unless you want to pack in the miles!) Additionally, some sections of the trail pass through towns. If you’re considering your first thru-hike or week-long trip, restocking supplies is incredibly easy.
logistics and permits
No permits or reservations are required to hike and camp along the SHT. During busy weekends, you may have to share campsites with other hiking parties.
The trail does pass through state parks. In these areas, you can only camp with a reservation and fee. If you don’t want to make reservations, plan your itinerary so you camp in the other numerous campgrounds.
11. Glacier Gorge, Rocky Mountain National Park
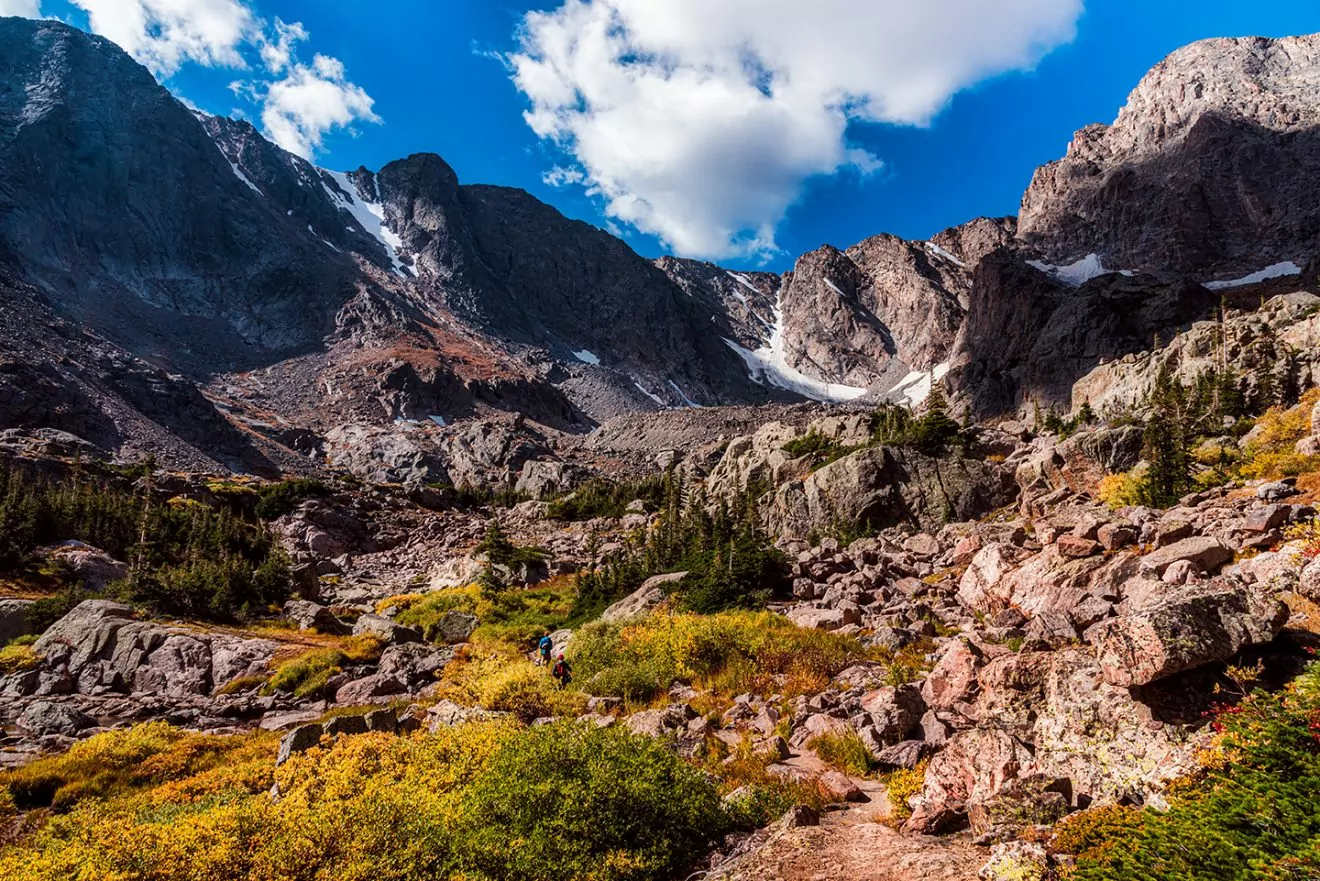 ©Brendan Bombaci (CC BY-ND 2.0)
Mileage: 10 miles roundtrip | Length: 2 – 3 days| Elevation Gain/Loss: 1,700 feet
If you don’t mind the company of other hikers, Glacier Gorge is a fantastic destination for a first backpacking trip in Rocky Mountain National Park. It’s hard to snag a backcountry permit for this coveted area, but if you do, you’ll stay in one of two designated campsites — either in the Glacier Gorge Valley or along Andrews Creek. If you’re staying at Andrews Creek, establish your basecamp and set out on a hike to Sky Pond, a sparkling alpine lake nestled beneath Taylor and Powell Peaks. Spend an extra day exploring the area and head up to Andrews Glacier. If you’re at the Glacier Gorge site, bring a fishing rod and test the waters at Jewel Lake. Or, hike up to Black Lake and Ribbon Falls.
Why is it great for a beginner?
The campsites are relatively close to the trailhead. Once you set up camp, you’ll have opportunities to explore stunning high mountain lake basins without the weight of a heavy pack. Starting from the Glacier Gorge Trailhead, you don’t have to gain much elevation to get some pretty impressive views.
logistics and permits
You’ll need to reserve a wilderness camping permit if you plan to spend the night in Rocky Mountain National Park. As there are only two designated campsites in this area, the spots fill up quickly. If you plan to fish, you’ll need a valid Colorado fishing license.
In Rocky Mountain National Park, you must carry and store all your food and scented items in a bear canister. This is the only food storage method permitted in this park.
12. Observation Peak Trek, Yellowstone National Park
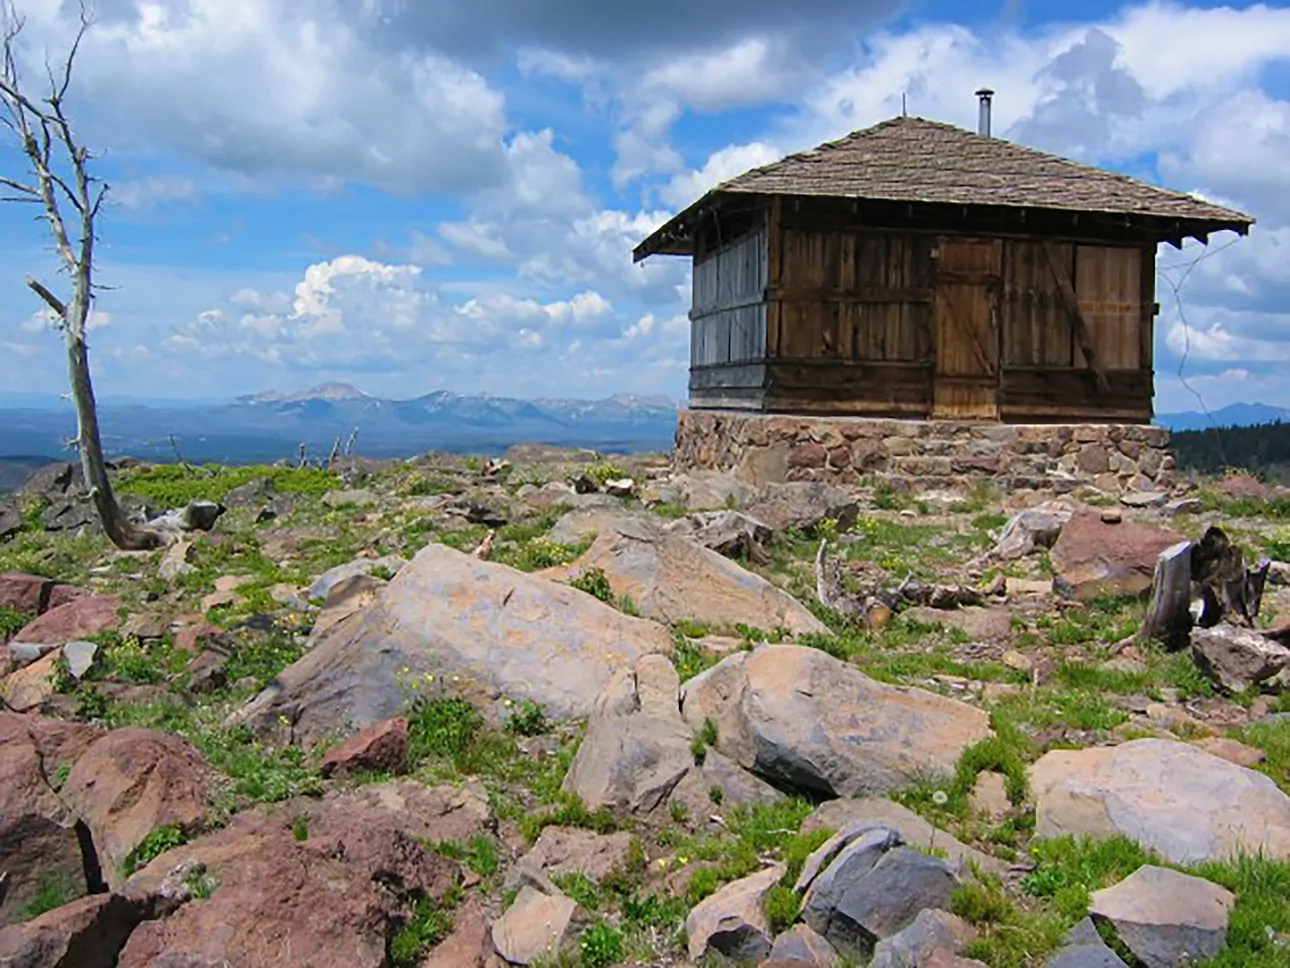
Milage: 10MI / 16KM roundtrip | Length: 2-3 days | Elevation Gain/Loss: 1300 ft
If you’re looking for an introduction to backpacking that will have you deep in the backcountry without having to hike for days, then a trek to Observation Peak is an excellent option. In the heartland of wild Yellowstone National Park, this relatively popular trail can be done in 2 or 3 days and gives you some of the most stunning scenery in the park. You can either chose to day hike to Observation Peak with a basecamp at Cascade Lake or include this summit on the first day of your trek before setting up camp. With moderate elevation gain and well maintained trails coupled with stunning lakes and vistas, this trail is one of the best extended weekend options in Yellowstone.
Why is it Great for a beginner?
An Observation Peak trek is a great option for first time backpackers as there are so many options for customizing the trip to what you want. Depending on if you are going for 2 or 3 days, you have options to hike to Observation Peak and take in the views, stroll to Grebe Lake and fish for trout, or simply relax at Cascade Lake if you want to rest your legs. Plus, the milage is minimal and doesn’t leave you exhausted by the time you reach camp. This trail is popular enough to make first time backpackers feel comfortable with others around, but doesn’t have so many people as to spoil the wilderness effect.
Logistics and Permits
The biggest logistical concern of hiking in Yellowstone is the wildlife. Grizzly bears are very active in this area and other wildlife such as bison and elk can also pose danger to hikers. This is one of the only downsides to embarking on this trip as an introduction to backpacking. However, with the moderate elevation and easy milage, you’ll be able to prepare for the possible dangers of wildlife and still complete this trip safely. If the wildlife seems like a bit much but the hike sounds appealing, Wildland Trekking offers this trip in both 2 and 3 day options so that you can get your feet wet before going out there on your own.
Like everywhere in Yellowstone, permits are required for overnight camping. Yellowstone’s traditional backpacking season is shorter than other national parks, mostly limited to summer, so you’ll want to make advanced reservations to ensure you get the route you want. Walk up permits are available at ranger stations 1 or 2 days before you begin your trek, but they go quickly each morning. It’s a good idea to have a back up itinerary in case you don’t get the permit you want. Permits are included on guided trips
Guided Trip Options
Wildland Trekking offers this trip as an all-inclusive guided hike with meals, gear, transportation, permits, and an expert mountain guide all included. Guided trips are a great way to find out what backpacking is like before getting out there on your own. Click here to learn more!
13. Little Lakes Valley, Inyo National Forest, California
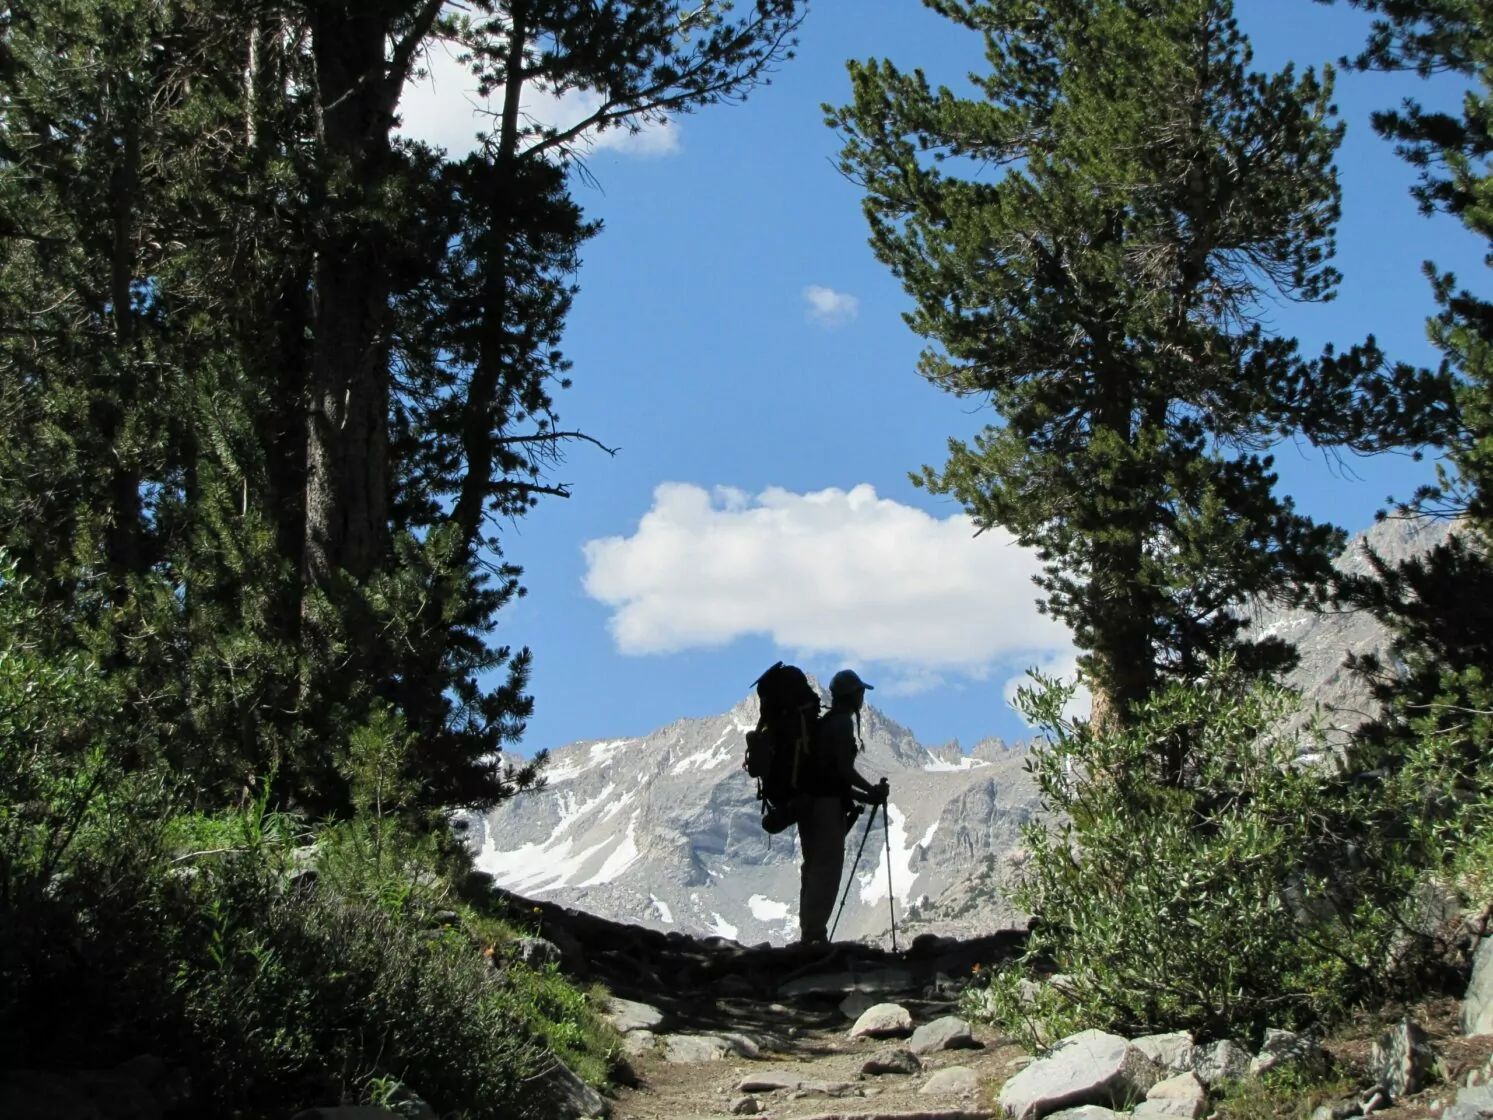
Milage: 8-10MI / 13-16KM Roundtrip | Length: 2-3 days | Elevation Gain/Loss: 1218 ft
Just north of Bishop on California’s Highway 395 is a blink-and-you’ll-miss-it turnoff with one of the Eastern Sierra’s best short distance hiking destinations: Little Lakes Valley. This valley, accessed from Mosquito Flats, is a great destination for a first time backpacking trip. With over a dozen serene alpine lakes, this valley is overflowing with campsite options, day hiking, fishing, and stunning views. While the trail is easily assessable, it’s no overly crowded and with the abundance of campsites, hikers may get an opportunity to have a lake to themselves. Located in the Inyo National Forest, there’s much less competition for permits compared to national park trails, but the scenery is no less spectacular.
Why is it Great for a beginner?
Little Lakes Valley is great for beginner backpackers because of the big bank for your buck (or view for your step) that you get on this short and relatively flat trail. There is some elevation gain on the way into the valley, but that means it’s downhill on the way back! The abundance of lakes and streams make finding water a breeze and the pristine lakes with a back drop of snow capped, jagged peaks is unbeatable. Plus, the trail is easily accessible from Highway 395 and Tom’s Place at the turnoff is a great place to spot at for a burger on the way out!
Logistics and Permits
Logistics for backpacking in Little Lakes Valley are pretty minimal as the short trail is out and back and there is only one access point. Your biggest concern is going to be the elevation as the trailhead is over 10,000 ft above sea level. All backpackers (not just beginners) who don’t live at elevation should spend at least one night (if not two) at a nearby campground that’s around 7,000 to 8,000 ft in order to acclimate to the elevation. Convict Lake is a good, close-by option for this.
Only attempt this hike in summer and early fall and make sure to check the weather before you go to assess road and snow conditions. Permits are required to spend the night here, but there is much less competition for them compared to national parks. You can make reservations online or get walk up permits at Inyo National Forest’s backcountry permit office.
This is bear country and you will need to use bear resistant containers for all food and smelly items. There are no campfires allowed anywhere in the valley and water collected from lakes and streams should be filtered.
14. Half Dome, Yosemite National Park
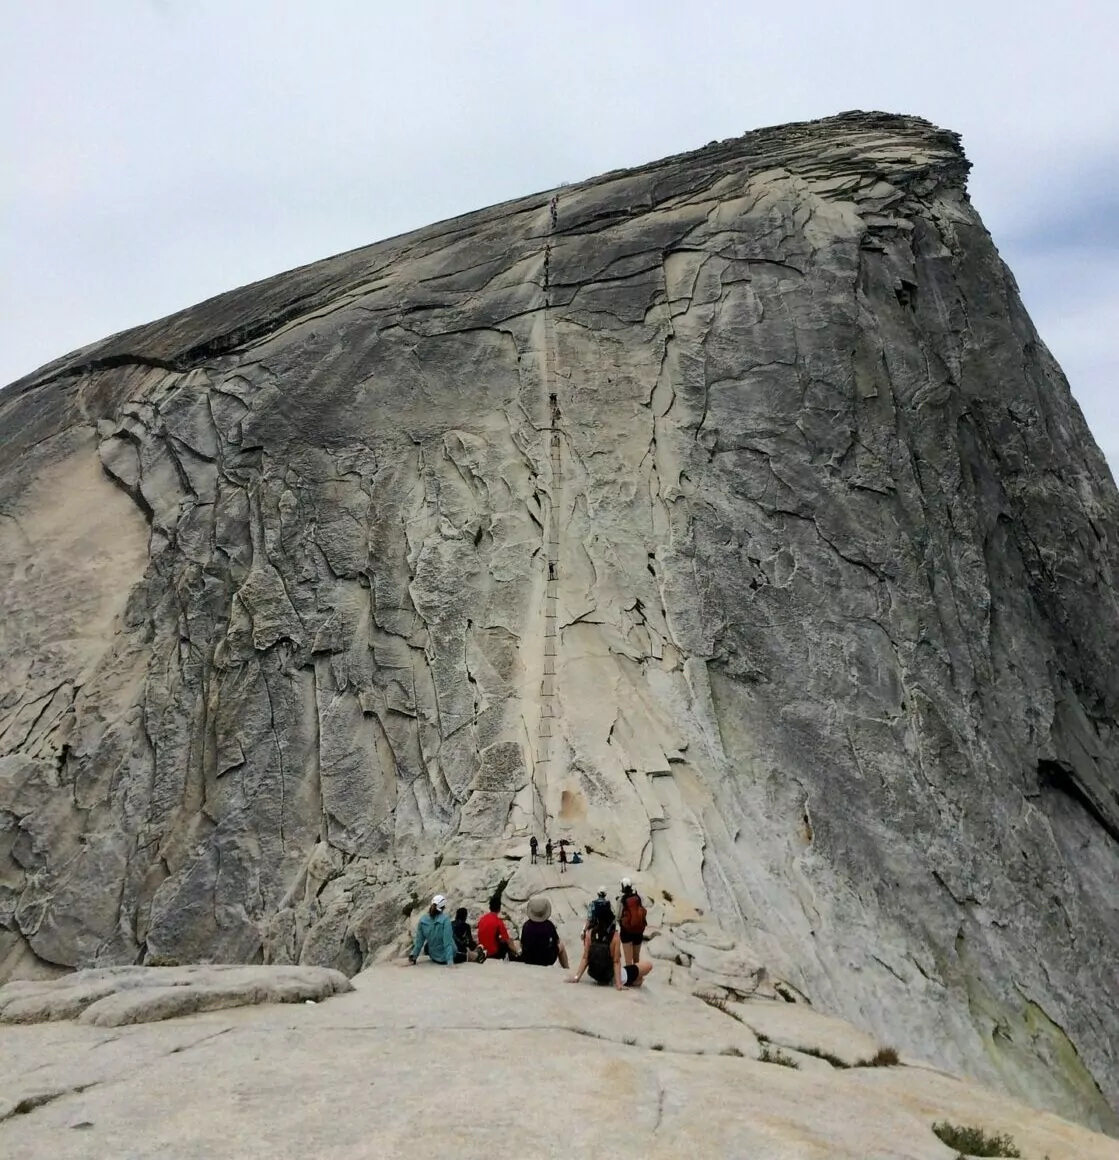
Milage: 16MI / 26KM Roundtrip | Length: 4 days | Elevation Gain/Loss: 2845 ft
First, a disclaimer: this trip is hard. Hiking to and up Half Dome is a challenge with large elevation gains and lots of exposure to heights. Beginning with the Mist Trail and ending with hiking the cables, this hike is not to be underestimated. But the views from the top are worth it. While many people do this hike in a single day, backpacking to the base of Half Dome and then summiting in the morning before any day hikers arrive is a great option, allowing you to skip the extremely long and strenuous milage day. It is notoriously difficult to get permits to hike Half Dome, but the backpacking permit is separate from the day hiking permit and will be easier to get.
Why is it Great for a beginner?
So if this trip is so hard, why is it included in this list of best trips for beginner backpackers? Well, beginner trips don’t necessarily mean easy trips. If you are already an avid outdoors person, in good physical condition, and accustomed to hiking, you might want your first backpacking trip to be a bit of a physical (if not a technical or logistical) challenge. In this case, Half Dome may be a great option for you, especially if you’ve already done it as a day hike.
While the elevation is still hefty even for avid hikers, backpacking to the monolith cuts down the milage to reasonable days, making a backpacking trip arguably easier than a day hike. Of course, you might consider going with a guiding company due to the somewhat technical terrain on the granite and to avoid the hassle of getting permits.
Logistics and Permits
Hiking Half Dome comes with some logistics to work out. The cables on the last miles of the climb are only up from late May through early October when there won’t be snow and ice on the granite. In addition, you won’t be able to hike on a rainy day (or even a day that is threatening rain) as the granite becomes extremely slippery when wet. Most accidents happen in wet weather. Check the forecast and make sure there are no storms brewing.
Permits are notoriously difficult to obtain for Half Dome, but backpacking permits are a little bit easier as you are not competing against all the day hikers for a spot. You can reserve permits on the National Park Service’s website.
The trail is in and back, so you won’t have to worry about transportation if you park your car at the trail head. Remember, this trail is commonly done as a day hike, so don’t expect to have backcountry solitude on this trek.
Guided Trip Options
Backpacking to Half Dome with a guiding company can be a great way to challenge yourself physically, but have an expert guide to show you the ropes of backpacking before you get out there on your own. We offer this trek as a guided tour for anyone wanting a bit of a challenge with great rewards. All of our trips are all-inclusive with meals, gear, transportation, permits, and an expert mountain guide all included. Click here to learn more!
15. West Rim, Zion National Park
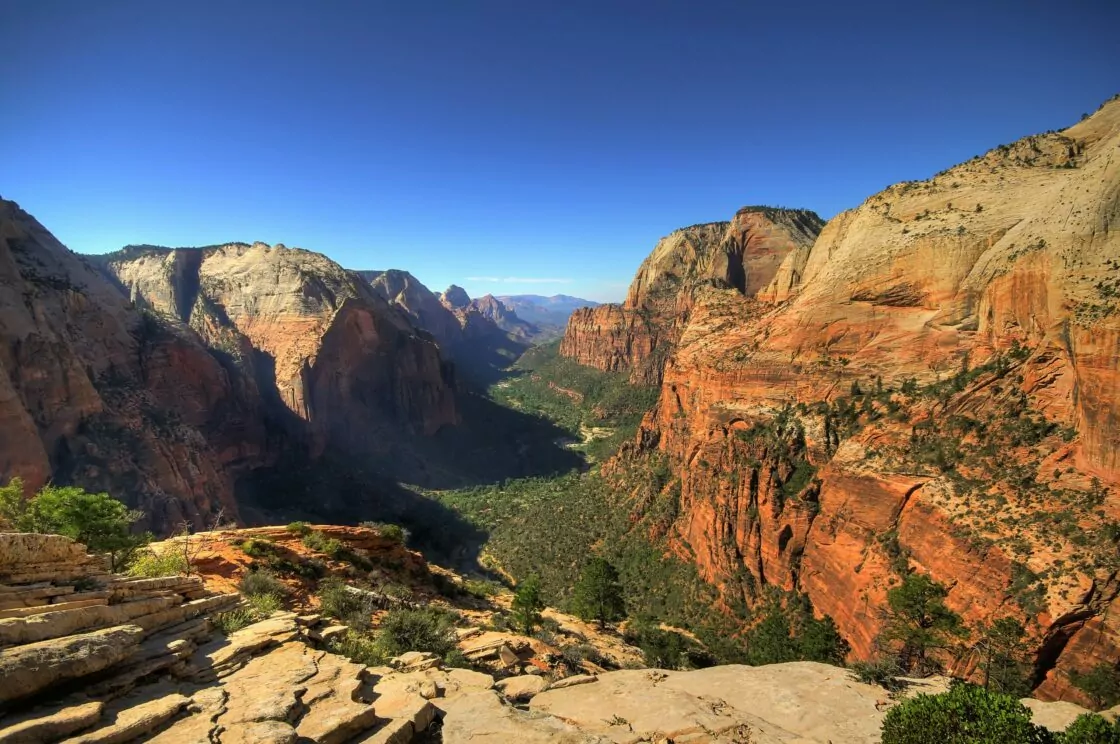
Milage: 16MI / 27KM Point to Point | Length: 2 days | Elevation Gain/Loss: 1700 ft
Beginning far from the gorgeous yet busy canyon that is Zion’s main attraction, the West Rim trail is a scenic, mostly downhill, 2 day backpacking trip that will knock the socks off any first time backpacker. Even seasoned backpackers will be kept interested on this moderate trail with non-stop views of Zion’s majestic red rock canyons and some campsites from which you can see both the sunset and the sunrise. Beginning at Zion’s highest point at Lava Point and hiking down toward the canyon, this trip takes hikers up to the alpine portions of Zion and then down into traversing through the classic canyons. And to top it all off, you’ll end at Scout Lookout with some of the most famous views in the park.
Why is it Great for a beginner?
The West Rim in Zion is a great trip for first time backpackers because it is simply loaded with gorgeous views and isn’t too strenuous. You’ll be able to take leisurely mornings when hiking this trail over two days and if you start at Lava Point, it’s almost entirely downhill! (You will want to bring trekking poles however, all that downhill hiking can be hard on the knees). The elevation and milage are moderate and you simply can’t beat the views down into the canyon. While Zion is known for its crowds, you won’t find this trail overly crowded, giving first time backpackers a chance for some solitude on the trail.
Logistics and Permits
Zion’s West Rim comes with a few logistical issues, but none that a first time backpacker can’t figure out. The trail is out and back so you will need to either park a car at the end of the trail and drive a second one to the trail head or use a shuttle service. Shuttles can be arranged from town easily.
Another logistical concern is water. There are seasonal springs along the trail, but the only one that flows year round is Cabin Spring. Water from streams and rivers may be impacted by a recent bacteria bloom that contain cyanotoxins, making the water unsafe for drinking and swimming. Please see the Zion’s official website for current updates on the cyanobacteria bloom.
Permits are required for overnight use and they double as campsite reservations for one of the 9 campsites along the trail. Walkup permits are available, but it’s best to reserve them online to make sure you get the permit you want. Zion has stricter regulations about backpacking compared to other national parks, so make sure to read the trail rules before setting out.


