
Best Backpacking Trips In Arizona

The Arizona wilderness is unlike any other. A desert landscape that is absolutely teeming with life. It may sound paradoxical, but there is a vast array of ecosystems out there to explore. From mountains to canyons, or waterfall oases to sandstone towers, Arizona has plenty to offer if you’re willing to find it. But let us give you a hand on that front! We’ve pulled four of our absolute favorite backpacking trips in Arizona together, and all the details are right here for you to plan your next adventure.
But regardless of the route you take, always stay safe and remember that Arizona is famous for harsh weather conditions. It’s therefore very important to research wildlife and weather forecasts beforehand so you can be fully aware and prepared.
Important Reminder: While Leave No Trace is important in all outdoor settings, it’s especially important for backpacking trips in Arizona where arid climates seriously inhibit the break down of food and human waste. Refresh LNT guidelines and be sure that whatever you pack in, you pack out too.
| Trip | Difficulty | Days | Miles |
| Grand Canyon Rim to Rim | Moderate | 4 | 24 |
| Havasu Falls | Moderate | 2-3 | 20 |
| Paria Canyon | Moderate | 4 | 38 |
| Superstition Mountains (WhiteRock Springs) | Strenuous | 3 | 23 |
Grand Canyon Rim To Rim
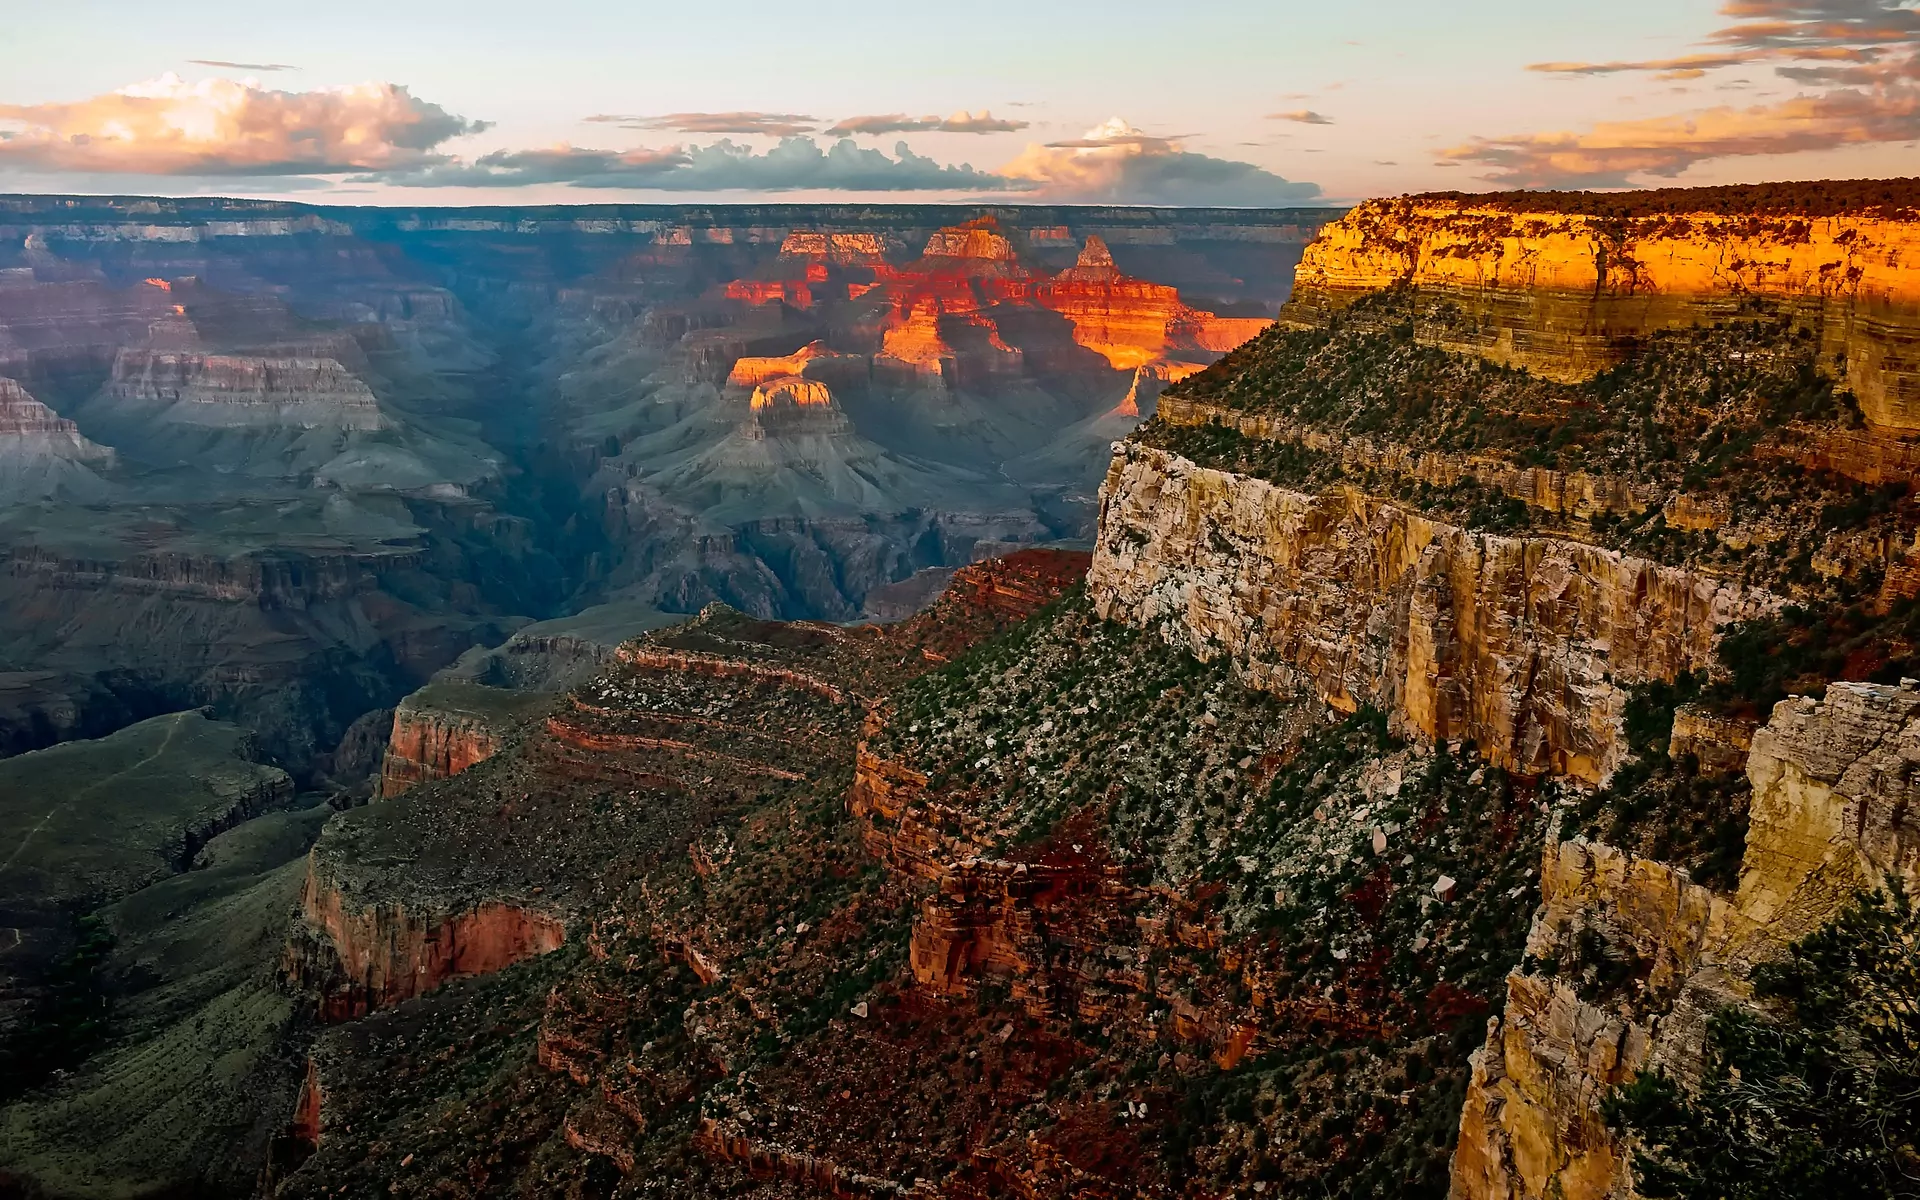
Trip Overview
Hiking the Grand Canyon is breathtaking no matter the trail you choose, but exploring the Canyon Rim to Rim is the trail to beat them all and certainly one of the best backpacking trips in Arizona. It gives you the unparalleled experience of being able to visit and enjoy both the North and South rims of the canyon. Seeing the Grand Canyon from above is one thing, but truly understanding its magnificence can only come from hiking through the bottom of the canyon itself.
This hike packs all this and more into just a matter of days. Although this hike is classified as moderate, it is no small feat to hike down and back up the canyon. The descent and ascent are spaced out, however, as they are the most strenuous parts of the hike. Nevertheless, don’t take your training lightly and be sure that you are fully conditioned and prepared before you set out. If you’ve never had the pleasure of backpacking in the Grand Canyon before, you receive a Grand Canyon specific packing list if you register for a guided Wildland Trekking trip.
Trip Details
While you can complete this trail in just a day while running; let’s give our lungs a break, shall we? It’s much easier and infinitely more enjoyable to space this hike out over a few days. Usually, it takes 4 days and 3 nights to make it from the North Rim to the South Rim. This would have you hiking at least 5-7 miles per day. You can complete the trail at whatever pace you wish, but this itinerary gives you more time to enjoy your surroundings.
Day One:
The Rim to Rim backpacking trip starts on the North Rim on the North Kaibab Trail. This begins your 6.8-7 mile descent into the bottom of the canyon to your first campsite. The first day brings you through a dense conifer forest down into an arid desert landscape. Trekking poles are especially helpful in descending the canyon and are recommended, but not necessary, for all hikers.
Day Two:
Continuing down the canyon, you will hike 7 more miles to reach the Bright Angel Campground. This day will bring you past the pristine Ribbon Waterfall.
Day Three:
Day three is a much shorter trek of 4.5 miles that leads to the Havasupai Garden Campground. This leg of the trail has special historical significance to the Native American Havasupai, as you will pass the Havasupai Garden Spring.
Day Four:
The final day will bring you out of the canyon to enjoy the views of the South Rim. From Havasupai Garden Campground it is 4.8 miles until you reach the top.
Getting There
Since you’re starting at the North Rim, you will likely be coming from Flagstaff, AZ. However, there are many other routes to get to the North Rim depending on your starting point. The route is very clearly marked as you drive but for more detailed driving directions please visit the Grand Canyon National Park website.
Permits, Fees, and Reservations
Grand Canyon National Park requires you to have a backcountry permit to hike and camp along the Rim to Rim trail. Permit requests can be made ahead of time and the permit cost is $10 per permit plus $8 per person or stock animal per night camped below the rim. For more details, and to apply for a permit, visit the Grand Canyon National Park Permit Page.
When To Hike
Spring and Autumn are the best times of year to hike Rim to Rim in the Grand Canyon. The summer heat is no joke and makes it nearly impossible to safely hike during the day. Although winter temperatures are tolerable, the North Rim is closed during those winter months.
Hike The Grand Canyon With A Guide
Guided Grand Canyon Rim to Rim backpacking trips are available and are a stress-free, exciting way to do this trip. The tour company handles permits, gear, transportation, meals, and provides a professional guide so you can focus 100% on enjoying your adventure. If you choose to book a trip with Wildland Trekking, it is highly recommended that you get trip insurance for life’s unpredictable last-minute situations that can prevent you from embarking on the trek.
Wildland Trekking also offers other backpacking trips in Arizona as well as the Grand Canyon of varying length and difficulty. Read more…
Havasu Falls
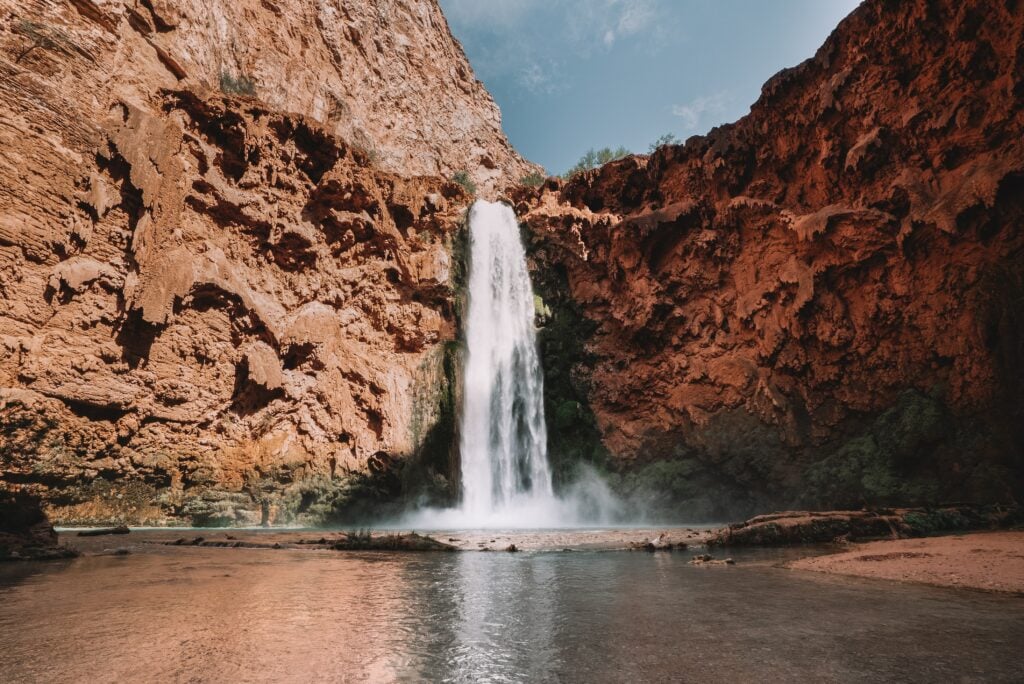
Trip Overview
Located on the Havasupai Indian Reservation, Havasu Falls Trail has become one of the most sought-after backpacking trips in Arizona. Finding water in the desert is always a delight, but Havasu Falls is a true oasis. Also known as ‘the heart of the Grand Canyon’, you will see a part of the canyon that bus tours cannot reach.
This trail has some strenuous portions, but overall, it is not an overly taxing hike. It may prove to be quite challenging if this is your first backpacking trip but should be rated moderate overall. Therefore, as it isn’t an overly challenging or long backpacking venture, Havasu Falls is accessible to most backpackers!
This has become a rather crowded hike over the years as its popularity has exploded. So, if you are seeking solitude in the backcountry, this is not the place to find it. Once you get to camp, however, there are a few day hikes you can take within the falls area that may take you away from other hikers. But overall, you can expect a crowd.
Trip Details
In past years, this hike could be done in two days with just a one-night stay, but as of 2019, the Havasupai Tribe requires a minimum of a 3-night stay in the falls area. Most backpackers will therefore spend 4 days on this trail and the surrounding falls area.
Day One:
This is an out and back trail and you will be hiking 10 miles on the first day to reach your campsite. Your adventure begins at Hualapai Hilltop. The start of the hike involves descending a series of steep switchbacks. After 6 miles, you will have reached Havasu Creek. Following the creek for 2 more miles, you will have arrived at the village of Supai. This leaves just 2 miles until you reach your campground.
On the first day, you will pass by three of the five major waterfalls found in this area: Rock Falls, Fifty Foot Falls, and Havasu Falls.
Day Two & Three:
Here you explore the falls area with some epic day hikes. You’ll have a chance to check out the 200 ft tall Mooney Falls, one of the most magnificent waterfalls in the area.Beaver Falls is also not to be missed. Take your time to explore the canyon and the seemingly endless number of waterfalls along the stream.
Day Four:
Time to say goodbye to this desert oasis and you will follow the same trail you used on your way into the canyon. Keep in mind, you descended some steep switchbacks on the way in so that means you’ll be climbing them on the way out. The journey out is 10 miles.
Getting There
The trailhead is within a 5-hour drive from Phoenix, AZ, Flagstaff, AZ, and Las Vegas, NV. Depending where you’re coming from, the routes will be different. For specific driving directions, visit the Wildland Trekking website here.
Permits, Fees, and Reservations
This hike requires a permit. All campground reservations are made for 3 nights / 4 days. They are $100 per person per weeknight and $125 per person per night for the weekend (Friday/Saturday/Sunday Nights). This would make it between $300-375 for a 3 night /4-day stay. You can stay longer than 3 nights but you will have additional nightly fees. All reservations for permits are non-refundable. For more detailed information on making reservations, visit the Havasupai Reservations website.
When To Hike
Havasupai Falls is closed December-February every year. When deciding what time of year you’d like to hike to the falls area, you need to consider your experience and ideal temperature.
If you choose to hike in the Spring, snowmelt will ensure that water will be flowing. You will also have good daytime temperatures with longer days and even some swimming weather!
Summer hiking is not recommended for most backpacking trips in Arizona. The bottom of the canyon can reach 120 degrees Fahrenheit. You will want to spend early morning hiking, and afternoons in the shade or swimming. July and August are also monsoon season so check weather reports. Monsoons can cause flash flooding and make the falls area extremely dangerous.
The autumn certainly has potential for a fun backpacking trip to the falls area. Keep in mind that August is still within monsoon season so check the weather. By the time late November rolls around, temperatures are much lower and might not be suitable for swimming.
All-in-all, spring and autumn will be your best bet as the temperatures will not be dangerously hot. Some people hike the falls in the summer, but it is important to heed heat warnings and pack enough water to get you to the campsite. Even though the falls are surrounded by water and swimming areas, heat is a real danger.
Hike Havasu Falls With A Guide
This is undoubtedly one of the absolute best backpacking trips in Arizona, and we’d love to share the wonders of Havasu Falls with you on a guided trip. Unfortunately, commercial groups are no longer permitted due to new regulations that came into effect in 2019. If this changes, check out our Havasu Falls trips to arrange an unforgettable trip. But in the meantime, you have all the information you need to plan an epic adventure on your own!
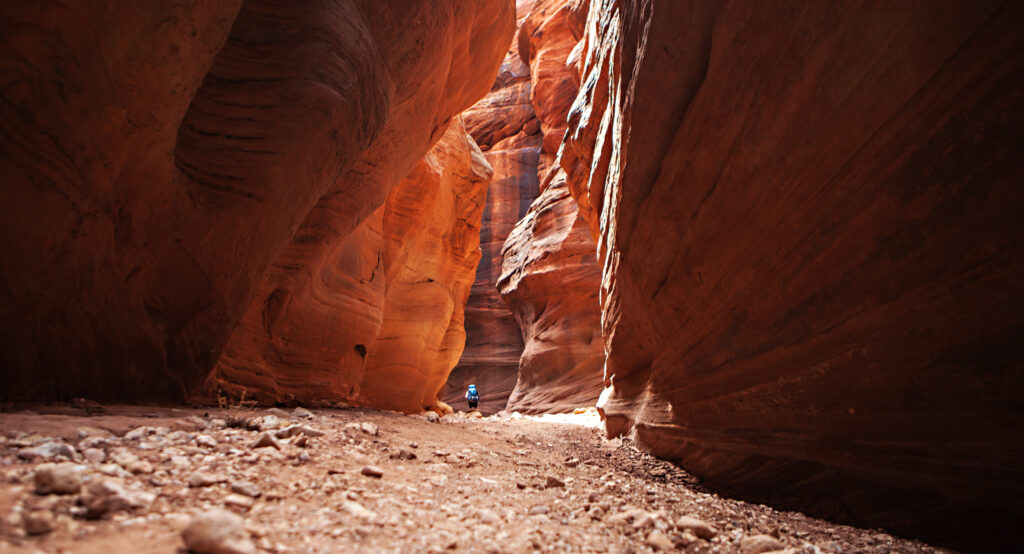
Paria Canyon
Trip Overview
Paralleling the Arizona-Utah border, the Paria Wilderness area is most famously known for a breathtaking rock formation known as The Wave. Getting to The Wave requires a permit and is a fantastic day hike if you’re fortunate enough to get a permit. Nearby is amazing Paria Canyon, which has a thru-hike that follows a one-way route starting at White House, Buckskin Gulch, or Wire Pass Trailhead and ends at Lees Ferry.
Throughout this backpacking trip, you will gradually lose around 1,130 feet of elevation making it a relatively moderate hike. The majority of the trail follows the riverbed, making it easy to follow. As there are parts of the trail that require you to wade through water, it’s important to know that your hiking pace will likely be slower – and wetter – than normal. Also take note of weather conditions before heading into the canyon as flash floods occur at certain times of the year.
Most backpackers will take 3-4 days to hike the trail. But this is very much a build your own adventure as there are many campsites along the route. Your personal hiking pace and water levels will dictate your daily mileage, and you may want to take your time on trail! You’ll be hiking between Navajo Sandstone walls reminiscent of Zion’s Narrows. So slow down, take a breath, and simply bask in the wonder of these rock formations. You’re likely to be basking in complete solitude as well, as this hike offers fantastic remoteness as you meander through the riverbed and canyons.
Important Instruction: Anytime you’re backpacking specifically in or near a source of water – or a wash that water could flow through – you will need to pack out your trash and practice Leave No Trace guidelines. Not only that, but you will need to pack out your toilet paper and human waste in Wag Bags as the use of catholes is not allowed.
Trip Details
There are three trailhead options to choose from when hiking Paria Canyon, but we will be detailing the hike starting from White House Trailhead. This keeps the distance to 38 miles. Other starting points will have longer mileage, so keep that in mind when choosing your route.
There are designated campsites along the trail, and three reliable springs as a water source. Most hikers won’t make it to the first spring to refill water until the second day, so pack accordingly. Despite the fact that you will be hiking down a river, it is not advised that you drink directly from the stream. Most water filters will not be able to properly filter out the silty grit and other water pollution coming from upstream. Filter water directly from springs.
Day One:
Starting from White House Trailhead, you will follow the Paria River about 8 miles to reach your campsite for the night. It will be just below the confluence of the Paria River and Buckskin Gulch. You will, however, pass three campsites before you reach mile 7. So if you are extending the trip to more than 4 days of hiking, you can choose to stop at one of these earlier campsites. If you choose to hike to the first source of water, you can add 5.2 miles of hiking on the first day.
Day Two:
The second day will be a hike of 12.5 miles towards a campsite across the river from Wrather Canyon. You will pass Big Spring (first reliable water source) this day so be sure to fill up on your way. The next spring is just under two miles beyond your campsite. If you need more water, hike to this second spring and you’ll find camping there.
Day Three:
If you stick to the itinerary, you should have only 9.5 more miles to reach your third and final campground. It will be located on the right-hand side of the river just past Bush Head Canyon. You will pass the Last Reliable Spring at mile 25 on this day. Be sure not to miss it and fill up all the water canisters you have. The rest of the trail out of the canyon lacks shade.
Day Four:
This will be your last day hiking. Continue to follow the riverbed for your final 8 miles until you reach Lees Ferry Trailhead.
You of course have the option to stick to the campsites that are across from the springs. This may make it easier for you to manage your water, especially with cooking in the evenings. Make a plan that works best for you and your group. Just remember to bring a map with you. There are a number of campsites to choose from so you can stop whenever it’s practical for you.
Getting There
The trailhead for this hike is not far from Paria Contact Station located just outside of Kanab, Utah. You will start the hike in Utah, but the majority of your time will be spent hiking in Arizona. The Paria Contact Station is located between mile markers 20 and 21 on Highway 89 between Kanab, UT and Page, AZ.
You will need to arrange a shuttle to bring you back to your car once you finish the trail. There are a number of different shuttle companies but most shuttles from Lees Ferry back to White House Trailhead will be $200-300. If you are hiking with a group, many groups will leave a car at Lees Ferry and then drive one car up to Paria Contact Station to skip the shuttle. This method works depending on where you are coming from.
Permits, Fees, and Reservations
Paria Canyon requires a permit which can be applied for online or over the phone. Advance permits are required for overnight trips and cannot be paid for at the Contact Station. You can, however, purchase permits for day hikes at the station. Keep in mind that your permit application is a lottery system and they only distribute 20 permits per day.
Permits cost $5 per person per night. Dogs can be brought into the canyon for an additional nightly charge of $5. If you wish to change a permit, you will be charged $30 per transaction.
You can visit the BLM website to see open dates and permit availability.
When To Hike
Like most of the best backpacking trips in Arizona, Spring and Fall are the ideal times to go. There is a chance of flash flooding in the canyon from July until early September so it is best to avoid hiking during that time period. If you do choose to hike in early Fall, check the weather before your trip and ask the ranger’s advice on current conditions before setting out.
You can hike in the summer months, but you will likely need more time in order to avoid hiking in the hottest parts of the day. As for winter, you need to keep in mind that you will be hiking in water for a significant portion of the trail. Fires are not permitted in the canyon, even at campsites, so if you do need to dry gear out, it may be difficult due and highly dependent on weather conditions.
Hike Paria Canyon with a Guide
Wildland Trekking offers a guided Paria Canyon Backpacking Trip. This trip is all-inclusive, which means permits, gear, meals and transportation are included. It originates and ends in St. George, Utah and is offered in the spring and fall months. Going guided is an adventure you’ll never forget!
All Inclusive Backpacking Trips
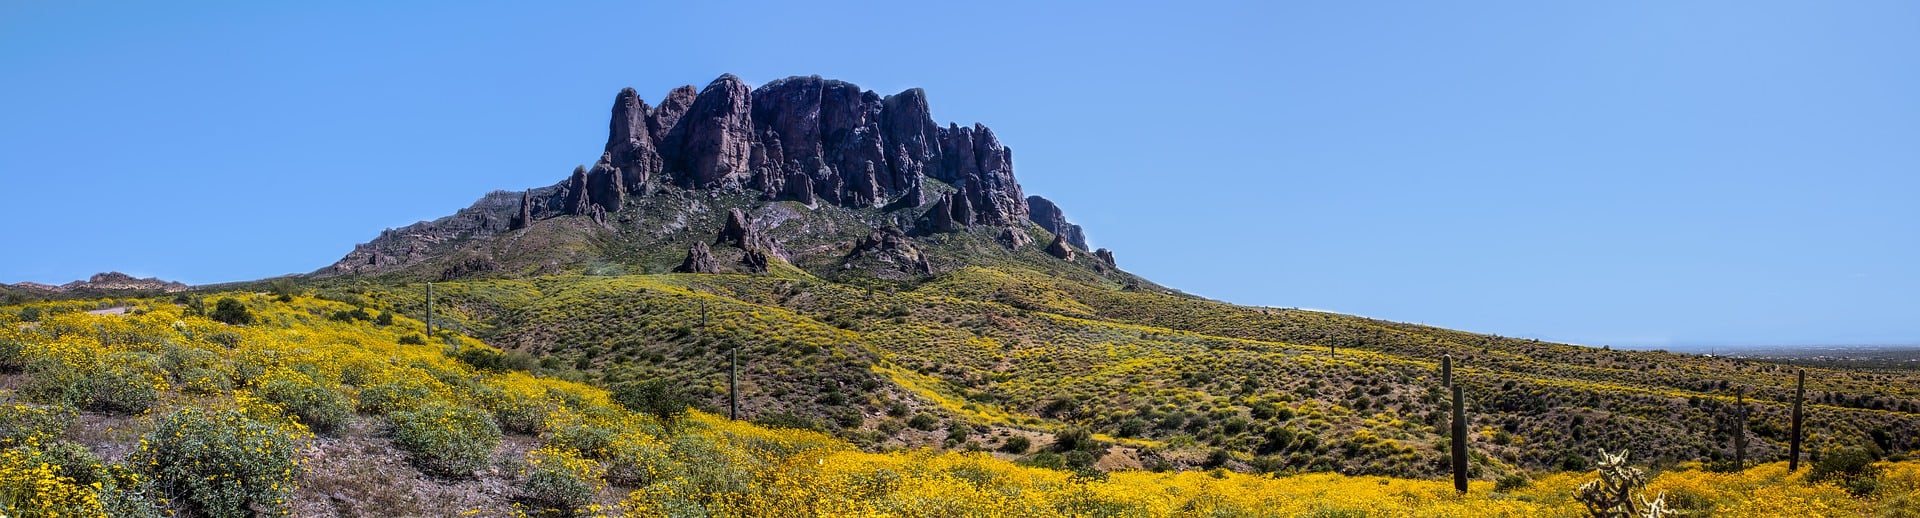
White Rock Springs – Superstition Mountains
Trip Overview
The Superstition Mountains are littered with amazing hiking and some of the best backpacking trips in Arizona. Many of the backpacking trails often connect with a number of different side-trails to make a unique route. With 160,200 acres, the Superstition Wilderness consists of over 170 miles of trail networks. This doesn’t imply that they will all be well-maintained, but there are still plenty to choose from.
The White Rock Springs figure-eight trail follows a network of trails to take you 23 miles round trip. This hike will have 3000 feet of elevation gain and sections with loose rock. Hiking poles may be useful and this hike should be considered strenuous.
Important Information: Before you embark on any backpacking or extended day hike in the Superstition Wilderness, be sure to contact the Tonto National Forest Mesa Ranger District to get an up-to-date backcountry water report.
Trip Details
This backpacking trip is referred to as White Rock Springs. However, you will not be following a trail by the same name. The name comes from the destination you are intending to reach and camp near. You will also have the opportunity to enjoy amazing views of Weaver’s Needle, an iconic 1,000ft high figure in the Superstition Wilderness.
Day One:
The first day will be a trek of 7 miles. Register at First Water Trailhead, where the route begins. You will follow this trail only for a short time (0.3 miles) before you reach a fork. The recommended route is to follow Second Water Trail (1.5 miles) to Black Mesa Trail (3.3 miles) leading you past Dutchman’s Trail up Bull Pass and around Black Top Mesa (1.5 miles). You will meet up with the Dutchman’s Trail again, but do not follow it. Continue straight on a slight descent (0.4 miles) to get onto Calvary Trail. This will lead you to White Rock Springs and a number of backcountry camping options.
Day Two:
Perhaps one of the best parts of this backpacking trip is that you have a basecamp. You can leave your camp set-up and take a day pack out for day two’s 10-mile hiking loop. It is recommended that you hike this loop counterclockwise so you can stop by Charlebois Spring on the last mile of the hike. Start back the way you came and follow Dutchman’s Trail (1.2 miles) until you meet up with Terrapin Trail (2.8 miles). Follow this to Bluff Springs Trail until you intersect Dutchman’s Trail once more until you’ve reached the Spring (5 miles). Then just one more mile back to camp for the night.
Day Three:
On the way out, you will start back the way you came, but you will want to take the Dutchman’s Trail all the way to First Water Trailhead. This will be a 6.8-mile hike out. Descending this route may have loose rock and hiking poles are suggested.
See an online map here to follow the trail progression.
Getting There
The First Water Trailhead is located just outside of Mesa, AZ past the Lost Dutchman State Park. Coming from Mesa and Apache Junction area, follow Highway 88 (N Apache Trail) until you can make a right turn onto N 1st Water Road. This will lead you to the trailhead.
Permits, Fees, and Reservations
Certain recreational activities may require a pass and you generally need a permit/pass for a multi-day trip. More information can be found on the Tonto National Forest website.
When To Hike
It is recommended that you hike anywhere in the Superstition Mountains in either the Spring or Autumn. Shade is not prevalent and water is scarce so summer hiking is not recommended, just like most backpacking trips in Arizona. Daytime temperatures are comfortable in the winter months, and the evenings are usually around 40 degrees. It can snow in the Superstition Mountains, but rarely. As always, please keep a weather eye on the forecast!
Arizona boasts an absolute plethora of hiking opportunities. We’d love to list them all for you, but we’d have to grow this post into a multi-volume novel! But for now, you know our favorite backpacking trips in Arizona and have all the information you need for an incredible trip. Where to go, when to go, permits, itineraries, and more are all right here at your fingertips. So what’re you waiting for? Get out there and explore.
Wildland Trekking Hiking Adventures

As the world’s premier hiking and trekking company, Wildland believes in connecting people to fantastic environments in amazing ways. Arizona offers an array of incredible hiking and trekking experiences, including the incredible Grand Canyon. Wildland Trekking provides many different multi-day hiking and backpacking adventures throughout some of the State’s most breathtaking regions. Read more about our Arizona trips.
To learn more about our guided backpacking trips and all of our award-winning hiking vacations, please visit our website or connect with one of our Adventure Consultants: 800-715-HIKE

