
15 Best National Park Backpacking Trips in the USA
Some of the best backpacking that the United States has to offer is located within our National Parks. There are currently 62 wilderness areas protected as National Parks in the United States. So, choosing only ten backpacking trips was difficult!
With so many diverse landscapes and amazing parks to explore, we tried to include a variety within our list. From high alpine adventures in the Rocky Mountains to Utah’s famous canyons, you’re sure to find an epic adventure that suits your style. All trips that we chose are considered multi-day backpacking treks. So, if you’re looking for a little adventure inspiration, these ten treks will be a great place to start.
| Trail | National Park | Difficulty | Miles | Days |
|
Mount Rainier | Strenuous | 93 | 10 |
|
Rocky Mountain | Moderate-Strenuous | 11.6 or 22 | 2-4 |
|
Grand Canyon | Strenuous | 24 | 4 |
|
Zion | Moderate-Strenuous | 16 | 2 |
|
Olympic | Moderate | 26+ | 4-5 |
|
Grand Teton | Strenuous | 30-45 | 3-7 |
|
Yosemite | Moderate | 17.2 | 2-3 |
|
Big Bend | Strenuous | 30-35 | 3 |
|
Isle Royale | Moderate | 30-42 | 3-5 |
|
Great Smoky Mountain | Moderate | 12 | 2 |
National Park Hiking Reminder: You will have to pay the standard entrance fee when hiking in the wilderness areas of our National Parks. For more information about fees or purchasing a pass, visit the National Park website.
1. The Wonderland Trail – Mount Rainier National Park
The Hike
The Wonderland Trail encircles Mount Rainier in a 93-mile trek through lowland forests and valleys into alpine areas. With so much gain and loss of elevation throughout this hike, it is considered to be a strenuous journey.
With such a long hike, how long it takes will depend on your hiking speed and daily mileage. Most hikers complete the trail in 5-10 days. There are eighteen trailside wilderness camps and three non-wilderness camps. One challenge this hike may present is being able to gauge your hiking speed and the campsite destination. You are only allowed to camp at designated sites. For information about camping areas, visit the NPS website for Mt. Rainier.
Recommended Itinerary
As this hike is a loop, you can choose to go either clockwise or counterclockwise. If you decide to hike it clockwise (which is most popular), you end up going downhill on the steepest sections. While it is up to you, our recommendation is to prepare yourself physically and hike the loop counterclockwise. Although the steep sections will be challenging to hike up, it will save your joints some strain by avoiding intense downhill stretches.
For a good middle ground, we will go over an itinerary for a seven-day trek. The route will also follow the loop counterclockwise. Keep in mind that you will need to base your mileage per day off the campsites you are planning to stay at each night.
Trailhead: White River
Day 1: 12.9 miles to Mystic Lake campsite
Day 2: 13.1 miles to Mowich Lake campsite
Day 3: 15.1 miles to North Puyallup River campsite
Day 4: 13.7 miles to Devil’s Dream campsite
Day 5: 16.2 miles to Maple Creek campsite
Day 6: 9.9 miles to Indian Bar campsite
Day 7: 10 miles back to White River trailhead
When to Go
The best time to hike the Wonderland Trail is mid-July through September. While the park will be open earlier than that, this will be a backpacker’s best bet to miss any snow on the higher elevation trails. August tends to be one of the busiest months on the trail, so it may be hard to get a permit.
No matter when you decide to hike, you can always check with the Rangers to see what the current trail conditions are. Knowing the current conditions are especially important if you want to hike early or late in the season.
Getting There
Getting to the trailhead will require you to have access to a vehicle. So, if you are from out of town and flying into Seattle, WA, you should plan on renting a car. The National Park is about an hour and a half or two hours from the Seattle-Tacoma airport. You do need to register your car before you park it at the trailhead, but you can do so when you check-in at the ranger station before you hike.
Permits & Fees
To hike the Wonderland Trail loop, you will need a Wilderness Permit. Mt. Rainier National Park requires that everyone backcountry camping has a permit. It is recommended that you make a reservation, especially if you are hiking during peak travel months. You can begin making reservation requests starting on March 15th, and no reservation requests are accepted for the Wonderland Trail after March 31st, so get your request in early! All permits after that date are on a first come first serve basis.
You can send in a reservation request and get more information on the NPS website for Mt. Rainier.
Hike with a Guide
Although Wildland Trekking does not offer the thru-hike of the Wonderland Trail in Mount Rainier National Park, we do offer Inn-based and Basecamp tours. So, if you’d like to visit the National Park but aren’t quite ready for a 93-mile trek, check out our Mount Rainier Hiking Tours.
2. Thunder Lake – Rocky Mountain National Park
The Hike
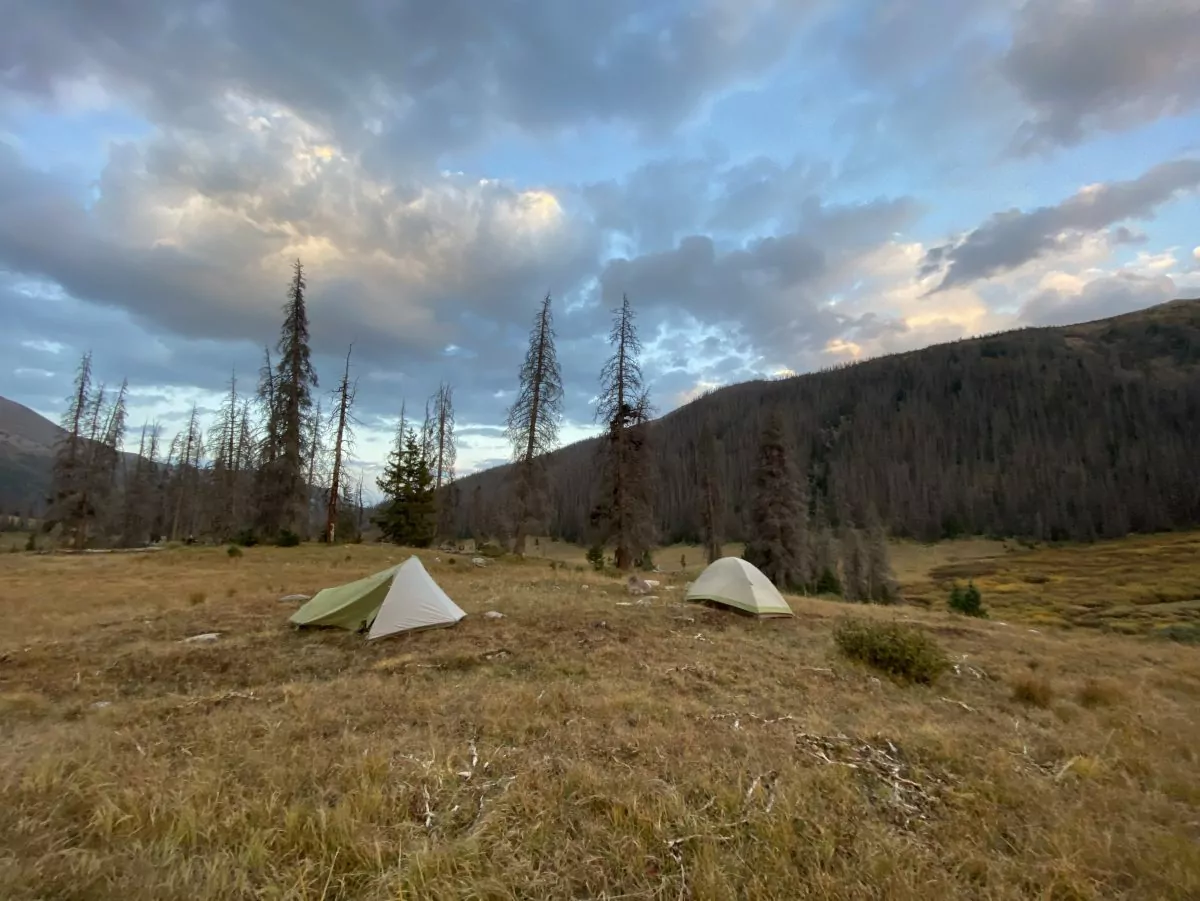
There are so many stunning hikes in Rocky Mountain National Park that choosing just one was tricky! Thunder Lake is one of the lesser-traveled cirques in the park, so it is the right mix of solitude and adventure. The trek takes most hiking parties 3-4 days, depending on mileage per day. You will travel 22 miles to complete the entire trail. You can do a two-day trek if you hike to Thunder Lake group campsite and then return the next day as an out and back trip.
The trail itself gives you a chance to camp on the banks of Thunder lake, explore the alpine country, and explore some hidden cirques of the Continental Divide. Depending on your group’s goals, you also have a chance to summit the incredible Tanima Peak (12,420 feet).
This is a shorter trip that can be taken on a long weekend and is considered to be moderate or strenuous. The difficulty will be determined by the route you choose. The trip will go up about 12,000 feet in elevation, so it is recommended that you arrive a day or two early to Estes Park to acclimate. You will cover certain sections during the trip that are not on a designated trail. This could mean hiking through meadows, forests, and talus fields, and some navigation knowledge is highly recommended.
Recommended Itinerary
As the trail is 22 miles long, your trip itinerary may look different than our recommendation. Give yourself the required amount of time to adjust to altitude changes and be physically prepared for the terrain.
While you can complete the trail in 3 days, we will follow a recommended itinerary of 4 days.
Trailhead: Wild Basin
Day 1: 6.8 miles to Thunder Lake campsite
Day 2: 6+ miles to summit Tanima Peak (return to Thunder Lake campsite)
Day 3: 5+ miles to Box and Eagle Lakes (return to Thunder Lake campsite)
Day 4: 6.8 miles to Wild Basin Trailhead
*Day 4 variation: Follow lower fork of Thunder Lake trail to intersect with Bluebird Lake trail. This variation allows you to hike past Ouzel Falls and then redirect to the Thunder Lake Trail.
If you’d like to follow a 3-day itinerary, simply remove the summit of Tanima Peak. If you choose the 2-day itinerary, hike to Thunder Lake campsite and then return to Wild Basin the next day.
To see trail deviations and optional routes, see the Rocky Mountain National Park website for maps of the area.
When to Go
As the Thunder Lake trail is a high mountain environment, the best time of year to travel here is between June-September. June has a higher chance of having snow on the trail. For the rest of the summer, you should expect rain. The Rocky Mountains are famous for dramatic and sudden weather shifts, so be prepared.
Go to the RMNP website for current conditions and weather in the area. They also have a great page on operating hours and seasons.
Getting There
Estes Park, Colorado, will be the closest city to the trailhead. It does not have an airport, so if you are flying in for a visit, Denver will be the most convenient gateway. From Denver, you can take a shuttle or rent a car. The trip to Estes Park from the airport is between 1 and 1.5 hours.
If you are from out of state, it is recommended that you spend a day or two in Estes Park to acclimate to the elevation. This is especially important if you want to summit Tanima Peak. From Estes Park, it should only be a 30-minute drive to the trailhead.
Permits & Fees
Any overnight travel in Rocky Mountain National Park requires a permit. There are two wilderness offices for the park, and they will have updated information regarding campsites. You can make campsite reservation requests online or in-person starting March 1. For more detailed information about wilderness camping, go to the RMNP website.
You can also find details regarding general park passes and fees on their website.
Hike with a Guide
If you want to experience the beauty of the Rockies but are worried about logistics, Wildland Trekking offers three and 4-day backpacking trips to Thunder Lake. Find out more and book your Thunder Lake backpacking adventure today!
3. Rim to Rim – Grand Canyon National Park
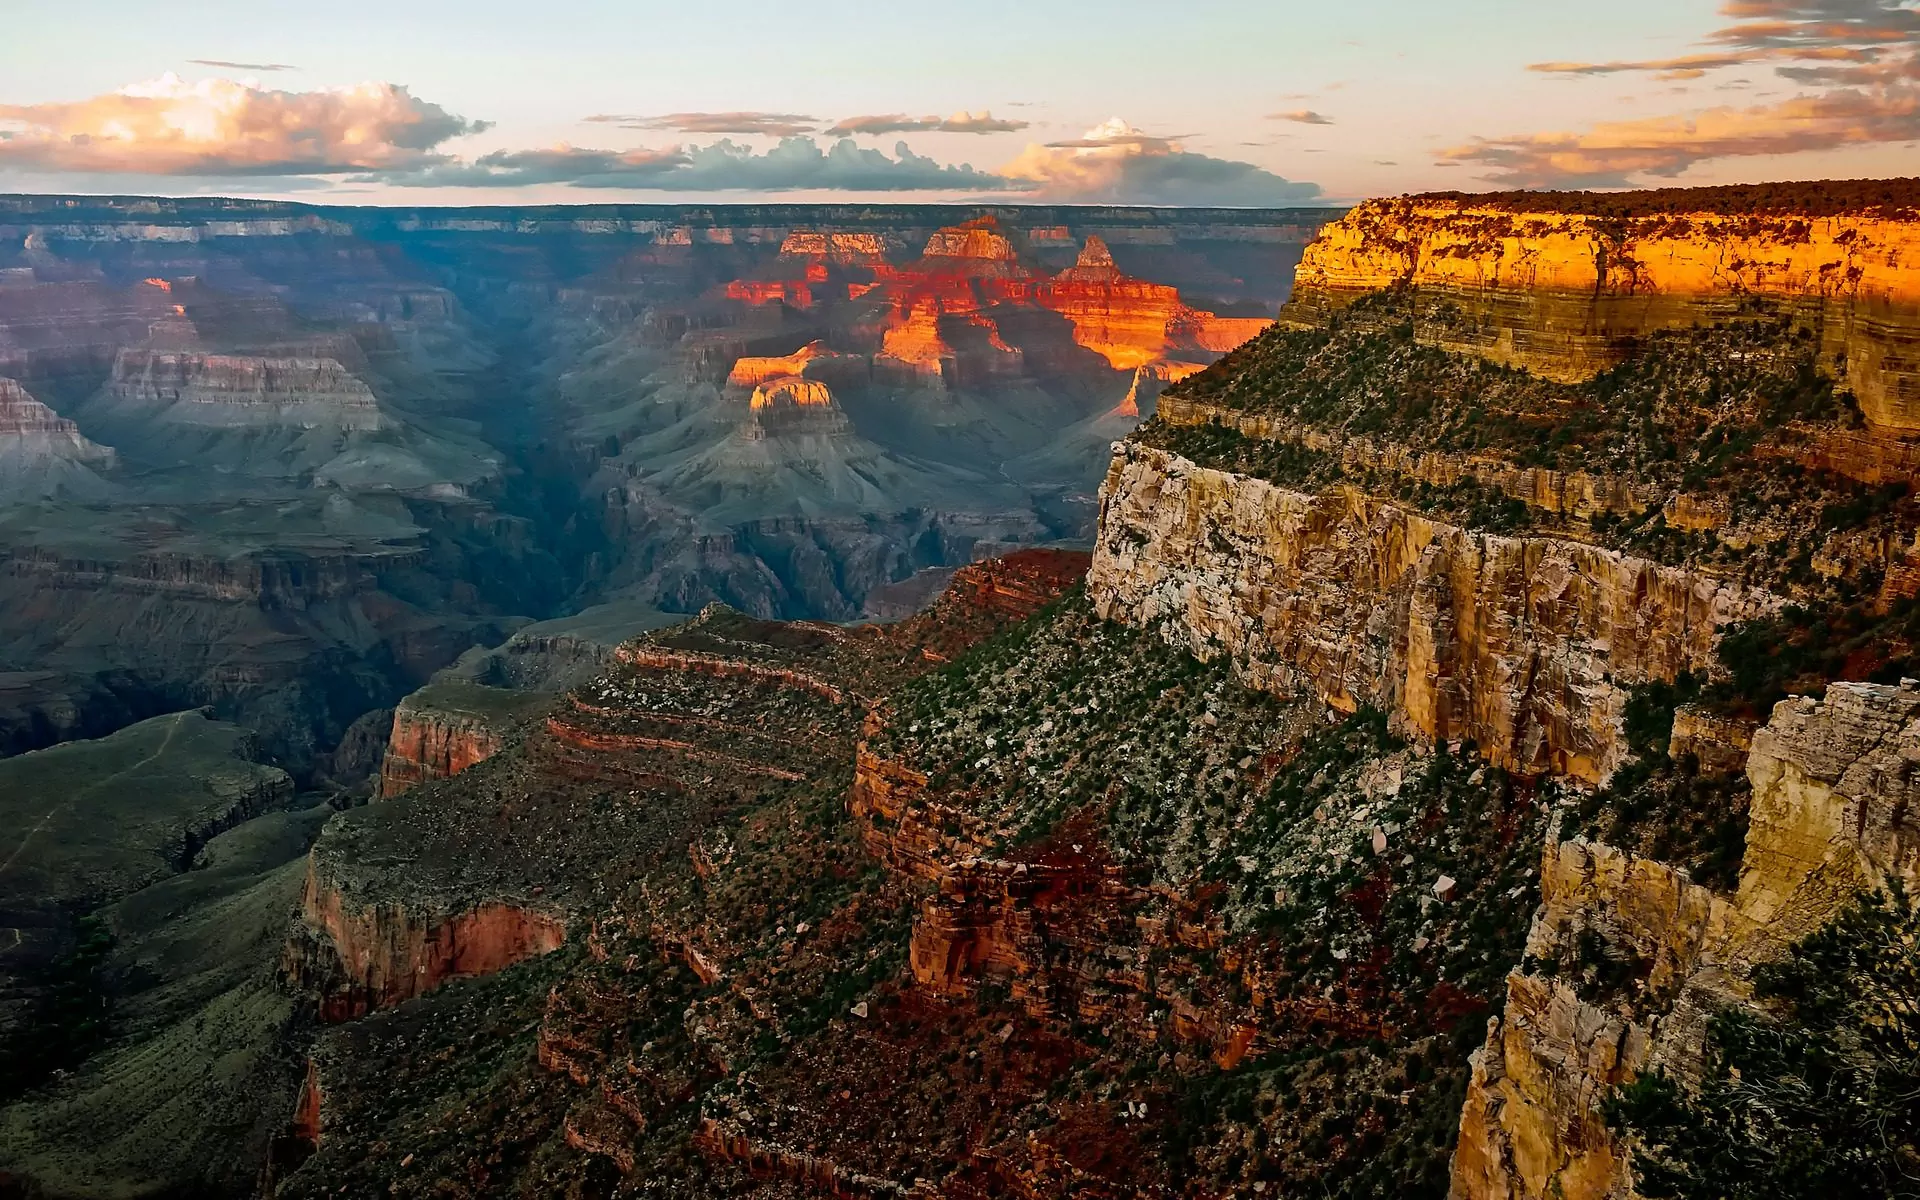
The Hike
If you choose to hike the Grand Canyon Rim to Rim, you can plan on a 4-day trip. The Rim to Rim trail is 24 miles long. Alternatively, you can choose to hike Rim to Rim to Rim, making your trek a 47 mile out and back experience.
Hiking Rim to Rim is a true once in a lifetime experience. You can witness the magnitude of the canyon from above, but once you take the time to hike down and out, you can appreciate it fully. You can choose to either start at the North or South Rim of the canyon, but keep in mind that you will only be hiking end to end. So, you should arrange for transportation at the opposite Rim for your trip ending.
Recommended Itinerary
The itinerary that we will follow below will be for a 4-day trip starting at the North Rim of the Grand Canyon. You can complete the trek in less than 4-days, but why rush it? Taking some extra time in the canyon is, at times, a spiritual experience.
Trailhead: North Kaibab Trail
Day 1: 6.8 miles to Cottonwood Campground
Day 2: 7.2 miles to Bright Angel Campground
Day 3: 4.5 miles to Havasupai Garden Campground
Day 4: 4.8 miles via Bright Angel Trail out of the canyon
Getting There
If you are flying in for your Grand Canyon trek, your gateway cities will be either Las Vegas, NV, Phoenix, AZ, or Flagstaff, AZ. Phoenix and Las Vegas both have larger airports that handle a wider variety of flight origins, but Flagstaff is still an option – albeit a smaller airport.
Flagstaff will also be a great place to lodge before your trek. This city is also the departure city for Wildland Trekking backpacking trips Rim to Rim. If you fly into Las Vegas, you may want to consider lodging in St. George, UT, or staying at the North Rim campground before your hike.
If you fly into Phoenix, you can take a shuttle or rent a car to get to Flagstaff. If you fly into Las Vegas, you may want to rent a car.
To get from Flagstaff to the trailhead at the North Rim, it is a 4-hour drive. To drive from Las Vegas to the North Rim, it is about 4 hours and 45 minutes. If you lodge in St. George, it is approximately 3 hours driving to the North Rim.
Permits & Fees
If you plan to camp anywhere in the park other than developed campgrounds, you will need a backcountry permit. The Rim to Rim hike is quite popular, so getting a permit should be a priority. The permit fee is $10, and visitors should also plan on paying park entrance fees upon arrival.
Go to the Grand Canyon National Park website to see when you can register for a permit according to the month of your trip. You can get detailed information about park entrance fees and passes online as well.
Hike with a Guide
Experience the grandeur of the Grand Canyon with Wildland Trekking. We offer a guided backpacking trek Rim to Rim that will ensure a once in a lifetime experience. Let us take the stress away from trip planning as you trek with our expert guides Rim to Rim. Learn more and book your Rim to Rim backpacking trek today!
Inspired Exploration with Wildland Trekking
4. The Narrows – Zion National Park
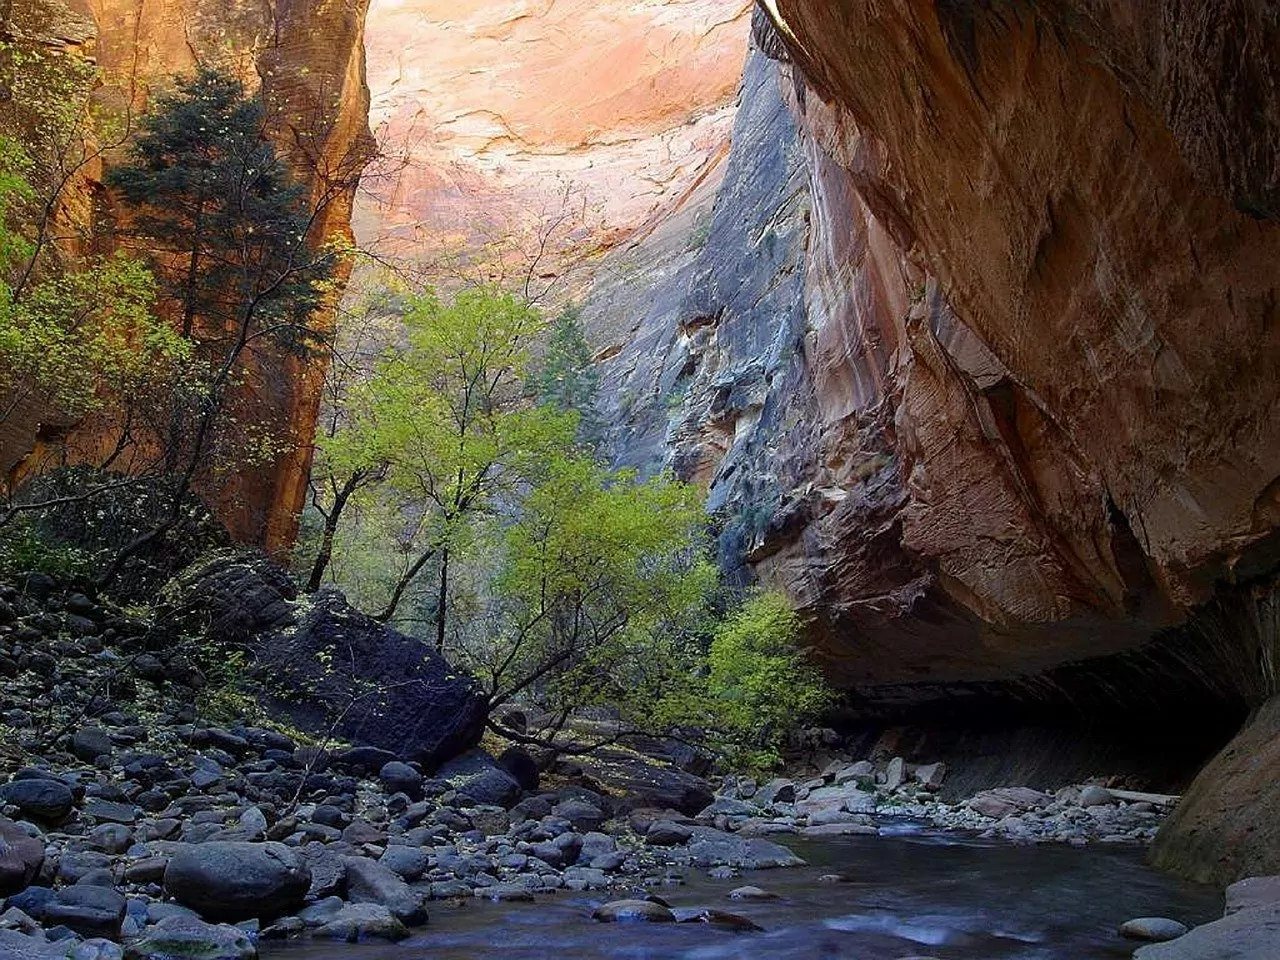
The Hike
The Narrows is one of Zion’s premier hikes. You can choose to do the 3.6-mile day hike or the 16-mile overnight trek. To do the 16-mile hike, you will be going from the top down into the narrowest part of the Virgin River. The hike begins at Chamberlain’s Ranch, and you’ll work your way down to the Temple of Sinawava. You can complete the top-down hike in a day, but many hikers like to savor the experience and spend a night in the canyon.
Although the hike is not on steep terrain, it is strenuous. You will be hiking in the Virgin River for the majority of the hike. The water is murky, making it hard to see the rocks covering the bottom. Proper footwear is essential for this hike, and many recommend trekking poles to keep your balance on the slippery rocks.
Despite the difficulty, the Narrows remains one of Zion’s quintessential hikes. The Zion National Park website has a great informational page about hiking top-down from Chamberlain Ranch. Go there for more detailed information.
Recommended Itinerary
You can hike the full Narrows in one day. However, our suggested itinerary is the 2-day trek. Staying one night on the Narrows hike is a magical experience, and the shorter mileage days give you more time to take in your surroundings.
Trailhead: Chamberlain Ranch
Day 1: Hike to the first campsite. There are 12 designated camping areas in the Narrows. Each campsite will be located anywhere from 5-15 minutes away from the last. It takes most hikers around 5 hours to reach the first campsite and about 7.5 hours to reach the 12th.
Day 2: Finish hike to reach the Temple of Sinawava. How long it takes to reach the Temple will depend on your hiking speed, and the campsite you stayed at that night.
Check out the Narrows campsites here.
Choosing to hike the top-down route in one day will give you little time to stop and explore the canyon. If you do decide to do it as a day hike, plan for 12-15 hours. It may take longer, depending on the number of stops and the speed you hike.
When to Go
The vast majority of hikers tackle the Narrows in late spring or summer. This is when the water tends to be the warmest and the water levels the lowest. Winter and early spring will be when the water is high from snowmelt and quite cold. The Narrows hiking is closed in the spring if snowmelt raises the water over 150 CFS. The Fall is an okay time to hike but gives the challenge of shorter days and colder water temperatures.
July through September is monsoon season for the area. These intense rainstorms have been known to cause flash floods, especially in Zion canyons. Although this is the most dangerous time for flash floods, they can occur at any time in the canyon. Stay up to date on current weather conditions, current river flow, and flash flood potential.
Get more climate and weather information on the Zion National Park website.
Getting There
The two primary cities that have lodging outside Zion National Park are either Springdale, UT, or St. George, UT. If you’re staying in Springdale, many outfitters have rentals for trekking poles and proper Narrows footwear. These outfitters also sometimes offer shuttles to the Chamberlain trailhead. If you can’t catch a shuttle, then you should plan on driving yourself to the start of the trail. However, you will need to figure out the logistics of getting back to your car when you’re done.
Permits & Fees
No matter if you do a one day hike or a two-day backpacking trip in the Narrows, you need a backcountry permit. Permit costs vary from $15-25 depending on the size of your group. You can also make reservations up to three months in advance. If there are still spaces available, you can enter in a last-minute drawing 7-2 days before your trip. Then if there are still slots left, you can get a walk-in permit one day in advance.
To ensure a hiking permit, it is best to reserve your spot ahead of time. For more detailed information regarding backcountry permits and park entrance fees, visit the NP website.
Hike with a Guide
Hiking anywhere in Zion National Park is like walking in a dreamland. The Narrows hike provides a unique experience, but not everyone has the baseline of knowledge to make it safe. Take away the worry of planning and the risk of being unprepared by planning a Zion Basecamp Tour with Wildland Trekking. Now only will this tour give you an unforgettable experience in the Narrows, but you will have a chance to see other parts of the park as well.
5. Enchanted Valley – Olympic National Park
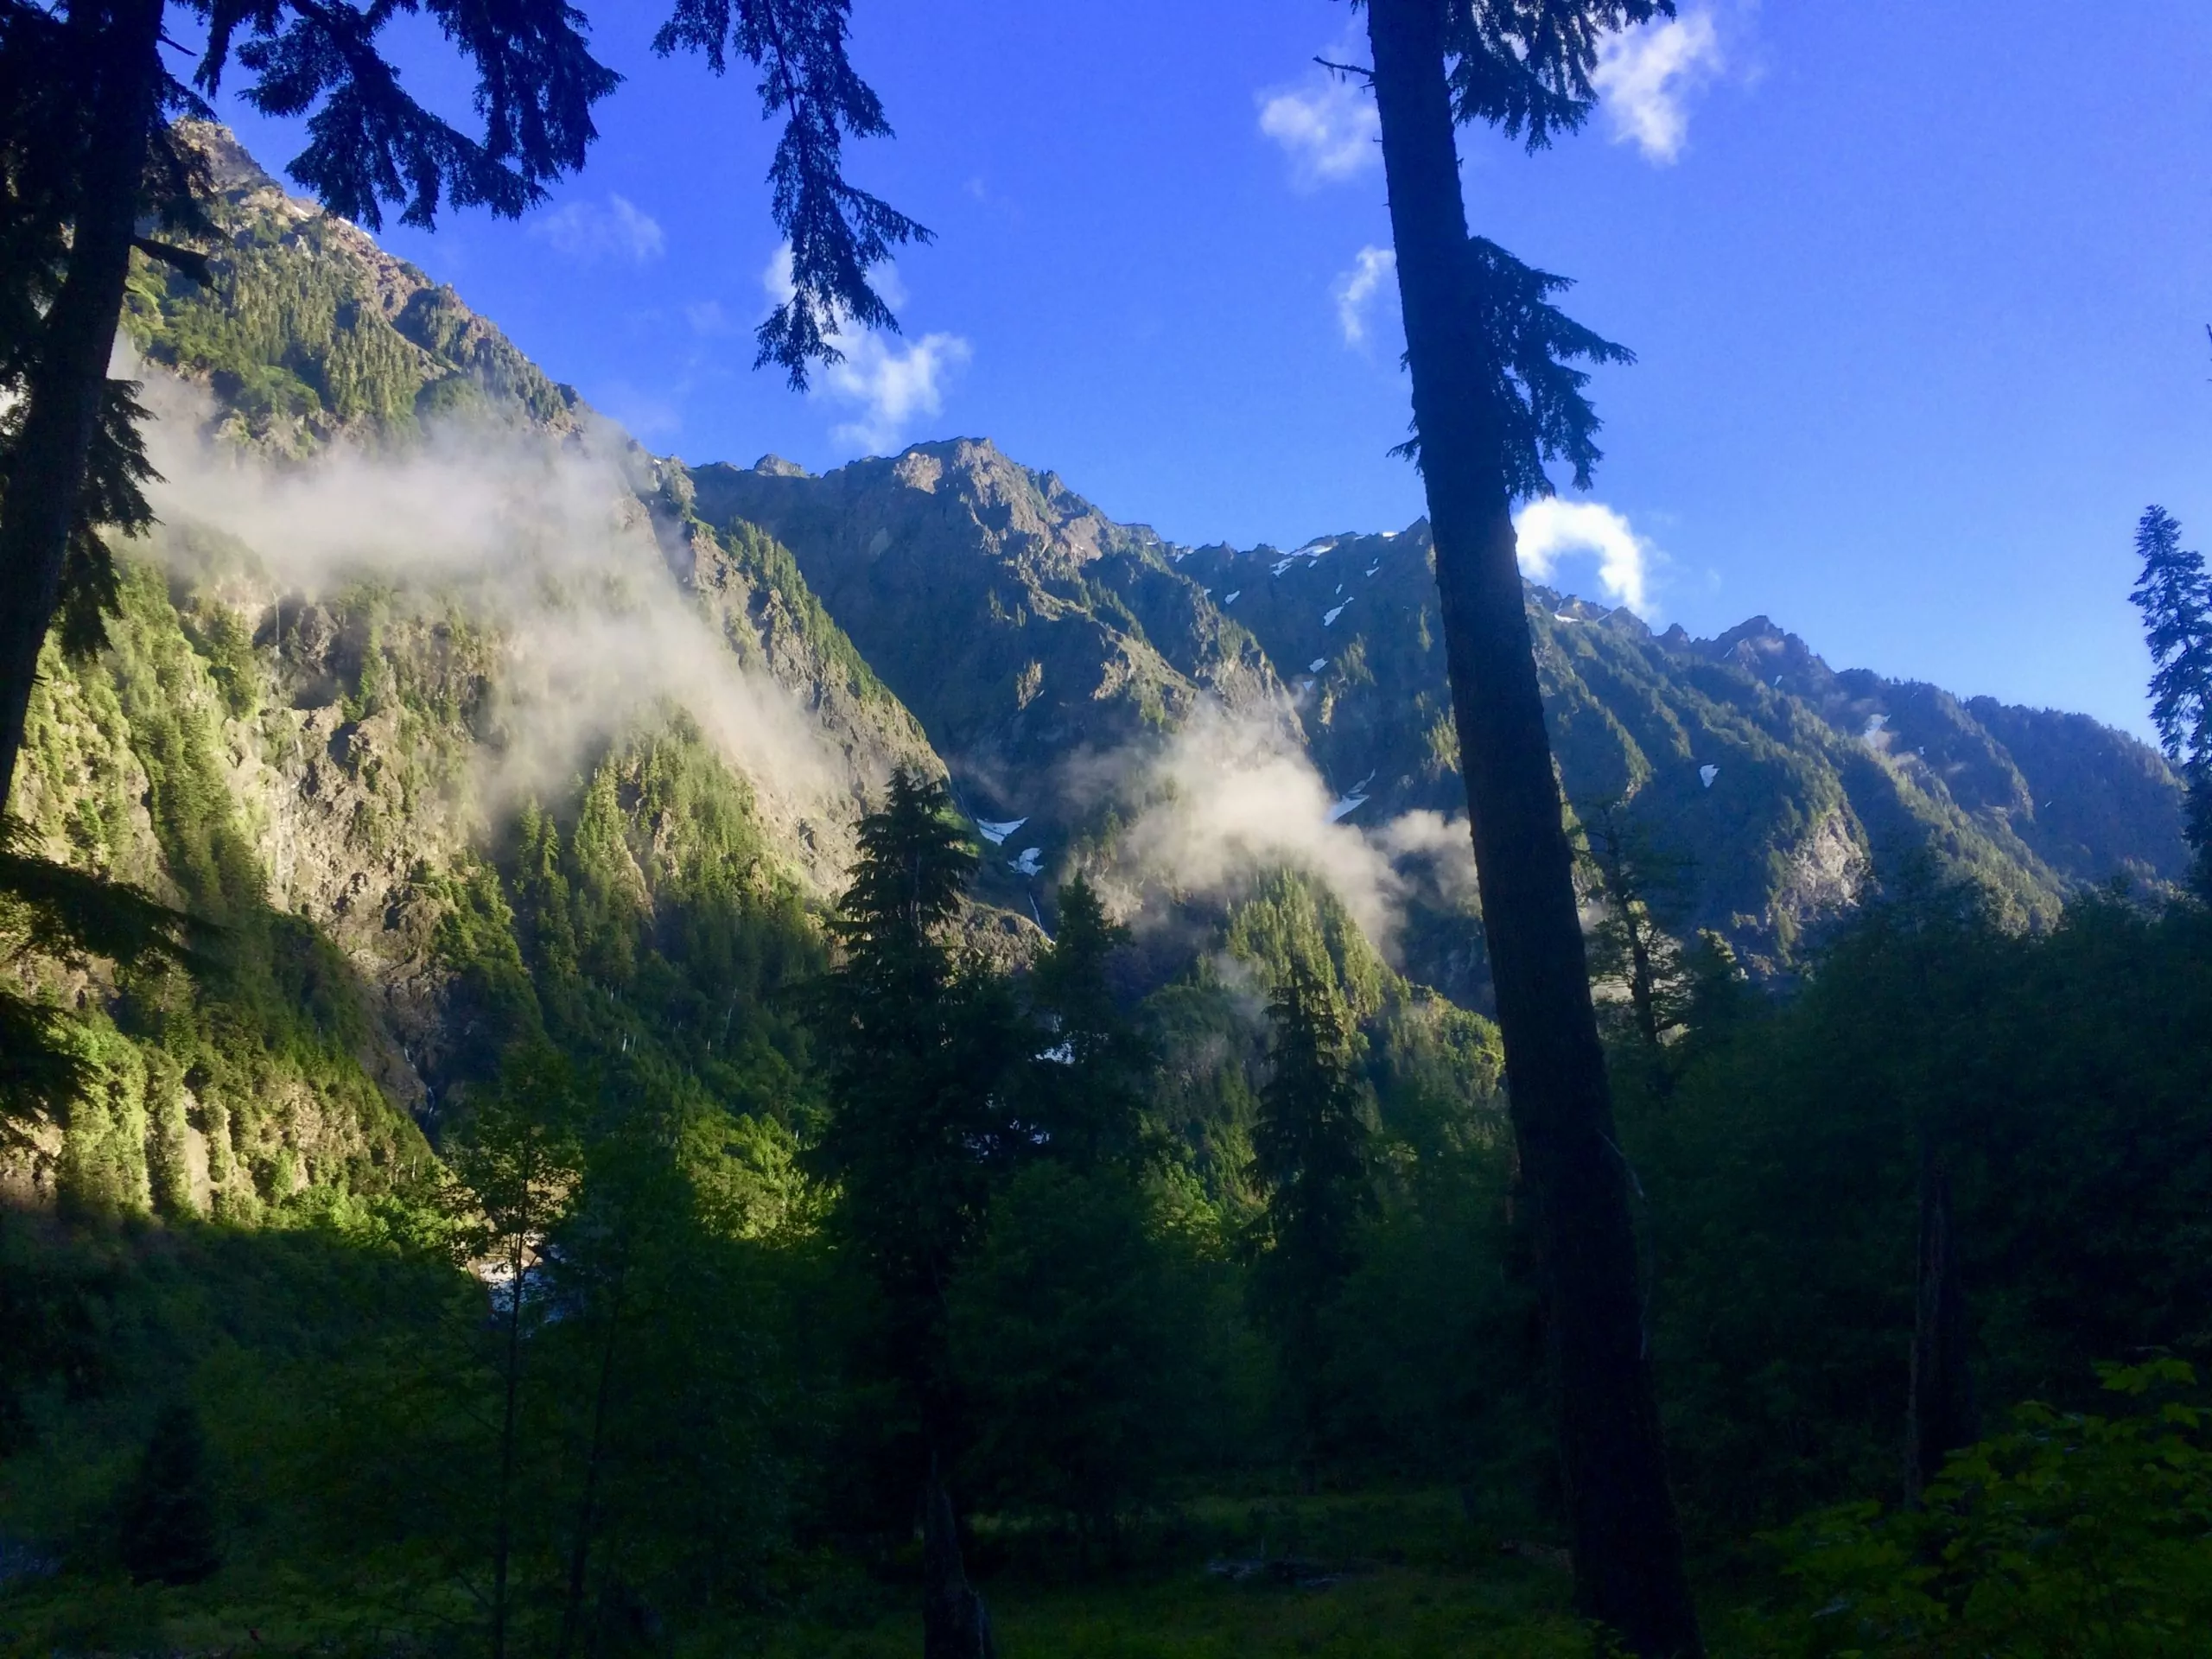
The Hike
This moderate hike in Olympic National Park is truly enchanting. The locals refer to the Enchanted Valley area as the “Valley of 10,000 Waterfalls.” Hike into a real-life fairy-tale as you trek through mossy woodlands, cross streams and rivers, and emerge into spacious mountain meadows.
Enchanted Valley is located in the East Fork Quinault River Valley. The trail itself is 26-30.6 miles round trip, depending on the route you take. This river valley has some unique features to be enjoyed, including an old-growth rainforest, numerous waterfalls, a historic chalet, and plenty of bears. Read up on wilderness food storage and wildlife safety before your hike.
Recommended Itinerary
Hiking into Enchanted Valley can be done in either 4 or 5 days. Our suggested itinerary is the 5-day trek. The extra day gives you more time to explore the Valley and all of its wonder.
Trailhead: East Fork Quinault River Trail
Day 1: 6.5 miles to O’Neil Creek campsite
Day 2: 6.5 miles to Enchanted Valley campsite
Day 3: 10 miles to ascend Anderson Pass
Day 4: 6.5 miles to O’Neil Creek campsite
Day 5: 6.5 miles back to the trailhead
To do the 4-day trek, cut out the ascent of Anderson Pass. The additional day simply gives you ample time to explore the Valley beyond the campsite.
When to Go
Olympic National Park is open year-round, but the most popular months to visit are June-September. From October-May, some facilities, roads, and campgrounds will either be closed or have reduced hours.
No matter the time of year you plan to visit, you should stay up to date on current weather conditions. The weather can change rather suddenly in the park in any season. Find out more about which season is best for a visit according to your activity plans on the NP website.
Getting There
If you are flying in to visit Olympic National Park, Seattle-Tacoma airport will be the closest. From there, it is just over a 3-hour drive to get to the national park. If you are traveling with a Wildland Trekking tour, you will depart from Olympia, WA. From Olympia, the park is just over 1.5 hours away. If you aren’t traveling with a Wildland Tour, we recommend renting a car to get to the trail.
Permits & Fees
Wilderness camping permits are required for all overnight stays in the Olympic National Park wilderness areas. Reservations for permits can be made up to 6 months in advance. These reservations can be made online or in-person at the park’s wilderness information center. Camping fees are $8 per person per night, with an additional $6 permit fee.
For more detailed information about Olympia’s permit registration and general park entrance fees, visit the NP website.
Hike with a Guide
Hiking the Enchanted Valley trail is one of the many trips Wildland Trekking offers in Olympic National Park. Trek into the Valley of 10,000 Waterfalls on a four or 5-day backpacking adventure. Let our guides take the reigns as you experience the wonder of the Enchanted Valley. Learn more and book your Enchanted Valley backpacking trip today!
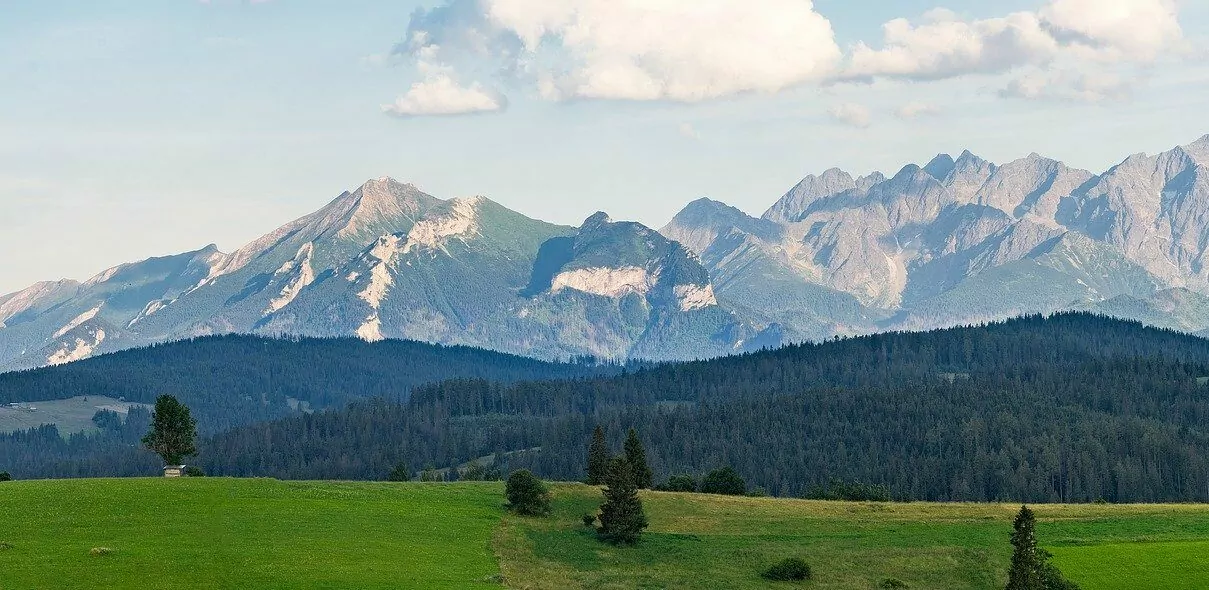
6. Teton Crest Trail – Grand Teton National Park
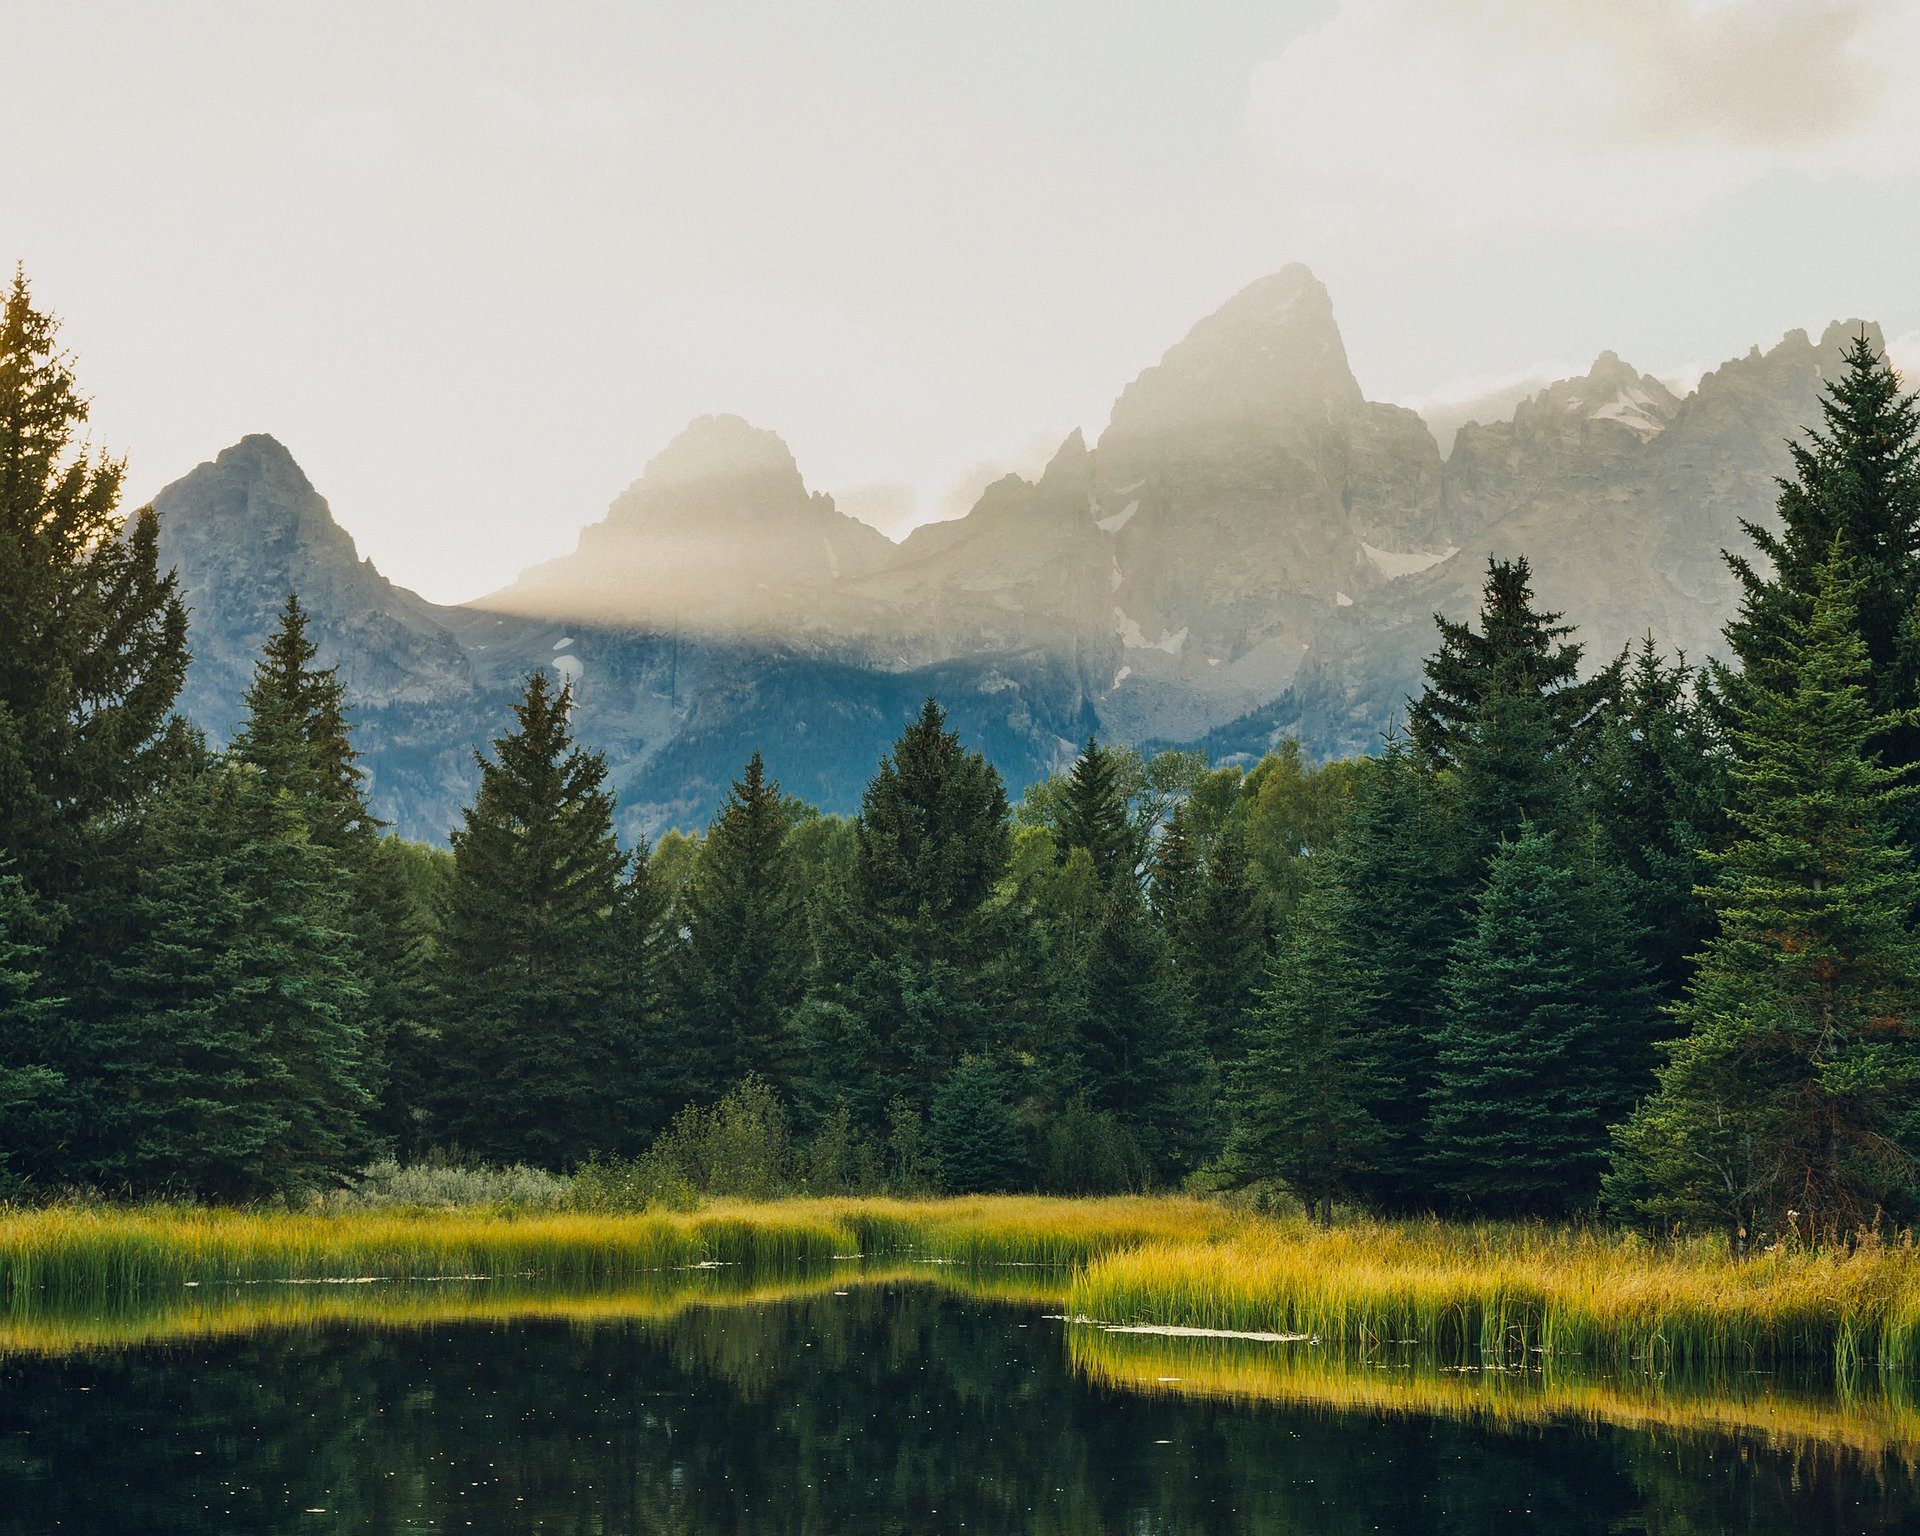
The Hike
Located in Wyoming, the Grand Teton National Park is home to part of the Teton mountain range. There is an enormous amount of beautiful wilderness to be explored in this part of the United States, and the Teton Crest Trail is a fantastic introduction to the region. With a high route trail traverse, you get stunning views of granite peaks, alpine lakes, and glacier-carved canyons.
The mileage on this trail will range anywhere from 30-45 miles, depending on the route you choose. No matter how far you decide to go, be prepared for a strenuous hike. There will be steep ups and downs, and you will rarely be below 8,000 feet of elevation. For backpackers looking for an extended stay in the Tetons, you could potentially extend the trip to 75 miles if you connect side trails to your route.
Recommended Itinerary
Despite the number of mile variations possible for this trail, we are going to stick to a six-day trek taking us on a 39-mile trek. We chose the six-day trek as it will give you some extra time to get to know the area a bit better. Keep in mind that there are other campsites along the trail apart from what we list here. So, you can plan to either hike longer days or shorter days, depending on your trip planning.
Starting Trailhead: Granite Canyon Trailhead
Day 1: 6.3 miles to Granite Canyon campsite
Day 2: 5.6 miles to Death Canyon Shelf campsite
Day 3: 5.7 miles to Alaska Basin campsite
Day 4: 8.3 to South Fork Cascade campsite
Day 5: 6.7 miles to Holly Lake campsite
Day 6: 6.5 miles to Leigh Lake Trailhead
Ending Trailhead: Leigh Lake Trailhead
Plan your visit according to your timeline and hiking speed—checkout digital maps on the Teton NP website.
When to Go
The ideal time to hike this trail is July-September. This timeframe will also be the busiest time in the park, but you will have the best weather. In some years, the Teton Crest Trail has been passable into October, but snow will determine this. Mid-June will usually herald substantial snowmelt, but that also changes year-to-year.
The Teton range is known for drastic temperature drops and occasional freezing temperatures mid-summer. The park service made a great video explaining their “summer weather.” Monitor the weather conditions of the trail and consult with park rangers to get up to date information before your hike.
Getting There
As this is a point-to-point hike, you will need to figure out a shuttle system. You can do this by booking a shuttle service or driving two cars to shuttle yourselves.
Jackson, WY, may be the closest gateway city to the trailhead. To get to the Granite Canyon trail, it is about a 20-minute car ride for the city center. There are plenty of lodging options in Jackson, or you can choose to camp somewhere close to the trailhead.
Permits & Fees
Backcountry permits are required to hike in the Grand Teton National Park wilderness areas. If you book online, permits are $45, and if you choose to get a walk-in permit, it is $35. Advanced reservations are only accepted January 8-May 15. See more detailed information on backcountry permits, camping regulations, and entrance fees on the NP website.
Hike with a Guide
Wildland Trekking doesn’t currently have backpacking trips specific to the Teton Crest Trail, but we do offer a couple of other backpacking trip options in the Grand Tetons. If you want to get off the beaten path and explore the parts of the Teton mountain range that visitors rarely get to experience, check out our backpacking trips and book today!
7. Half Dome – Yosemite National Park
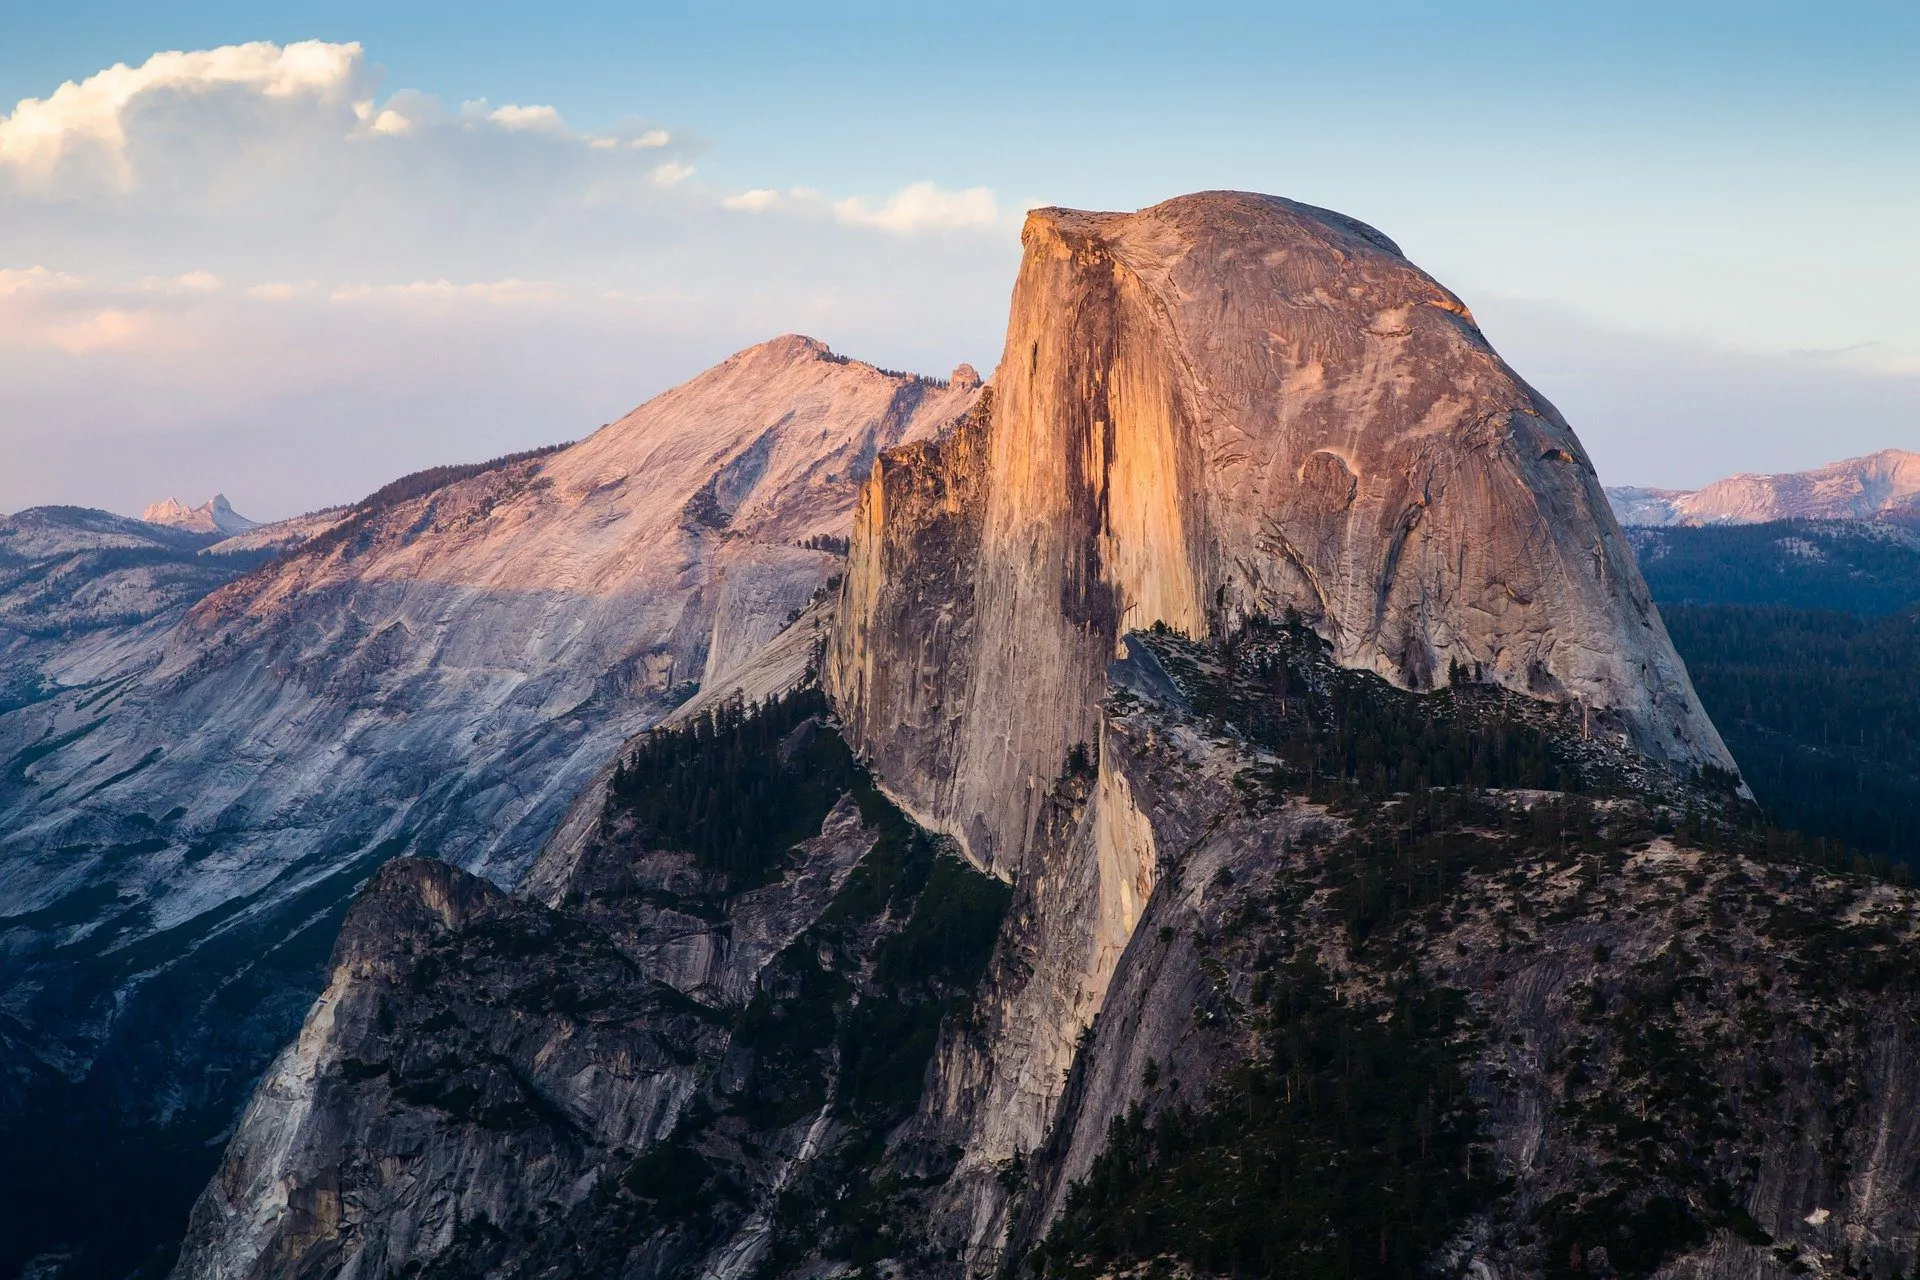
The Hike
This 16-mile backpacking trip will give you two nights in the Yosemite valley. The end goal is to summit Half Dome, all 8,842 feet of it. Other than half Dome itself, there are many other amazing aspects of the hike to enjoy. You will pass various waterfalls, Panorama cliffs, the sub-dome, and many other natural wonders along the trail.
Although this trail is well-maintained, the hike will be strenuous. There will be steep, rocky sections that are occasionally wet. The final 400 ft to the summit of Half Dome will follow two parallel cables raised on metal posts. These cables will guide you up the smooth, 45-degree granite slope.
Recommended Itinerary
The Wildland Trekking itinerary follows a four-day schedule to make time for an orientation. However, the recommended hiking itinerary that we will layout for you below follows a three-day plan.
Trailhead: Happy Isles Trailhead
Day 1: 4.4 miles to Merced River in Little Yosemite Valley
Day 2: 7 miles to summit Half Dome and return to camp in Little Yosemite Valley
Day 3: 5.2 miles back to Happy Isles Trailhead
Some hikers choose to follow a two-day schedule. However, this gives you a long trek on one day, which is why we recommend three days if possible.
When to Go
Planning a backpacking trip anywhere in the Sierra Nevada mountains requires close attention to the weather and current conditions. The area is most suitable for hiking June-September. In many years, there has been snow at higher elevations through mid-June. For the rest of the summer, rain is a possibility.
Stay informed by going to the Yosemite NP website to see current conditions and up to date weather forecasts.
Getting There
There are several gateway cities both in California and Nevada that give you proximity to the national park. The primary California cities include Fresno, Bakersfield, Merced, Sacramento, Oakland, San Francisco, San Jose, and Visalia. For Nevada, Reno and Las Vegas are your best options.
From many of those cities, you can take a bus, shuttle, rail system, or rent a car to get to the National Park. There is also some fantastic lodging in the park to stay at before your trek.
Permits & Fees
Permits are required to hike Half Dome, whether you are day hiking or overnight camping in the Valley. The permits for day hikers are applied for online via a lottery system. Backpackers should apply for a wilderness permit to hike. If you can make a reservation, great; otherwise, they are first come first serve. Go to the NP website for more detailed information regarding permits and park entrance fees.
Hike with a Guide
Wildland Trekking offers a 4-day backpacking experience on the Half Dome trail. Half Dome is one of Yosemite’s more popular trails, and for many, a life-long dream to summit. Experience the Yosemite backcountry and see the Valley from above. Learn more and book your Half Dome backpacking trek today!
8. Outer Mountain Loop – Big Bend National Park
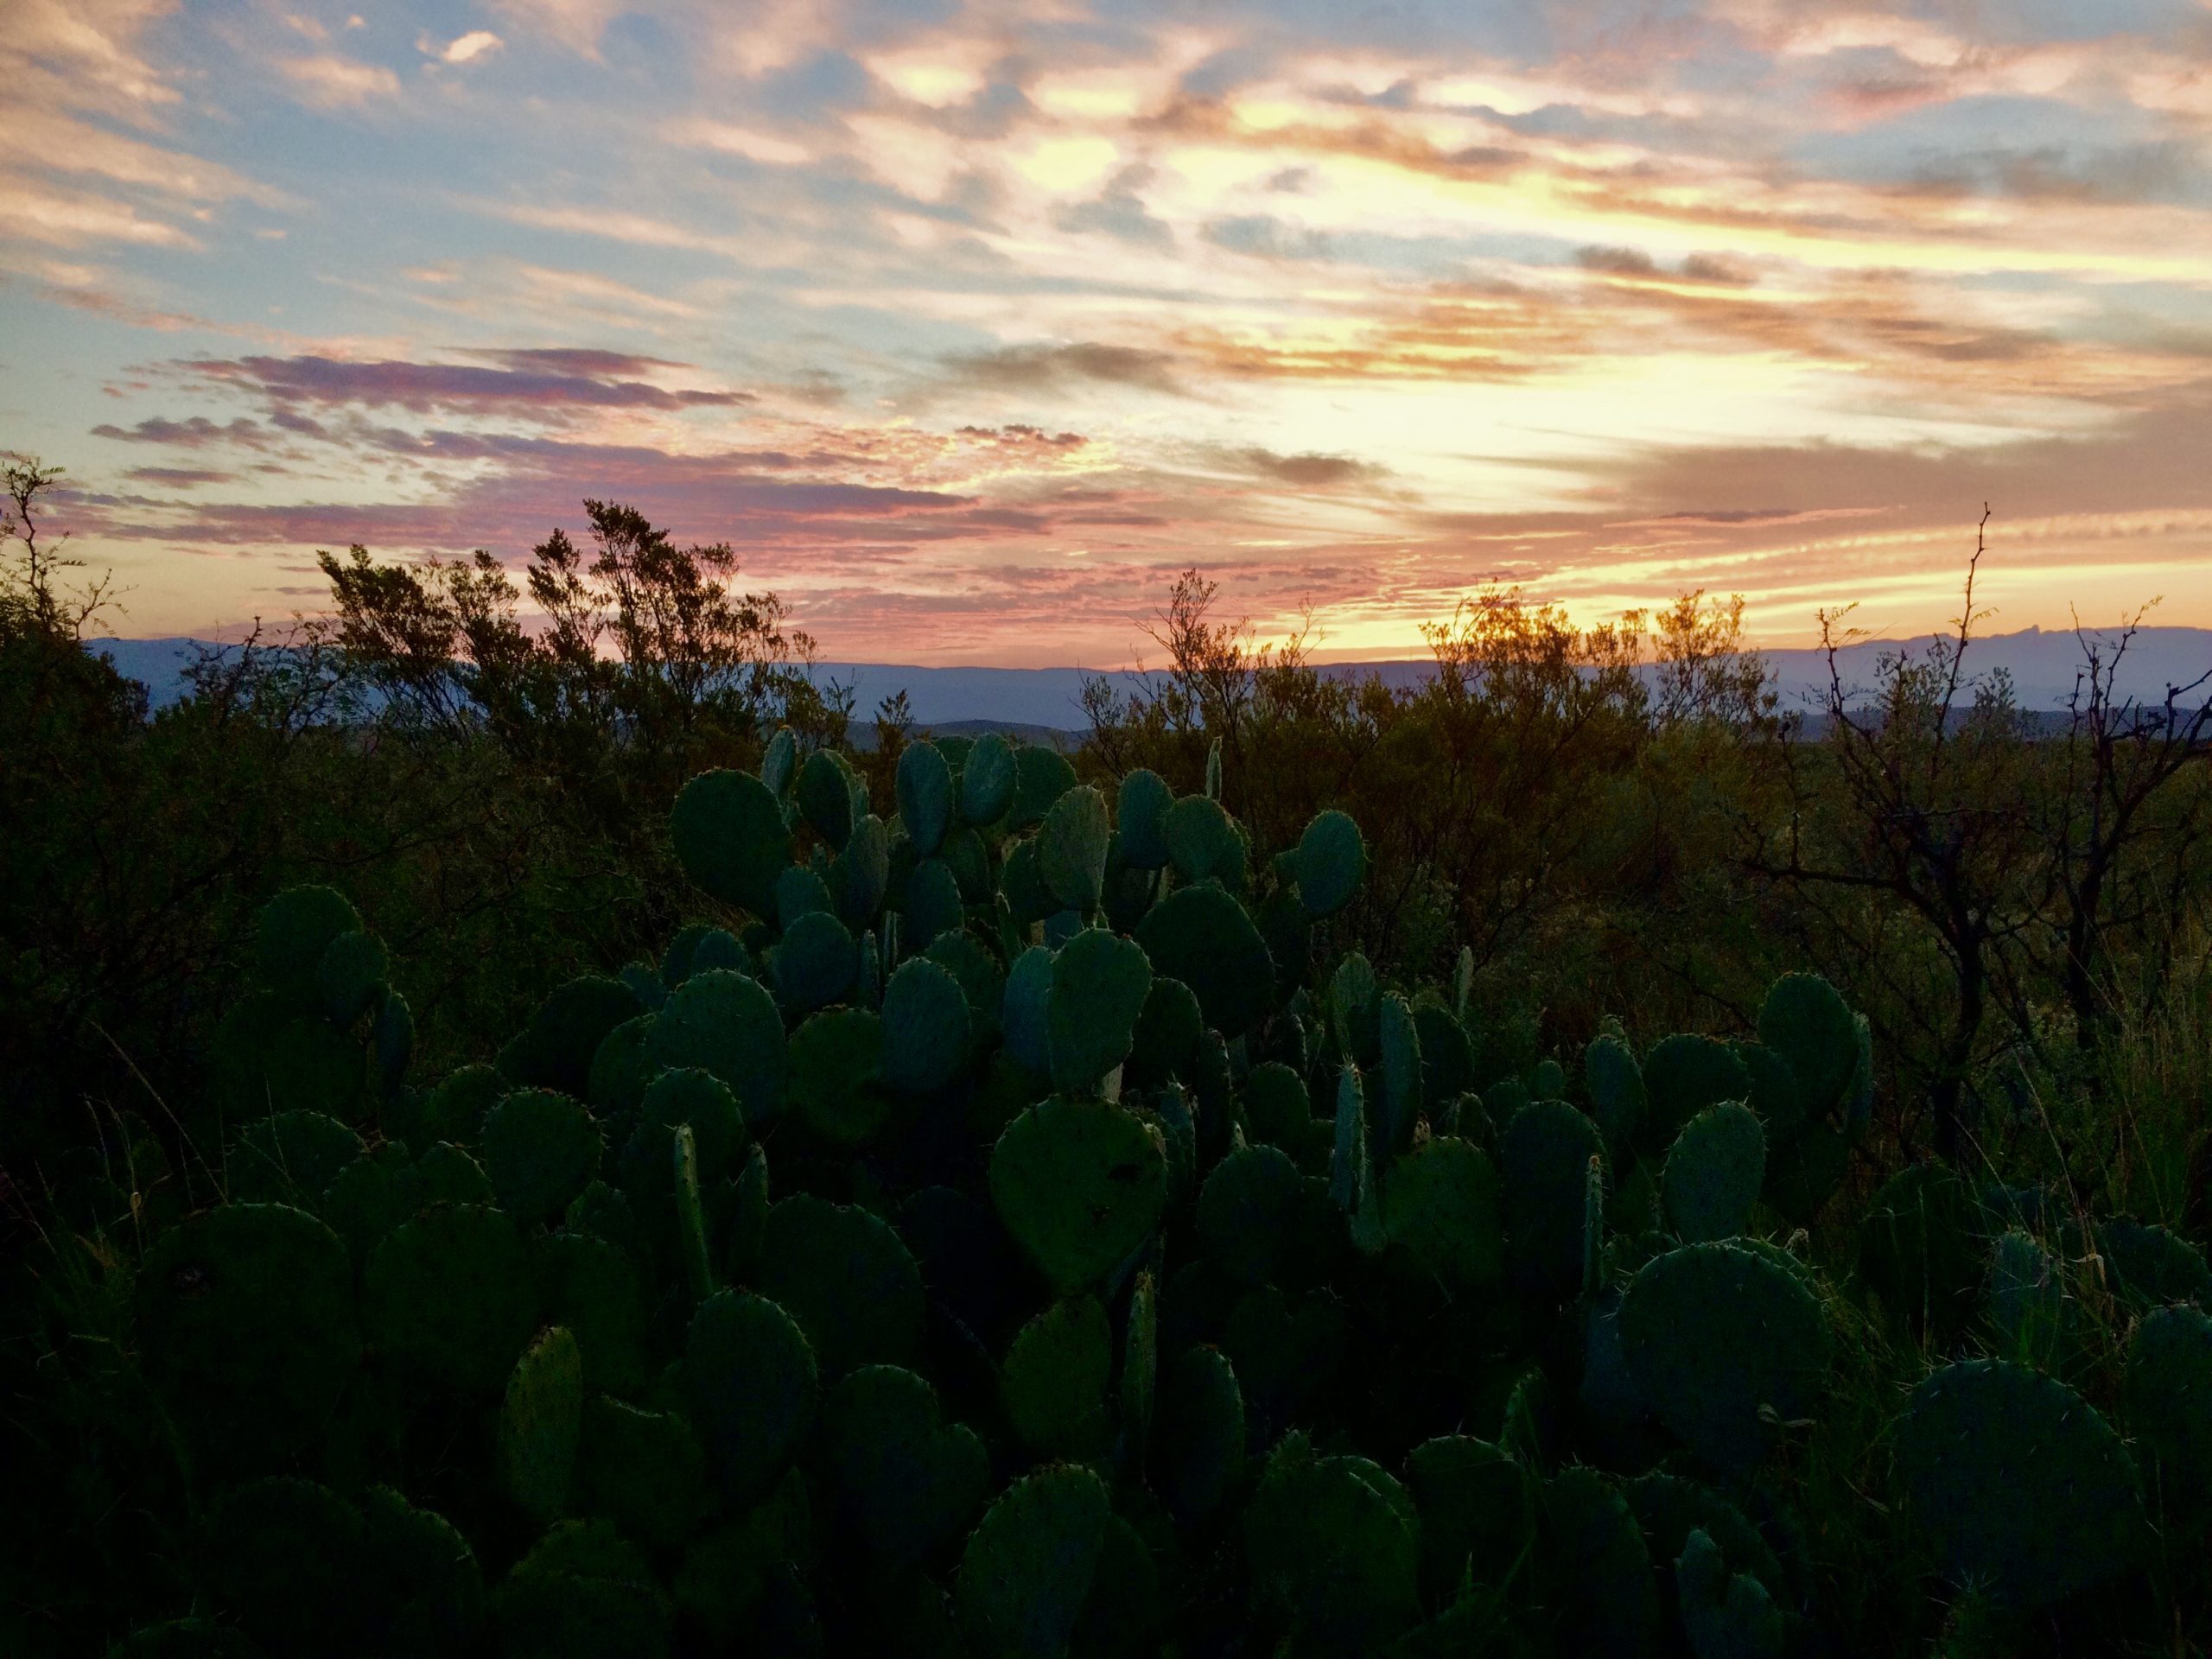
The Hike
Big Bend National Park is located in southern Texas. The Outer Mountain Loop is a 30-mile trek that combines Pinnacles, Juniper Canyon, Dodson, Blue Creek, and Laguna Meadows trails. You will hike through a variety of ecosystems and wildlife habitats in the Chisos Mountains and the Chihuahuan Desert.
This loop trail is not recommended for first time Big Bend visitors. Sections of the trail are incredibly steep, with minimal flat hiking. The strenuous trail requires proper knowledge of the environment and physical ability to be safe. As you will be in a desert environment, you will need to cache water before your hike at Homer Wilson Ranch.
More detailed information regarding water cache locations can be found on the Big Bend National Park website.
Recommended Itinerary
To cover the full 30 miles of the Outer Mountain Loop, it is recommended that you follow a three-day itinerary. Most hikers will begin hiking clockwise to complete the loop.
Trailhead: Chisos Basin Trailhead
Day 1: 11 miles to Juniper Canyon campsite
Day 2: 10 miles to camp in Dodson or Blue Creek Zone
Day 3: 9 miles back to the trailhead
For this hike, you will start with three days worth of food and two days worth of water. The only water cache allowed is Homer Wilson Ranch, which is located between Dodson and Blue Creek Zone. Get water at the end of your second day or the beginning of your third. Two popular side trips on this loop are the summit of Emory Peak or the South Rim. Either trip will add five miles to your trek.
When to Go
Unlike many of the other trails on our list, the best time to hike the outer mountain loop is November-April (winter). Do not attempt this route in the summer. The desert does not provide many water sources, and it would be near impossible to carry enough water to travel safely. There is little to no shade on the trail either.
Stay up to date on current conditions and weather in the park on the NP website.
Getting There
Big Bend National Park is relatively isolated. It will take some extra planning on your part to arrange how to travel to the park. Plus, there is no public transportation to the park. The closest airports are either Midland/Odessa (235 miles away) or El Paso, Texas (330 miles away). You can get rental cars at either location.
Several highways lead to the park. However, services and towns are few and far between. Since you will be traveling by car, you should have plenty of food, water, and gas for your journey.
More tips on directions and transportation to the park can be found on the NP website.
Permits & Fees
A backcountry permit is required for hiking and camping in the Big Bend wilderness areas. You can get permits in advance up to 180 days online or up to 24 hours before in person at the visitor’s centers. See more backcountry regulations, permit instructions, and park entrance fees on the Big Bend website.
9. Greenstone Ridge Trail – Isle Royale National Park
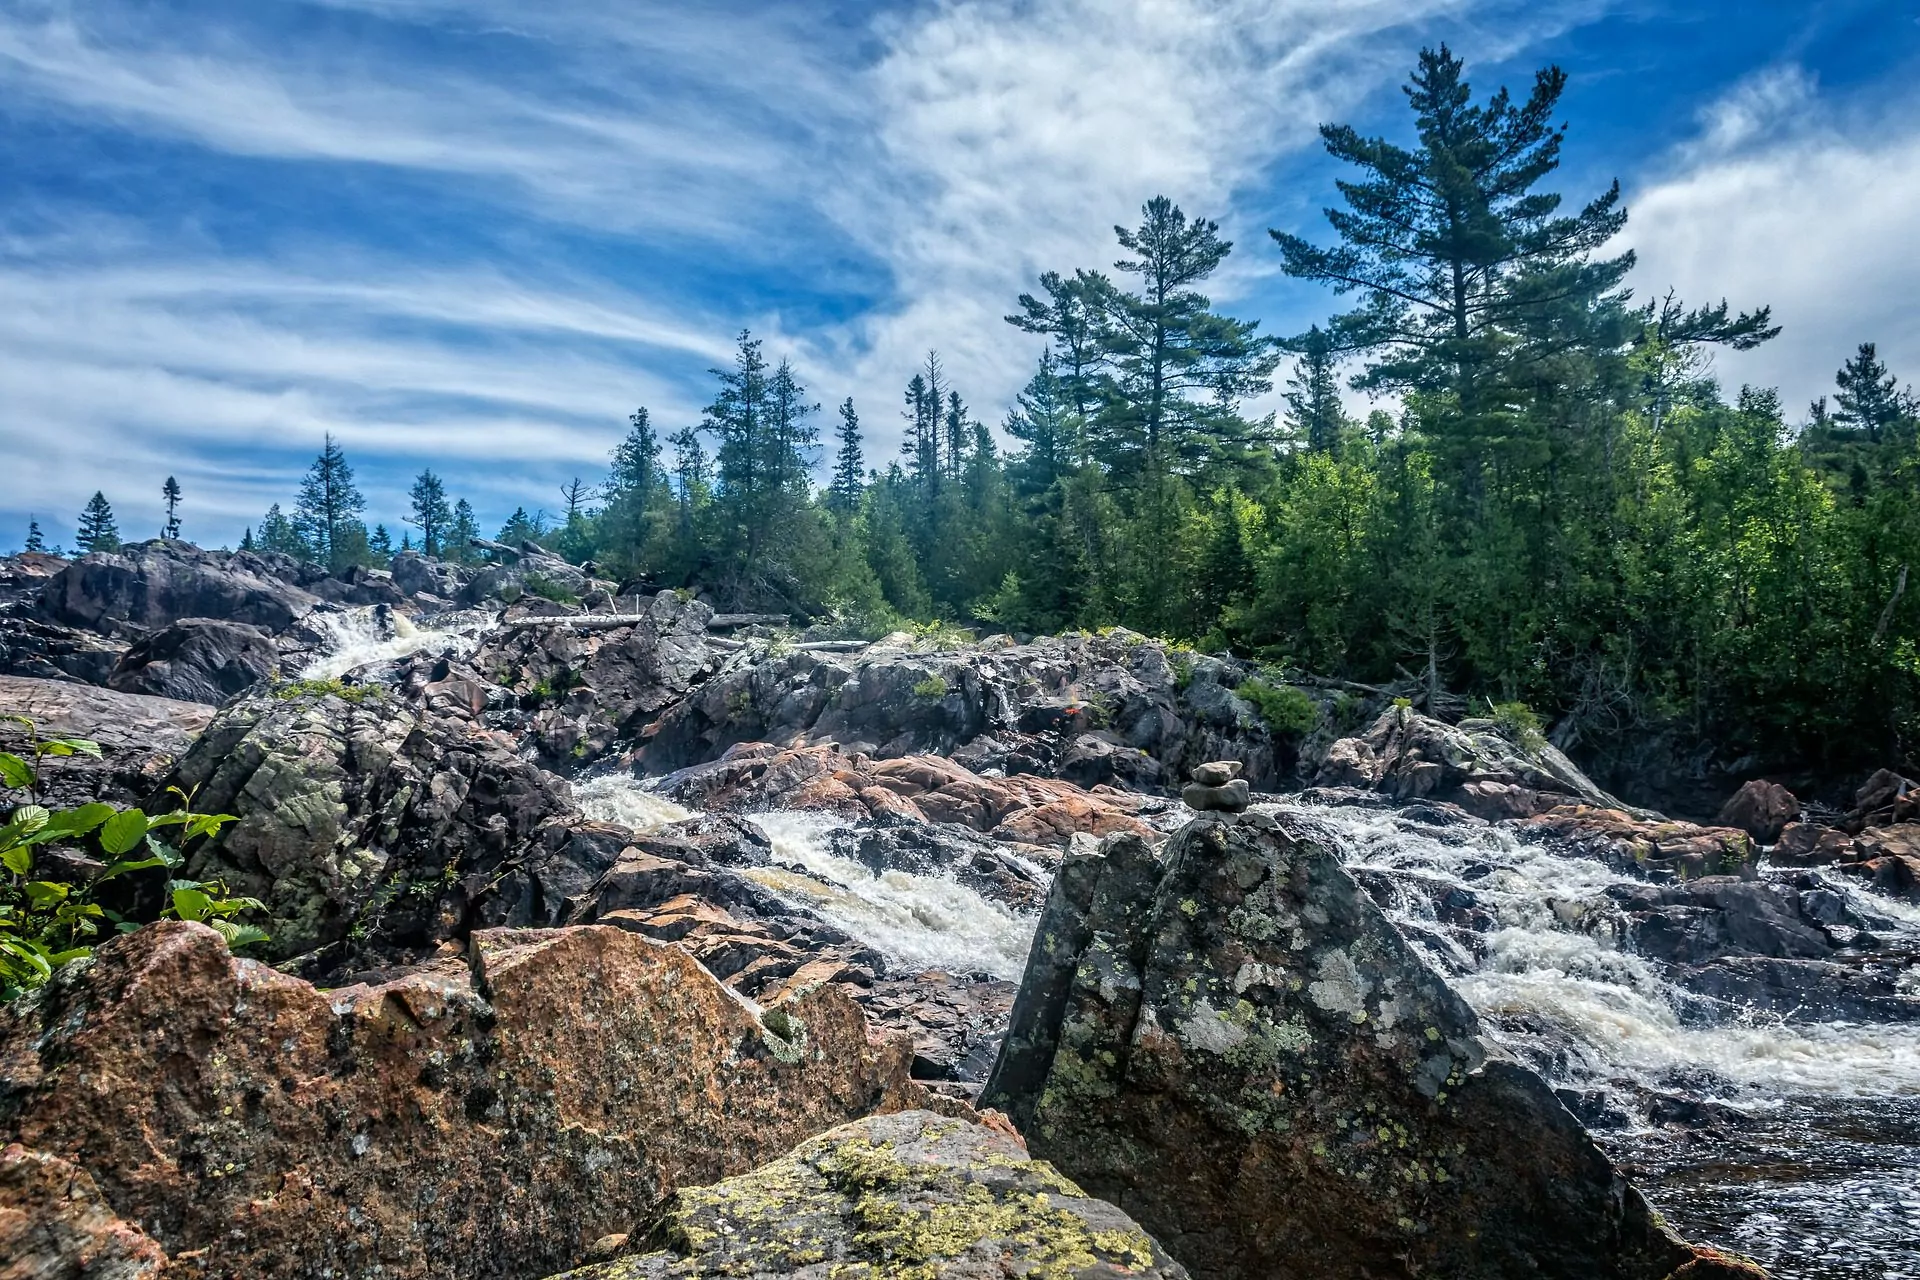
The Hike
Isle Royale National Park is unique in that it is a remote island cluster on Lake Superior. It is close to the coasts of Minnesota, Wisconsin, Michigan, and Ontario. Despite its proximity to other states and Canada, it is a Michigan National Park. Being a remote island on the largest freshwater lake in the world also makes Isle Royale one of the least visited National Parks in the United States.
The Greenstone Ridge trail is on the main Isle Royale island, a 50 mile long and 9-mile wide island. There are 45 other smaller islands, but they are not a part of this trek. The trail ranges from 35-42 miles point-to-point. There are different routes across the island, but the Greenstone Ridge trail gives you a high vantage point as you travel across a high ridge in the center of the island.
Recommended Itinerary
There are several exit points off of the Greenstone Ridge Trail to take a ferry back to the mainland. So, depending on your timeline, you can exit at either Malone Bay (the closest), Daisy Farm, Three Mile, or Rock Harbor (the farthest). Our recommended itinerary will bring you the furthest from Windigo to Rock Harbor. You can go from Rock Harbor to Windigo if you choose as well.
You can complete the hike in 3-5 days, but to see the best sections of the trail, our itinerary is the five-day option leading you 42 miles.
Trailhead: Windigo Visitor Center at Washington Harbor (Western Trailhead)
Day 1: 11 miles to Lake Desor South Campground
Day 2: 8.3 miles to Hatchet Lake Campground
Day 3: 9.3 miles to East Chickenbone Lake Campground
Day 4: 6.1 miles to Daisy Farm Campground
Day 5: 7.1 miles to Rock Harbor
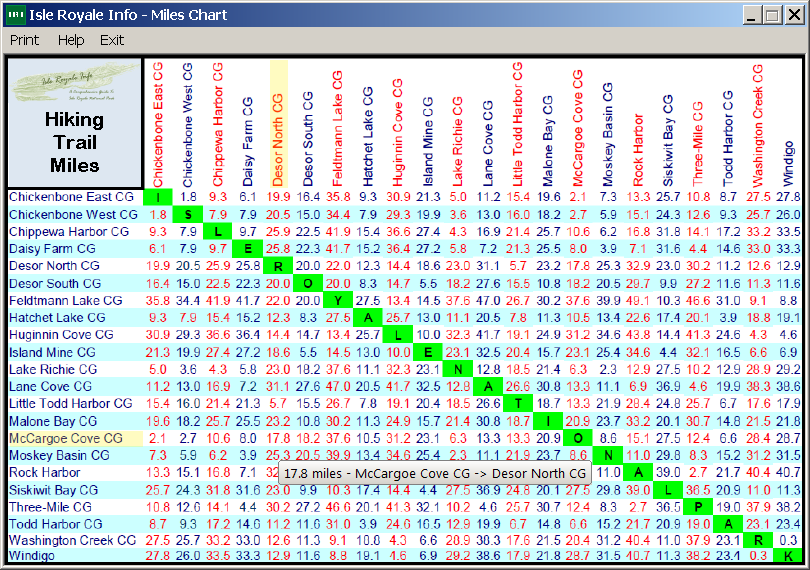
To plan other itinerary options, see the park map and miles chart between campgrounds. Although the terrain is moderate, it is nice to hike less than 12 miles per day to have extra time at campsites for swimming and exploring. If you have spare time, go a couple of miles past Rock Harbor to Lookout Louise. This is one of the least visited parts of the park, but arguably the most scenic. There is camping near here.
When to Go
Isle Royale National Park is open from April 15th through the end of October. For the best conditions, Spring and Fall are recommended. In the spring, you miss many bugs, and the leaves are not quite grown out on the trees, giving you a clearer view. However, the Fall gives you unparalleled foliage and colors on the trees with colder temperatures.
You can expect plenty of bugs from May to August. This will also be the most popular time to visit. Temperatures will usually be around 70 degrees Fahrenheit, but the weather can change 20 degrees in either direction rather quickly. The ridge is exposed in many places, making adverse winds possible. The wind is an excellent escape from the heat and bugs, but it can be rough at times.
See information on current park conditions and weather on the NP website.
Getting There
Getting to the park takes a little bit more planning compared to other parks due to the fact it is a remote island. You can get to the island either by boat or by seaplane. To get to the west end of the island by boat, ferries leave from Houghton, MI. However, to get to the east end by boat, ferries leave from Grand Portage, MN. Grand Portage to Windigo will be the shortest ferry ride as it only takes about 3 hours.
Seaplanes depart from Houghton, MI, and run throughout the summer. You can land on either side of the island by plane. More information on transportation to and from the island can be found on the NP website.
Permits & Fees
Isle Royale National Park requires permits for any overnight guests. There is no fee for the permit, but there is a standard park entrance fee.
10. Little River Trail – Great Smoky Mountain National Park
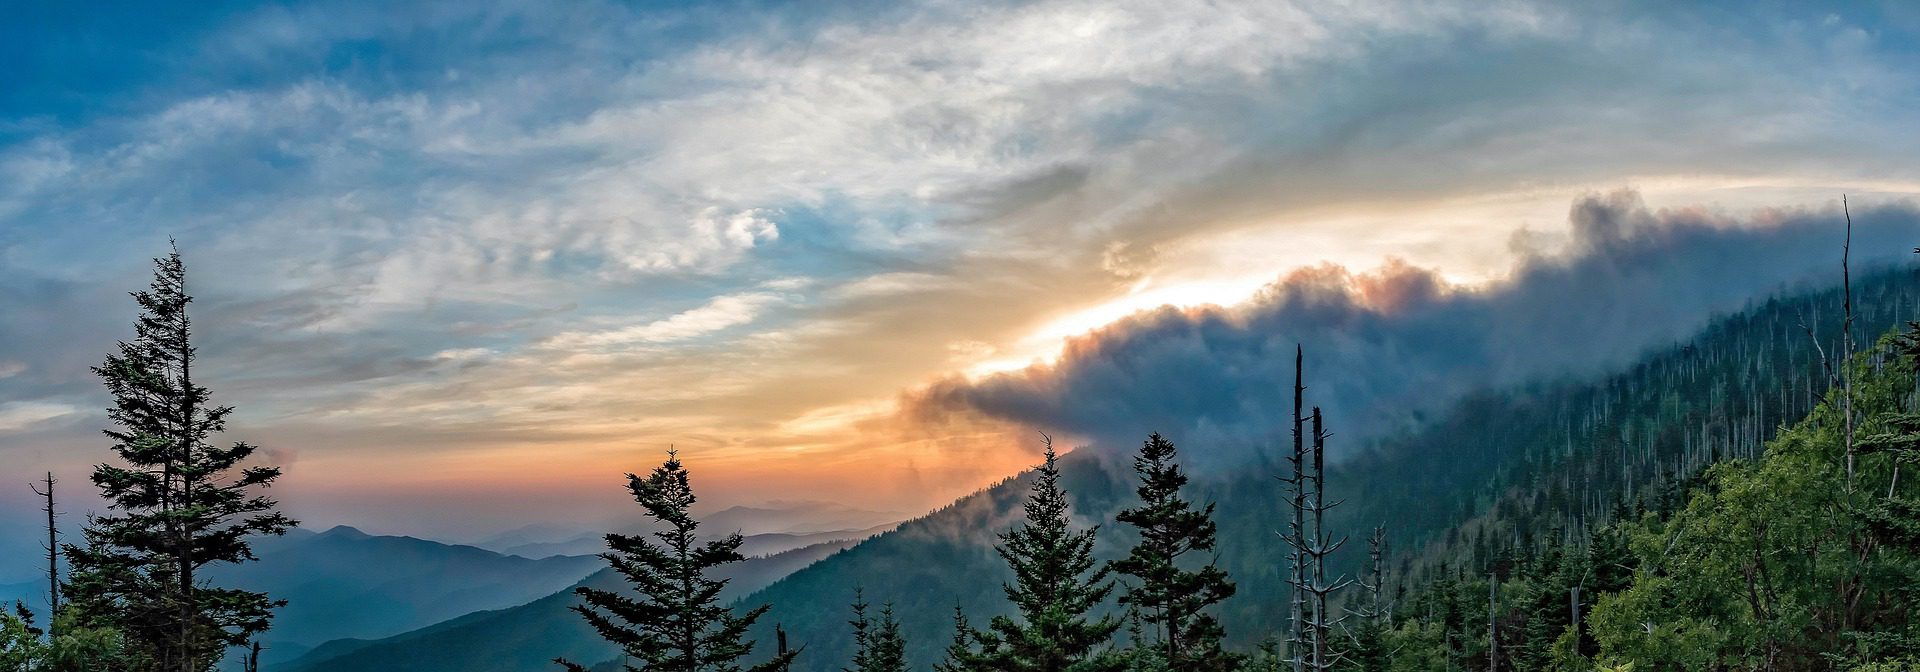
The Hike
The Little River Trail is an approximately 12-mile out and back trail in the Elkmont region of Great Smoky Mountain National Park. Elmont is located in the Tennessee portion of the mountains. The trail itself is a reclaimed railway bed known for the river scenery, fireflies, and area history.
There are extensive remote camping options on the trail, so your trip can be catered to your desired camping location. You should only be camping in designated areas and should comply with all park regulations and policies.
Great Smoky Mountain National Park is one of the most visited parks in the nation, making its laws and policies strict to ensure patron safety and to protect the natural space. Failure to comply with park policies could result in a hefty fine.
The hike itself is relatively moderate, with only about 412 feet of elevation gain. It is generally done in two days but can be stretched to enjoy the camping along the trail. There will be an occasional river crossing, so be prepared to get your feet wet.
Recommended Itinerary
Since this is a shorter hike, our recommended itinerary will be for a two-day adventure. This will give you time to complete the trail with only six miles of hiking each day. As an out and back trail, there is some room for extension if you stop earlier for camping. If you are an avid fisherman, this may be a prime location to camp for a few days. You can also do this as a day hike.
Trailhead: Little River Trailhead in Elkmont
Day 1: 6.4 miles to Backcountry Camp 30 Three Forks
Day 2: 6.4 miles back to the trailhead
There are plenty of other campsites along the trail, but camp 30 is the final one on the trail.
When to Go
Mid-March to April is prime time to hike this trail if you wish to see wildflowers. However, the summer and Fall are pleasant hiking temperatures as well. The summer months will likely be the most crowded time of year in the park, as well as the most humid. The trail is accessible year-round, but winter temperatures and conditions aren’t always favorable.
See area conditions and weather on the NP website before your hike to be sure you packed proper gear.
Getting There
The closest city will be Gatlinburg, which is a 27-minute drive from the trailhead. There is also a campground about 12 miles away to stay at before your overnight. To enter the park, you will pass the Sugarlands visitor center to pay entrance fees, collect permits, and get up to date trail information.
As this is a popular area, there may not be parking at the trailhead. There is overflow parking available at James Creek Trailhead just down the road.
Permits & Fees
Reservations and permits are required for all backcountry camping. To make a permit reservation or see all park rules and regulations visit the NP website. Like other National Parks, there is a required entrance fee for the Great Smoky Mountains as well.
Hike with a Guide
Wildland Trekking does not currently offer a backpacking trek on the Little River Trail. However, we do provide many other backpacking options in the Great Smoky Mountains.
If you have any questions about booking a trip with Wildland Trekking, please don’t hesitate to contact us! You can reach us at 800-715-HIKE (4453).
11. Wild Olympic Coast North Route - Olympic National Park
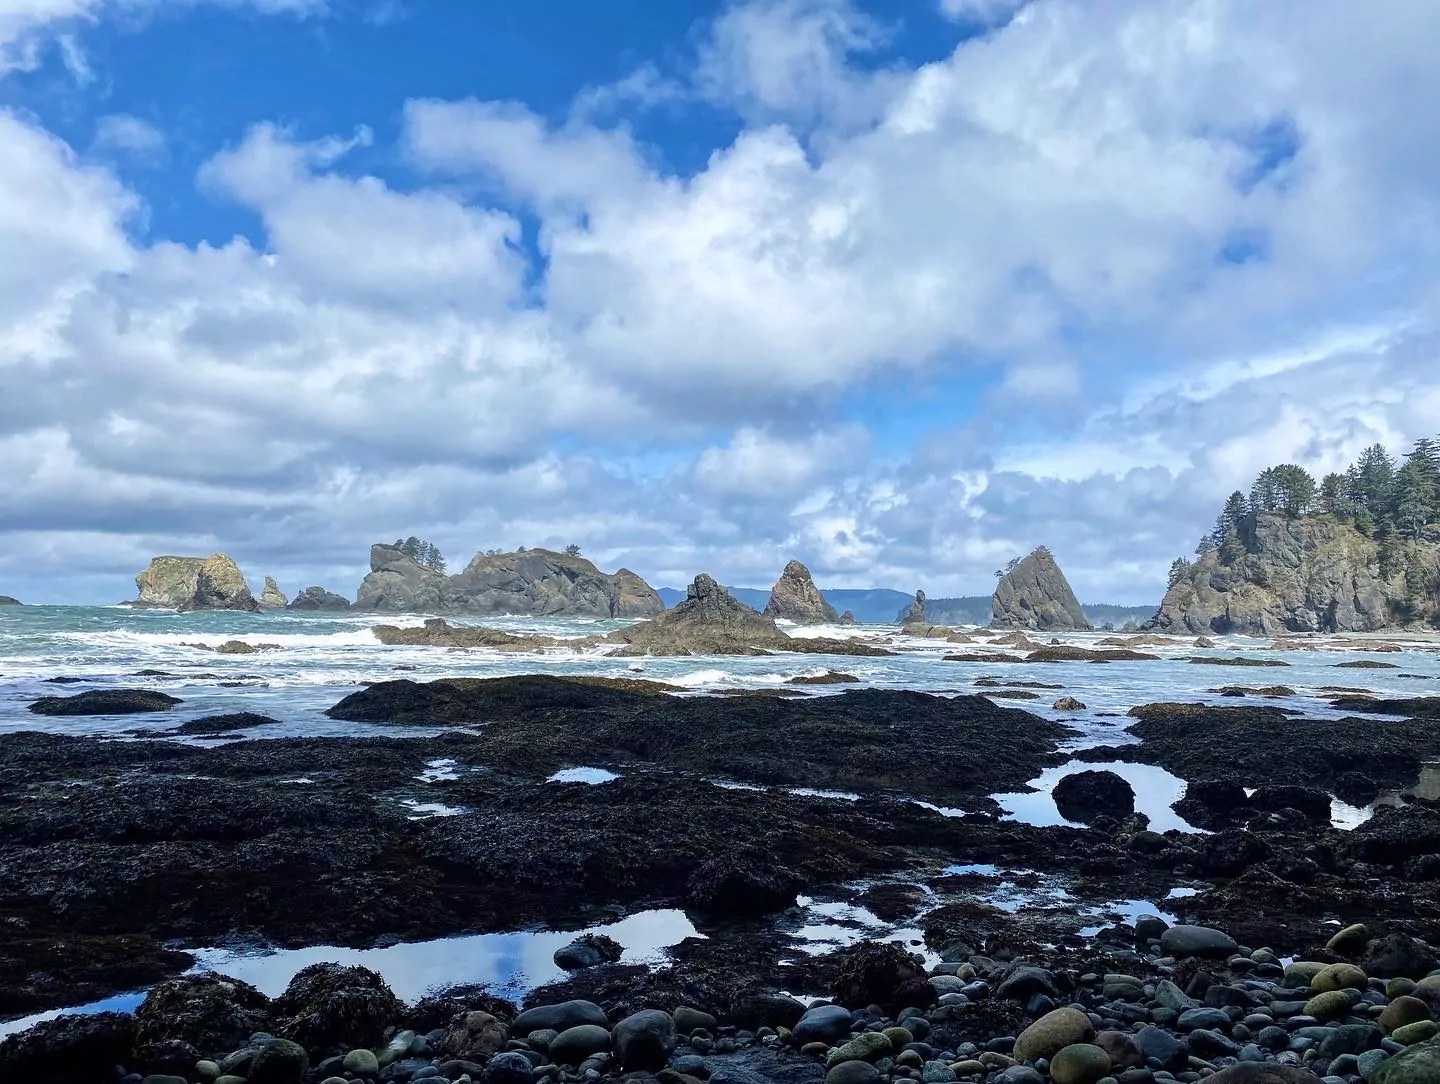
The Hike
Up in the most Northwestern corner of the continental United States lies the North Coast backpacking route along the rugged coastline of Olympic National Park. Although we already have a trek from Olympic on this list of best backpacking trips in the U.S., Olympic National Park is unique in offering three distinct habitats that boast widely different experiences. You will find this moderate to strenuous rugged coastal trek unable to be more different from the trip to Enchanted Valley filled with waterfalls.
The trail is just under 20 miles of jagged headlands, coastal forests, and tide pools full of marine life. The trail is rather rugged with many sections scrambling over large boulders or traversing intertidal zones covered in kelp and barnacles. If the tide is too high to cross in front of the headlands through the intertidal zone, trekkers can make use of rope ladders to climb to the bluffs and continue trekking from above the pounding waves. Usually taking about 4 days to complete, be prepared for beach walking and camps near streams on this spectacular hike that offers non-stop stunning views of these wild rocky shores.
Recommended Itinerary
The Wild Olympic Coast Northern Route is doable in four days if you plan out the tides right, but you can also take a rest day at any of the camps to explore more of this scenic area included the rocky tide pools the dot the shore line. Here is our recommended four day itinerary with no layover day. Even though the milage seems short, the rugged terrain and off trail hiking can make for slow going.
Trailhead: Shi Shi Beach Trailhead
Day 1: 4 miles to Shi Shi Beach
Day 2: 4.5 miles to Seafield Creek
Day 3: 4.3 miles to Cape Alva
Day 4: 6.1 miles to Ozette Lake
This is a point to point trail so you will need to park a car at Ozette Lake or arrange a shuttle service back to the original trailhead.
When to go
Summer is the best time to hike the North or South Route of the Wild Olympic Coast due to weather and temperature. Late spring and early fall can also be good times to hike this route, especially if you are keen on having the trail to yourself (mostly). You will be least likely to encounter rain during these seasons, although trekkers should prepare for rain any time of year as well as thick fog and dampness in the air from the proximity to the ocean. Anything you leave outside over night will be wet the next morning.
Hikers should also keep the tides in mind for this trek. Even though there are always overland options (involving scrambling up steep steps or rope ladders) that allow you to pass headlands that are impassable at high tide, most people find it easier to traverse the intertidal zone at low tide. This also gives you the opportunity to more fully immerse yourself in the coastal environment of this national park. Tide charts can come in handy and allow guests to track the tides.
Getting There
If you’re flying into the area to visit Olympic National Park, the SeaTac (Seattle-Tacoma) airport will be the closest, about a 3 hour drive from the park. If you are traveling on your own, it’s best to rent a car from here and drive to the trailhead. Transportation is included on guided tours and all Wildland trips to the area begin in Olympia, WA.
Permits & Fees
All overnight camping requires a permit in Olympic National Park with a fee of $8 per person per night (16 and over) and a non-refundable $6 permit fee (for each permits). Youth up to 15 years old are free. All reservations are made through the national park website. Permits can be competitive as this is a fairly popular trail, so make sure to make your reservations far in advance.
Hike with a guide
Hiking with a guiding company can be a great way to get out into the wilderness without the hassle of planning out logistics. Wildland Trekking offers a variety of backpacking trips to Olympic National Park including the North Route of the Wild Olympic Coast. Let us do all the nitty gritty planning so that you can show up with your pack and enjoy the trek.
12. Rae Lakes Loop - Sequoia National Park
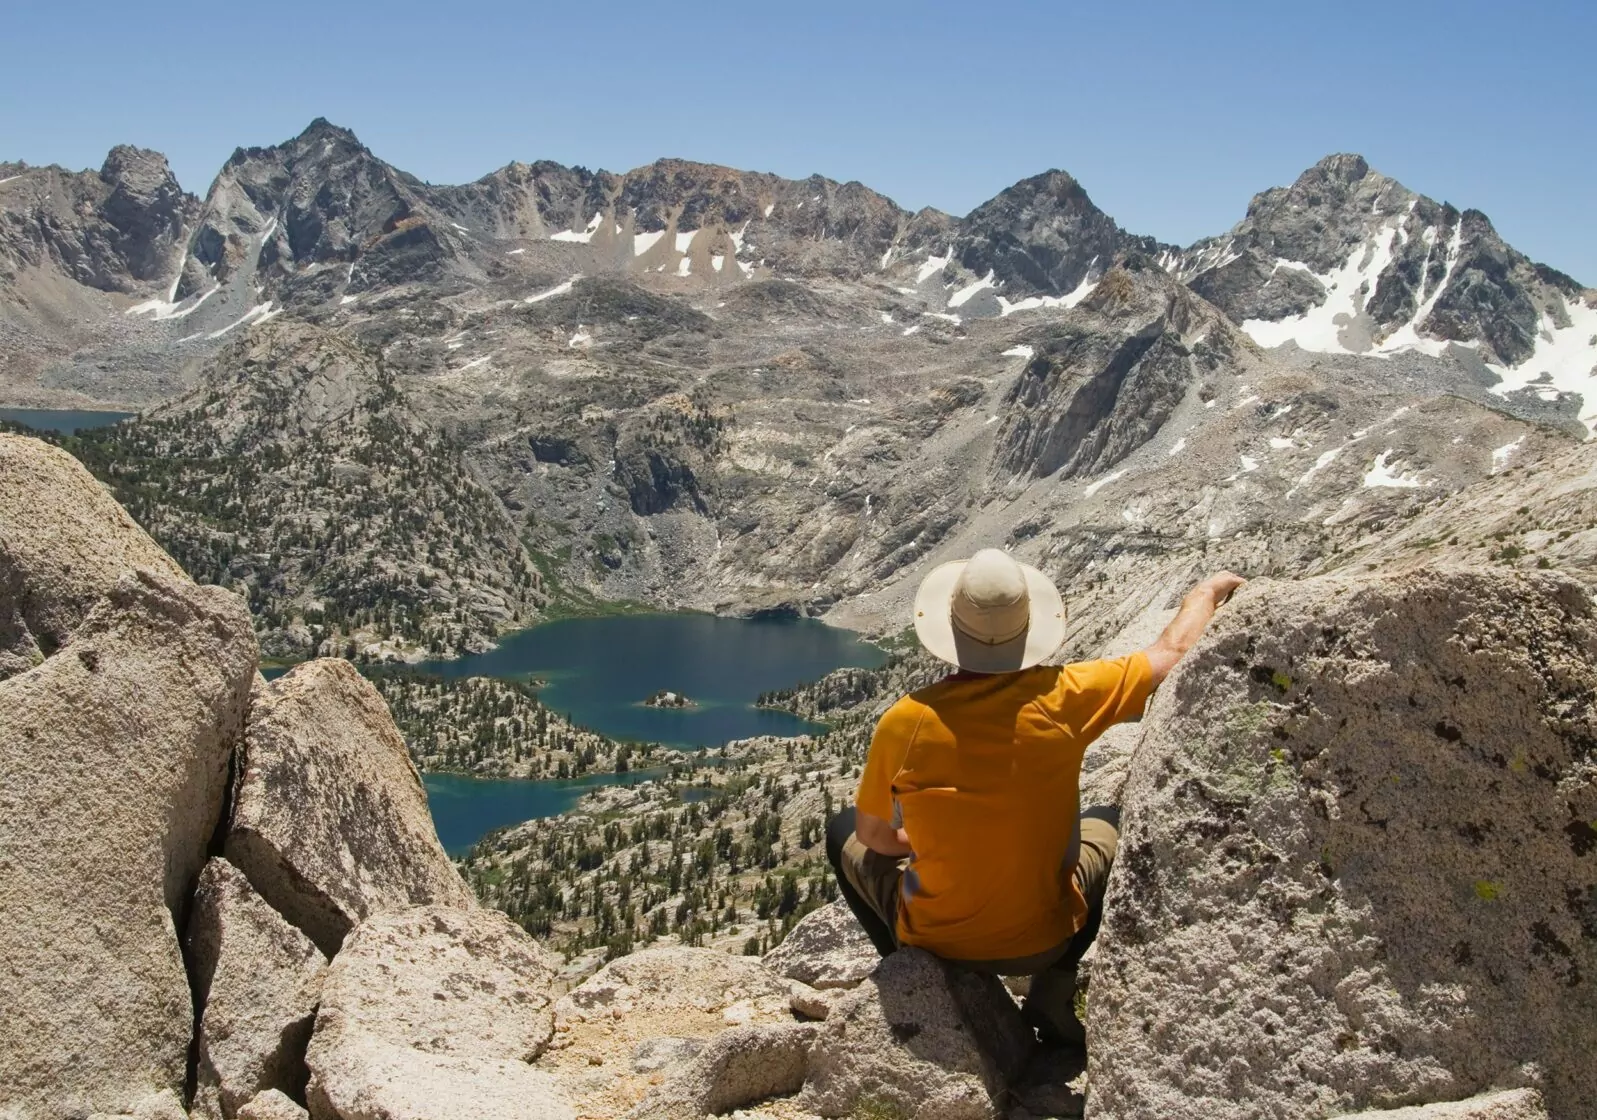
The Hike
Lying along the eastern edge of the California are the High Sierra Nevada Mountains, jam packed with backpacking trails. But Rae Lakes Loop in Sequoia- King’s Canyon National Park stands out as one of the best backpacking trips in this region. Often overshadowed by it’s famous northern neighbor, Yosemite, Sequoia- Kings Canyon National Park is a gem not to be missed in this area.
Boasting stunning alpine scenery, Rae Lakes Loop is 40 mile backcountry loop that presents both a mental and physical challenge to experienced backpackers but is well enough traveled and moderate enough for a second or third trip into the backcountry. You can hike the trail either clockwise or counterclockwise, with counterclockwise being the more strenuous option. This trail takes trekkers passed some of the famously named features in the High Sierra such as Fin Dome, The Videttes, Glen Pass, and Paradise Valley through which flows the South Fork of the King’s River.
This trail is known for its stunning scenery, despite lying in the center of a mountain range known for stunning scenery. The loop joins the John Muir Trail for its most eastern section where hikers can talk with some who are attempting this famous thru hike. Although the trail has some serious elevation, the views of soaring mountains capped with snow and shaking aspen leaves in the valleys are some of the most rewarding sights in this national park.
Recommended Itinerary
We recommend hiking Rae Lakes Loop clockwise, taking 6 or 7 days to do so, with Glen Pass landing on day 4 or 5, depending on your campsites and if you choose to take a layover day. This means that you’ll be starting your hike with an ascent up Paradise Valley past Mist Falls and tracing the south fork of the King’s River. From there you’ll join the John Muir Trail, pass alpine lakes, traverse Glen Pass, and follow Bubb’s creek back down to the trailhead. Either direction works great, but positioning Glen Pass (coming in at over 10,500 ft) later in the trek when you are more acclimated to the altitude is generally a good idea. Here is a sample itinerary with no layover day
Trailhead: Wood’s Creek trailhead (clockwise) Bubbs Creek Trailhead (counterclockwise)
Day 1: 7 miles to Middle Paradise Valley
Day 2: 7 miles to Woods Creek Crossing
Day 3: 6 miles to Rae Lakes
Day 4: 5.3 miles to Charlotte Lake (over Glen Pass)
Day 5: 7.5 miles to Junction Meadow
Day 6: 7.1 miles back to trailhead
When to go
Despite being the mildest mountain range in the world, the Sierra’s aren’t friendly to backpackers in the winter, early spring, or late fall. The snow season begins early and ends late here, sometimes with Glen Pass remaining impassable until mid-July. With some of this trail occurring above the tree line (around 10,000 ft), summer is your only option for completing this trail, although some of the lower sections may be available for hiking in late spring or early fall.
Getting there
Rae Lakes Loop is located in Sequioa-Kings Canyon National Park (technically two separate parks, but managed as one) at the end of Road’s End (go figure its the end). The nearest major airport is Fresno, but other gateway cities such as Visalia and Tulare are also good options. You will need to rent a car if you are flying into the area in order to access the trail head if you are hiking on your own. Guided treks include transportation for increased ease for guests.
Permits & Fees
Wilderness permits are required for any overnight camping and they can be competitive to get during the high summer season. You can reserve your permit up to six months in advance or try to get a walkup permit the day of or day before your trip at the ranger station near the trail head. The fee is $15 for the permit plus $5 for each person. Click here for more information about permits.
Hike with a guide
Many trekkers choose to hike with a guiding company in order to ease the burden of logistics and rely on a trained profession for guiding their adventure. There are pros and cons to both going on your own or with a guiding company, but few (if any!) regret taking a trip with Wildland Trekking. We offer many trips in the High Sierras as well as a Rae Lakes Loop Trek that is all inclusive with meals, transportation, gear, and an expert mountain guide included!
13. Gallatin Mountains — Northwest Yellowstone
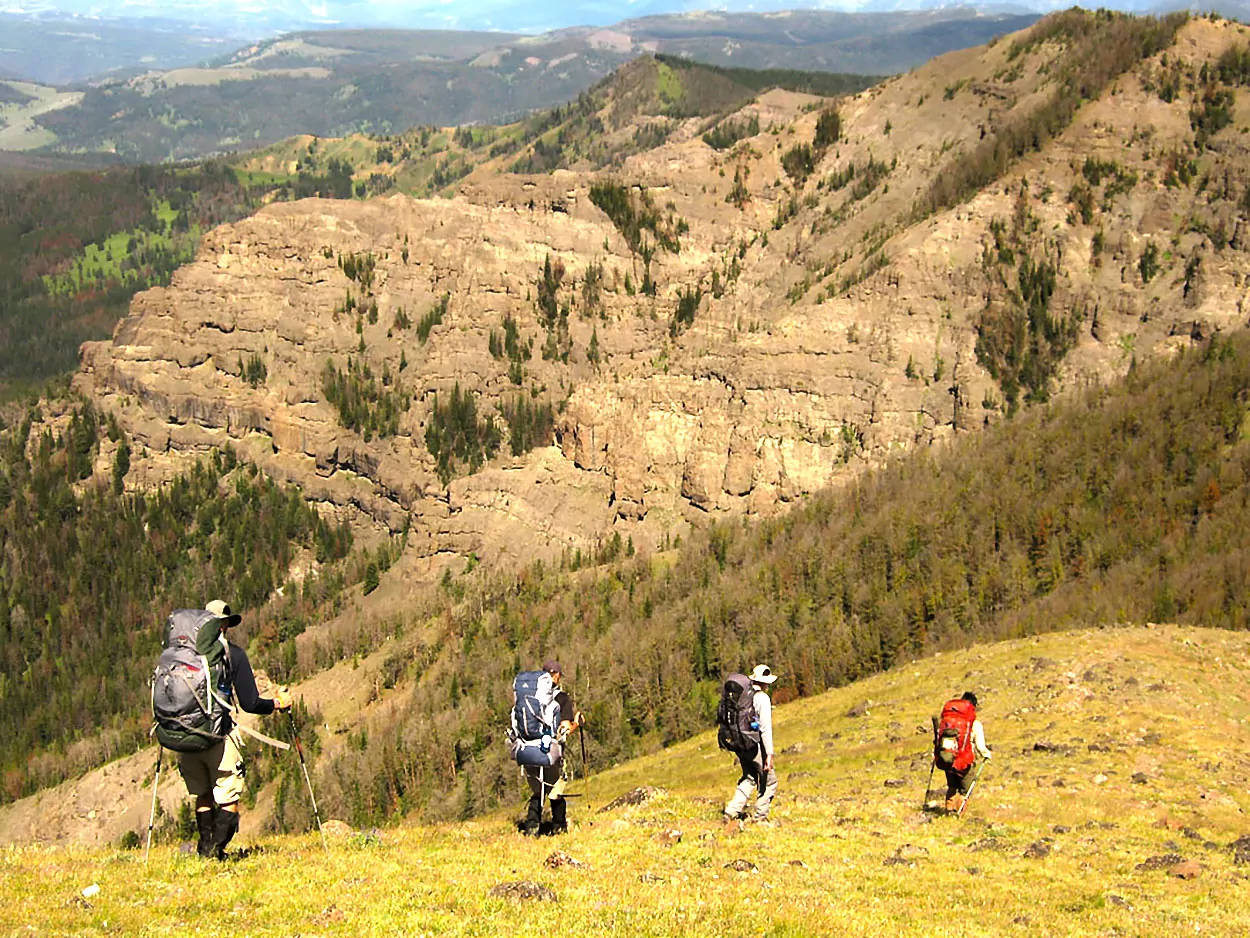
The Hike
You can’t have a list of best national park backpacking trips and not include a trip in Yellowstone National Park, the first and one of the most famous parks in the US. While sometimes not thought of as a backpacking destination, Yellowstone provides spectacular sights to behold with few better than the views from the Gallatin Mountains.
Beginning in the northwest corner of the park, this mountain range boasts some of the most difficult but most rewarding and remote trails in the park. Backpacking through the Gallatin Mountains, even for just a week, is sure to make the list of 15 best national park backpacking trips. With multiple scenic mountain passes, lakeside camping, wide open meadows, abundant wildlife, and some of Yellowstone’s prominent peaks, a trek through the Gallatin Mountains is difficult to beat.
Recommended Itinerary
We recommend doing a trek in the Gallatin Mountains as a point to point hike from Glen Creek trailhead to Dailey Creek trailhead. This is typically done as a 7-day trek with one day that you don’t move camp to summit Electric Peak while camping on the banks of the Gardner River. Alternatively, you could choose to take a rest day at any of the rivers or lakes that you make camp and soak up the scenery while giving your legs a rest.
All of Yellowstone’s backcountry camping requires the use of pre-established campsites so you will need to reserve each site for your trip. The trailhead begins at 7,000 ft and rises to over 10,000 on some passes, so make you take a few days before you begin at acclimate to the elevation. Here is a sample itinerary that includes taking a day to hike Electric Peak.
Trailhead: Glen Creek Trailhead
Day 1: 6.1 miles to Gardner River
Day 2: 8 miles up Electric Peak (do not move camp)
Day 3: 6.2 miles to Sportsman Lake via Electric Pass
Day 4: 7.3 miles to High Lake
Day 5: 7.5 miles to Shelf Lake
Day 6: 9.2 miles to Dailey Creek
Day 7: 3.5 miles to Dailey Creek Trailhead
When to Go
Yellowstone is located in Wyoming, Idaho, and Montana— all known for their heavy snowfall. Summer (June- September) is the best time to go on this trek and be able to complete it without skis or snowshoes. Make sure to ask at the ranger station what the snow conditions are, especially on Electric Pass as snow at higher elevations can remain late into the summer making the pass— well, impassable. If you’re worried about the snow levels, you can book your trip with a guiding company to ensure that safety procedures will be in place no matter what the weather.
Getting There
Yellowstone is a rather remote park with few major airports close by. The biggest gateway town is Jackson Hole, WY, but this southern town is far from the northern trailhead that leads to the Gallatin Mountains. The north entrance or the northeast entrance located in Gardner, MT and Cody MT respectively are the closest entrances for this trailhead. If you are flying into the area, you will need to rent a car as there is no park-wide shuttle service in Yellowstone. Transportation is included on guided treks for greater ease of travelers.
Permits & Fees
All backcountry camping in Yellowstone requires permits as well as specific campsite reservations for where you will be camping. The park issues these permits are March 1st each year for peak season (May through October). There is a $10 permit fee plus $5 per person per night. More information about permits can be found here.
Hike with a Guide
Many trekkers choose to hike with a guiding company in order to ease the burden of logistics and rely on a trained profession for guiding their adventure. There are pros and cons to both going on your own or with a guiding company, but few (if any!) regret taking a trip with Wildland Trekking. We offer many backpacking trips in the Yellowstone, included a Gallatin Skylines backpacking trip, all of which are all inclusive with meals, transportation, gear, and an expert mountain guide included.
15. Backpacking in Denali National Park, Alaska
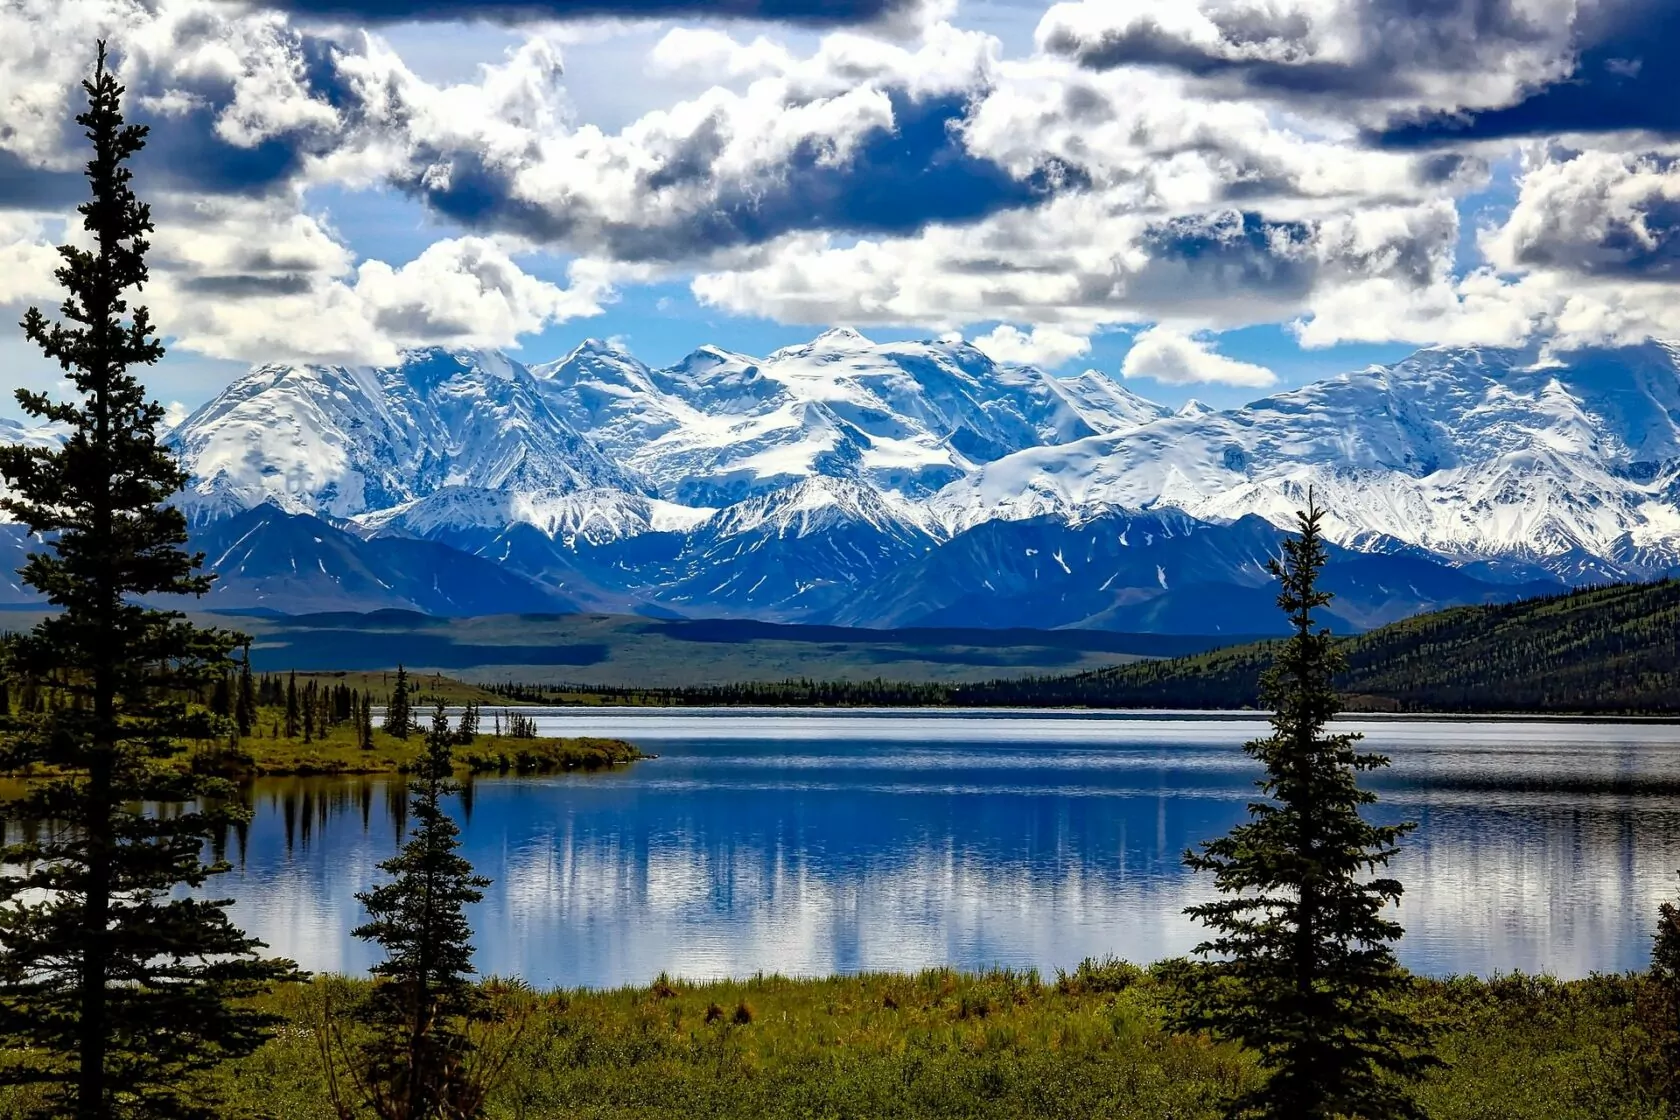
The Hike
Denali National Park, a great inland park in Alaska that is bigger than the state of New Hampshire, is truly a pristine wilderness that few get the chance to explore. Backpacking in Denali gives you some of the most complete solitude that you will find in any American national park and is definitely worthy of a place on this list of best national park backpacking trips.
However, describing a backpacking trip in Denali is difficult for one particular reason: there are no trails. Besides a couple of short walking trails near the Visitor Center, Denali has no developed trails or signs. This vast wilderness has complete ecologically integrity as open land where every step you take feels as though no one has stepped there before.
Backpacking is allowed in Denali, but trekkers need to plan their own routes, navigate by map and compass, ford rivers with no bridges, and practice wildlife safety while sharing the wilderness with moose, brown bears, black bears, wolves, and many other creatures. While not for the inexperienced backpacker, a trip into the vast wilderness of Denali is truly one of the best national park backpacking trips.
Recommended Itinerary
Since there are no trails in Denali, we can’t recommend a specific itinerary. Trekkers will need to plan out where they think they will want to hike and camp and then be flexible with that itinerary when on the trail. Events like a river that is too deep to ford, a bear hanging out where you planned on camping, a heavy thunder shower, or a washed out river bed can all cause your itinerary to change. It’s very important to remain flexible and to have a backup plan for campsites and walking.
Since there are no trails, your progress will be slower, so don’t overestimate how much you can hike in one day. You may find yourself “bushwhacking” through thick undergrowth (make sure to call out so as not to surprise a bear) or walking across open tundra along side a river.
When you visit the ranger station to pick up your permit, a range will go over your itinerary with you and inform you of any closures due to natural events or wildlife. The National Parks Service has a great series of videos about backcountry camping in Denali that covers everything from packing and planning to wildlife safety while in the park.
When to Go
Summer is the short answer of when to go backpacking in Denali. While winter is beautiful and an amazing time to enjoy the park, traditional backpacking requires a lack of snow which in Denali means summer (late May through September). You can expect rain at any season. The saying in Denali goes, “If it isn’t raining when you start your trip, it will be raining later.” Check the current conditions for seasonal and weather updates.
Getting There
Getting to Denali is easy to understand (there aren’t many options) but difficult to carry out (its rather remote). You can drive to Denali located at Mile 237 on Alaska Highway 3. The park is 240 miles north of Anchorage, 120 miles south of Fairbanks, and 12 miles south of the Healy, the nearest year round village. Perhaps a more popular way of arrival is by the state owned Alaska Railroad that drops you off about a five minute walk from the visitor center. You can also access the park by plane or walk to the park on foot from the mountaineering headquarters in Talkeetna.
Permits & Fees
Backpacking permits are issued in person at the Backcountry Information Center no more than 1 day before your trip begins. All those planning on participating in your trip will need to be present for a backpackers’ orientation. Because backpacking in Denali is so different from other national park destinations, an orientation is required for your safety and the preservation of the habitat. The backpackers’ video series should be viewed prior to the orientation, but chapters 3-5 are included in the meeting.
Wildland Trekking Hiking Adventures
As the world’s premier hiking and trekking company, Wildland believes in connecting people to fantastic environments in amazing ways. Wildland Trekking Company offers an array of incredible hiking and trekking experiences in 9 states and 11 countries. Read more about our world-class destinations.
To learn more about our guided backpacking trips and all of our award-winning hiking vacations, please visit our website or connect with one of our Adventure Consultants: 800-715-HIKE.

