
Your Guide to the 3 Most Common Outdoor Gear Repairs
There’s a particular kind of heartbreak that comes with discovering a hole in your sleeping pad on night one of a long trek. Or when your tent zipper refuses to close as storm clouds roll in. Fortunately, many common outdoor gear mishaps can be fixed with a little know-how and some simple tools. Whether you’re on the trail or back at home, this guide will walk you through step-by-step outdoor gear repair for some of the most common hiking and camping equipment failures.
Temporary vs. Permanent Repairs
When you’re in the backcountry, making temporary outdoor gear repairs is often your only option. Quick fixes like duct tape, zip ties, or dental floss can keep you going until you reach a resupply point or town. Once you’re home, it’s time to apply more permanent solutions like sewing reinforcements, using long-term adhesives, or replacing broken parts. Having both short-term and permanent repair strategies is key to keeping your outdoor gear in top shape!
Patching an Inflatable Sleeping Pad
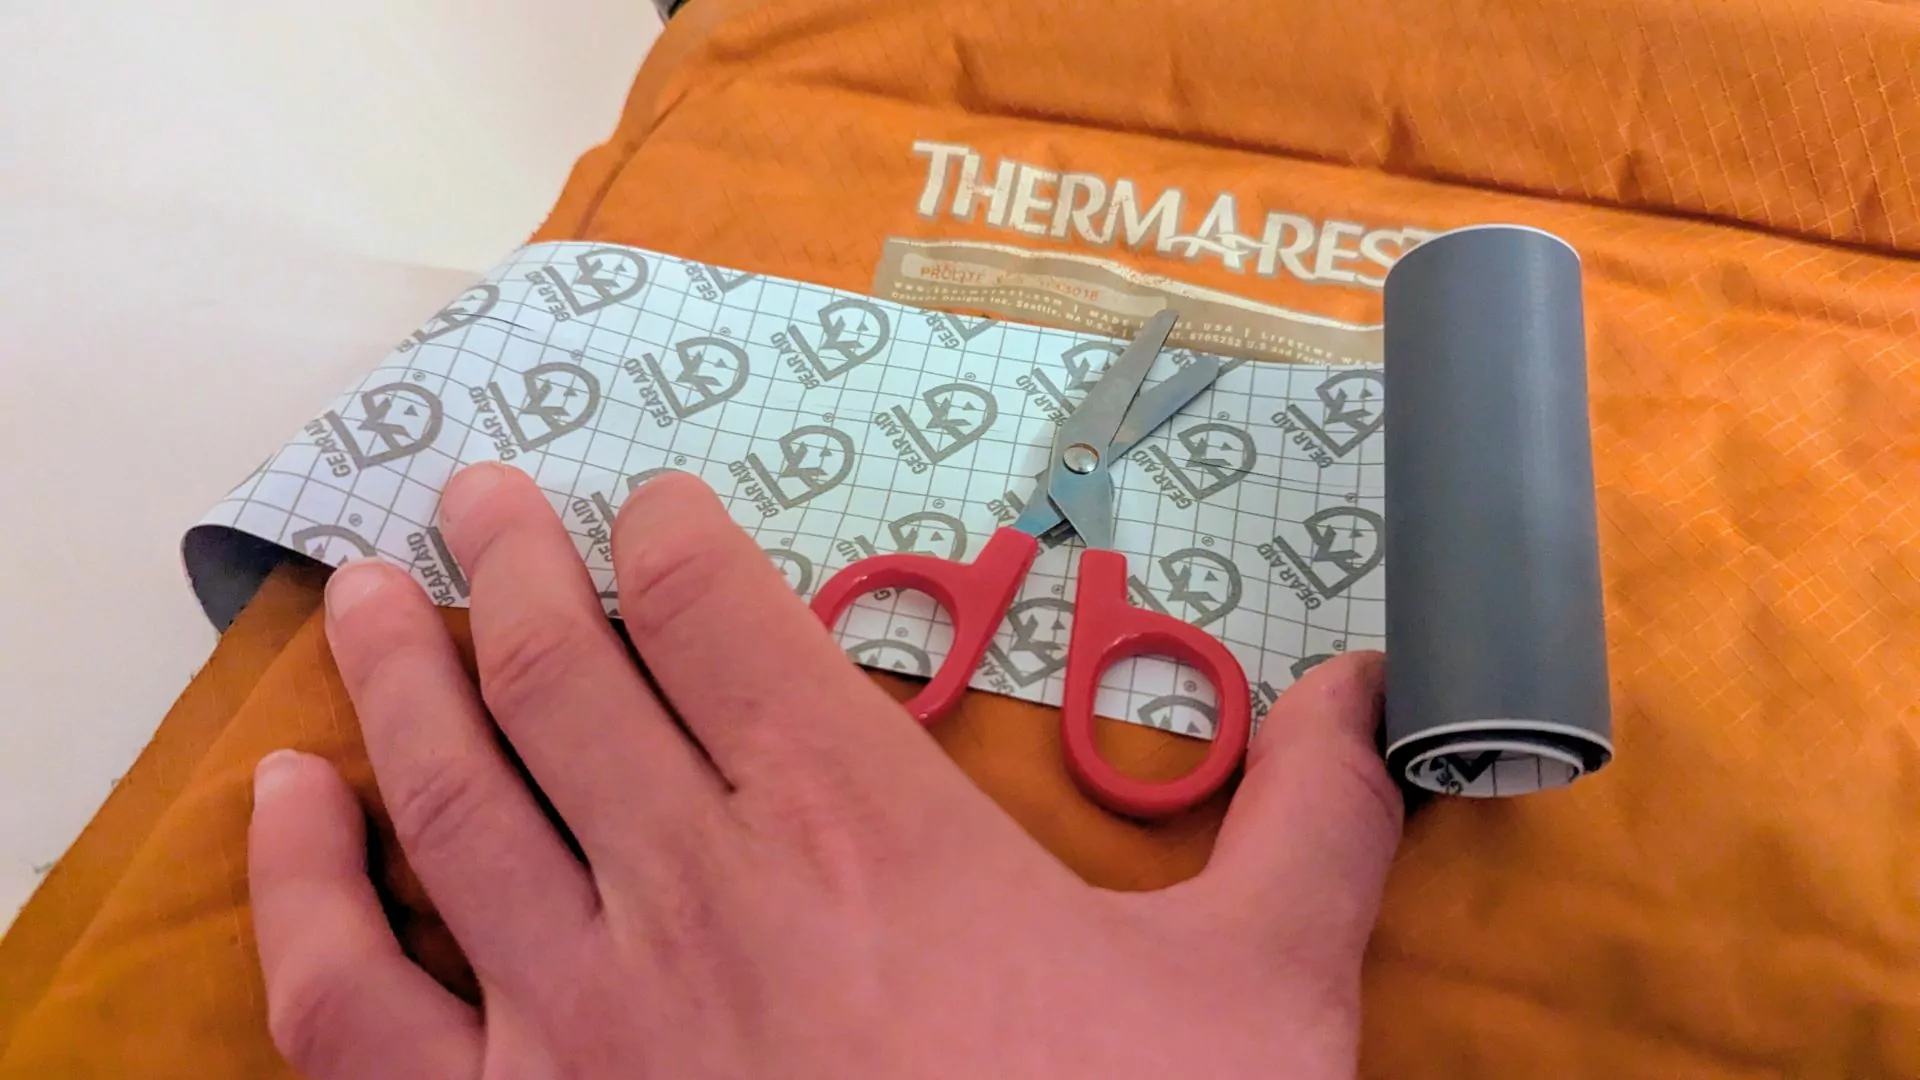
A leaky sleeping pad can quickly turn a comfortable night under the stars into a long, cold struggle. Here’s how to find and fix that pesky hole:
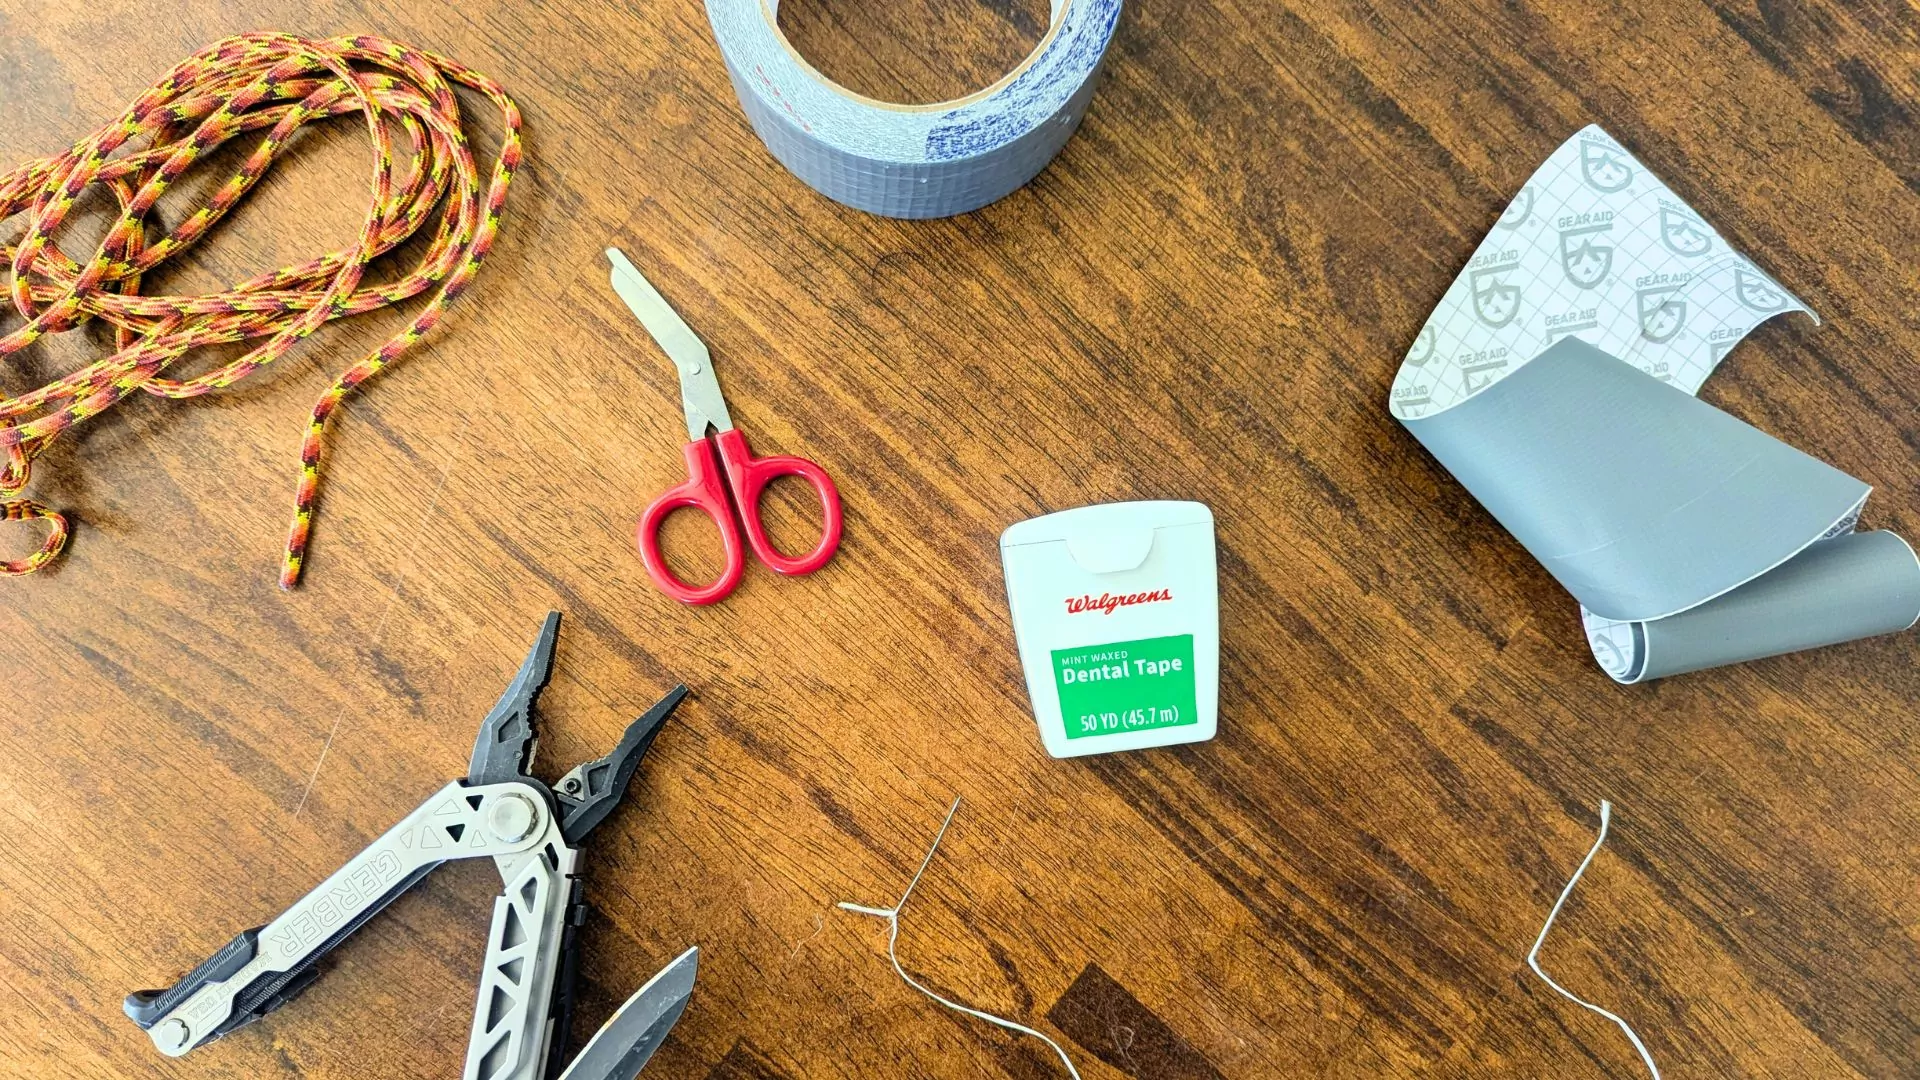
What You’ll Need:
- A small container of water and soap or a tub
- A repair patch kit (often included with your pad)
- Rubbing alcohol
- A towel
- Sandpaper (optional for roughening surfaces)
Step-by-Step Fix:
- Locate the Leak – Inflate your sleeping pad and submerge it in water or rub soapy water over the surface. Watch for bubbles forming at the puncture site. If you don’t have water, press your ear close to the pad and listen for escaping air.
- Mark the Spot – Once you find the leak, mark it with a pen or a piece of tape so you don’t lose track of it.
- Prepare the Surface – Deflate the pad, dry the area, and clean it with rubbing alcohol. If the surface is slick, lightly roughen it with sandpaper to help the adhesive bond.
- Apply the Patch – Use the adhesive patch from your repair kit, pressing firmly for a strong seal. If your kit includes adhesive glue, apply it before sticking on the patch for extra durability.
- Test It – Re-inflate and check for leaks before heading back to bed. Give the adhesive time to cure fully before putting too much weight on the pad.
Trail Story:
On my thru hike of the AT, I discovered my sleeping pad had a slow leak toward the end of the journey. With no water source nearby, I resorted to the old-fashioned method—pressing my ear against the pad and slowly rotating until I found the faintest hiss of air escaping. I used a piece of duct tape for a temporary repair, and once I reached town, I sealed it properly with a patch kit. This simple fix had me sleep soundly through the night, without having to wake up and re-inflate.
Experience the appalachian trail in New hampshire
Fixing a Broken Zipper
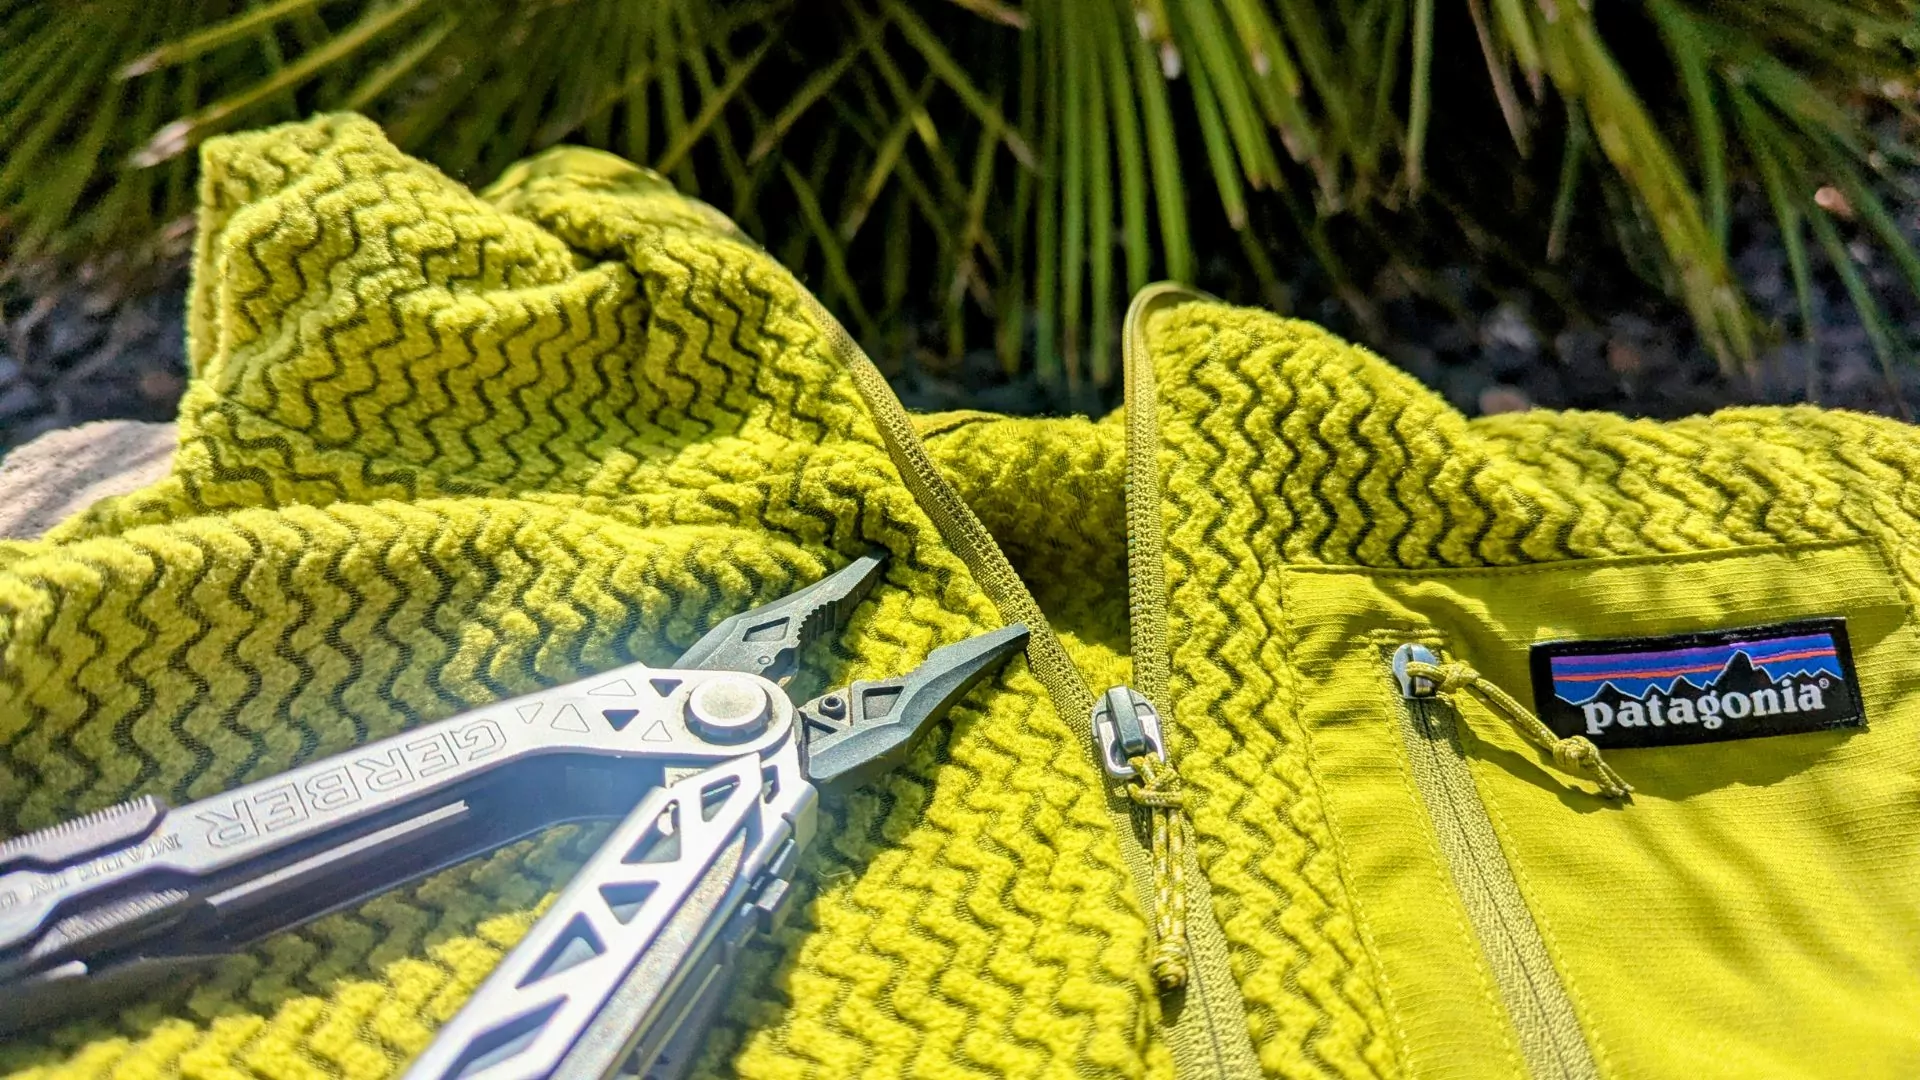
A broken zipper can make a tent or sleeping bag almost unusable. Here’s what to do when it won’t budge or keeps separating:
What You’ll Need:
- Needle-nose pliers
- Bar of soap, wax, or zipper lubricant
- Zipper replacement kit
- Sewing needle and heavy-duty thread (optional for stitching a torn zipper track)
Step-by-Step Fix
- Check for Obstructions – Sometimes dirt, fabric, or debris gets stuck. Remove any obstacles using tweezers or pliers.
- Lubricate the Zipper – Rub a bar of soap, candle wax, or zipper lubricant along the teeth to help smooth movement. Work the slider back and forth to distribute the lubricant evenly.
- Adjust the Slider – If the zipper separates after closing, use pliers to gently squeeze the slider’s sides to tighten its grip. Be careful not to overdo it, or the zipper may become too tight to function.
- Replace the Slider – If the slider is broken, remove it using pliers and slide a new one from a repair kit onto the zipper teeth. Make sure it matches the original size.
- Repair the Zipper Track – If teeth are misaligned or missing, hand-stitch a stop at the end of the zipper track to prevent further unraveling.
Trail Story
On a stormy night in Oregon during my PCT thru-hike, my tent zipper failed completely, leaving the door flapping open in the wind. With the rain coming down hard, I used a zip-tie to secure the door for the night. When I reached the next town, I rounded up some pliers from a hardware store to pinch the zipper slider, restoring its grip and preventing further mishaps. Sometimes, field fixes buy you just enough time to reach a permanent solution!
Backpack A section of the PCT in washington
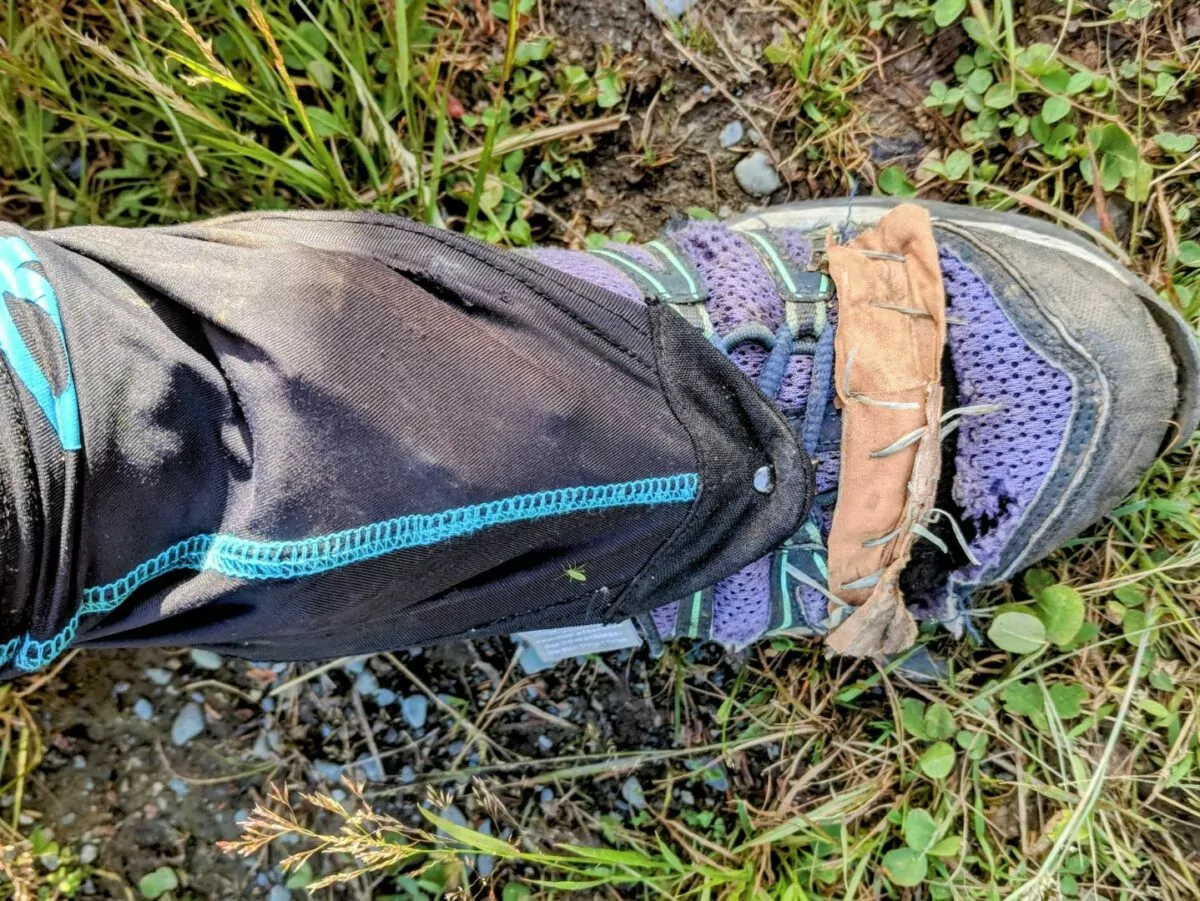
Repairing a Worn Out Shoe
When your shoes start falling apart on the trail, it can feel like the end of your hike. A loose sole or a torn seam can quickly lead to blisters or discomfort. Fortunately, a little creativity can get you back on your feet. One of the most unexpected yet effective solutions is dental floss—yes, you heard that right!
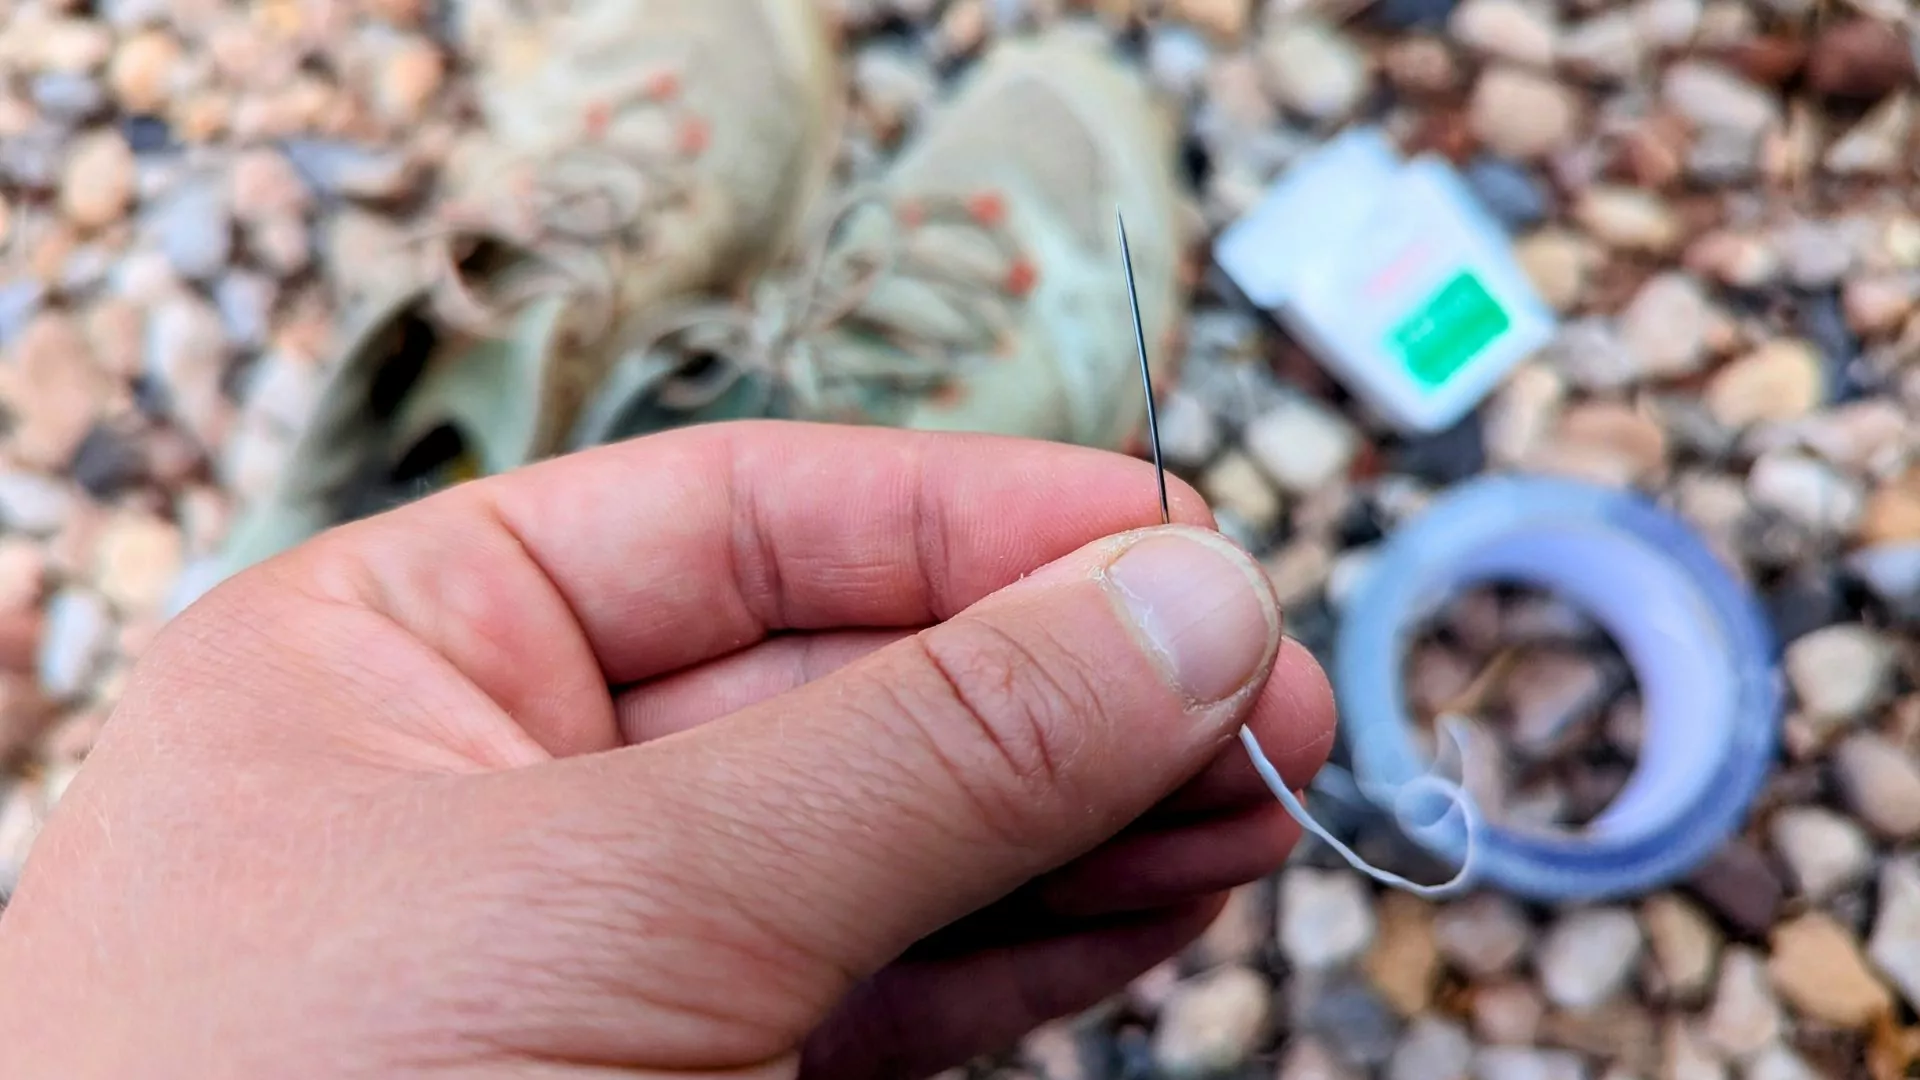
What You’ll Need:
- A strong needle
- Dental floss (waxed is best)
- Scissors
- Duct tape (optional for added support)
Step-by-Step Fix
- Assess the Damage – Check if your shoe’s stitching has come undone or if the sole is coming loose. If the stitching is the issue, dental floss can act as a great makeshift thread.
- Thread the Floss – Cut a length of dental floss long enough to stitch the tear or seam. Thread it through a needle if necessary, and tie a knot at the end.
- Sew the Shoe – Start sewing the tear or seam back together using a simple overhand stitch. Dental floss is incredibly strong and will hold up well in most conditions. For extra durability, you can reinforce the stitching by going over it a few times.
- Secure Loose Soles – If the sole is coming loose, use dental floss to stitch it back to the shoe. If the damage is too extensive, duct tape can temporarily hold the sole in place until you get home.
- Test the Repair – Once your shoes are back together, take a short walk to make sure everything feels secure before hitting the trail again.
Trail Story
On a rocky stretch of the Continental Divide Trail, my Altra Lone Peaks started falling apart. The stitching along the side came undone, and I could feel rocks directly touching my feet. Fortunately, I have packed a few sewing needles, specifically for gear repair! I threaded a needle with some floss, sewed up the seam, and added a bit of leukotape around the repair for extra support. It wasn’t pretty, but it held up for the rest of the section, and got me to my next pair of shoes!
hike up to the continental divide in wyoming
Being Prepared
Outdoor gear failures are an inevitable part of any adventure, but with the right know-how and a few simple tools, you can tackle most issues on the spot. Whether it’s patching a leaky sleeping pad, fixing a zipper, or reinforcing your shoes with dental floss, knowing how to make temporary repairs can keep you safe and comfortable until you reach a more permanent solution.
Remember, the key to outdoor gear repair is to be prepared and resourceful. Having a small repair kit, a bit of duct tape, and some creativity can go a long way in ensuring your gear holds up through the toughest conditions. So next time you find yourself facing a gear mishap, don’t panic—take a deep breath, make a quick fix, and keep moving forward. Your adventure is still waiting!

