
Best Family Hikes in Zion National Park
Jump to:
Zion National Park in southern Utah is famous for its towering sandstone cliffs and adrenaline-pumping hikes, such as the climb up to Angel’s Landing and the awe-inspiring wade through the Narrows. While these experiences are certainly part of the draw to the park, Zion has some of the best family-friendly hikes and many other exciting options for a more family-focused vacation. With miles of easy to moderate trails to explore, kid-friendly activities (definitely check out the Junior Rangers Programs!), wildlife sightings, and open space to run and play, Zion is a wonderful destination for spending special time with your loved ones.
This article details the six best family hikes in Zion National Park, specifically catering to families who may not be up for strenuous hiking trails or remote backpacking adventures (…yet!) All of the hikes listed are permit-free and references to their corresponding Zion Shuttle stops will make finding these hikes a breeze, so you can focus less on logistics and more on the stunning views.
All-inclusive Utah National Park Adventures
1. Pa’rus Trail
The Area
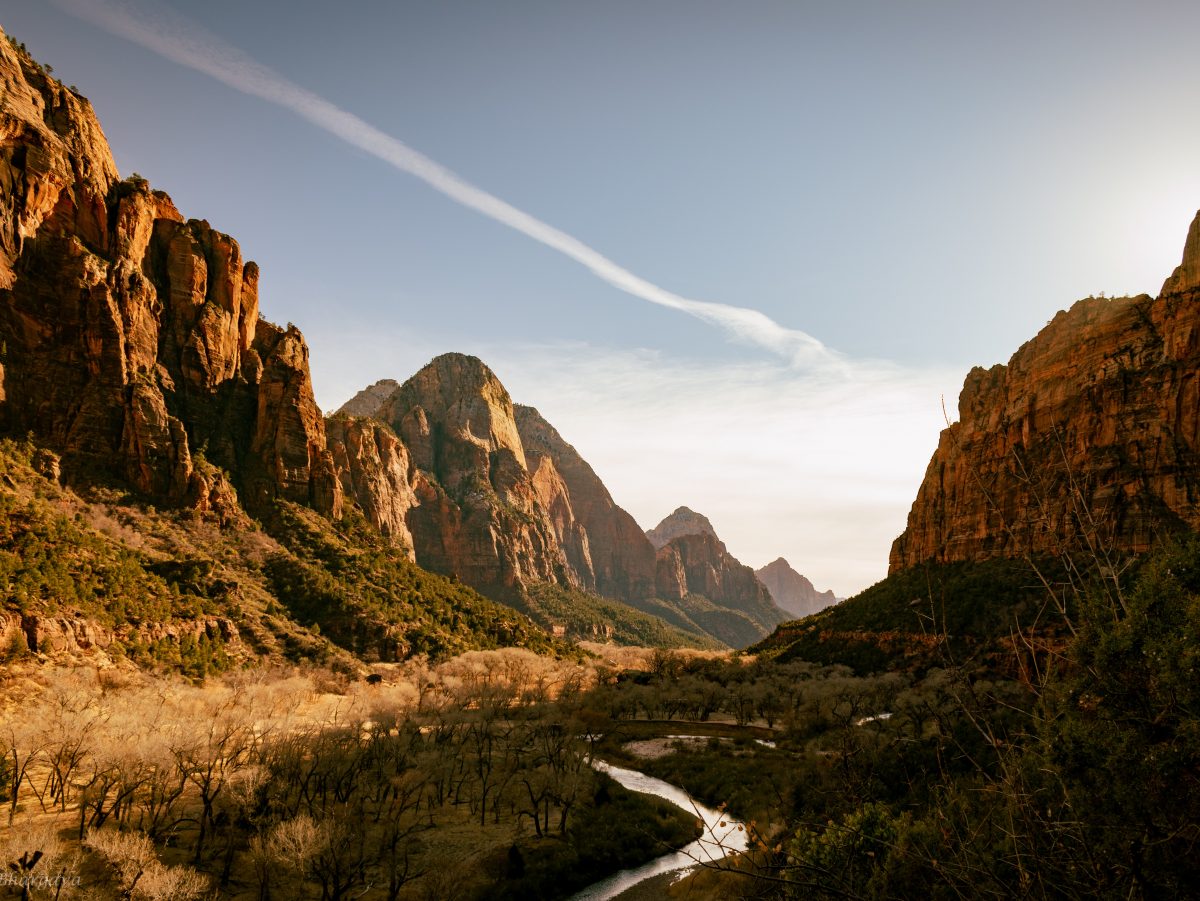
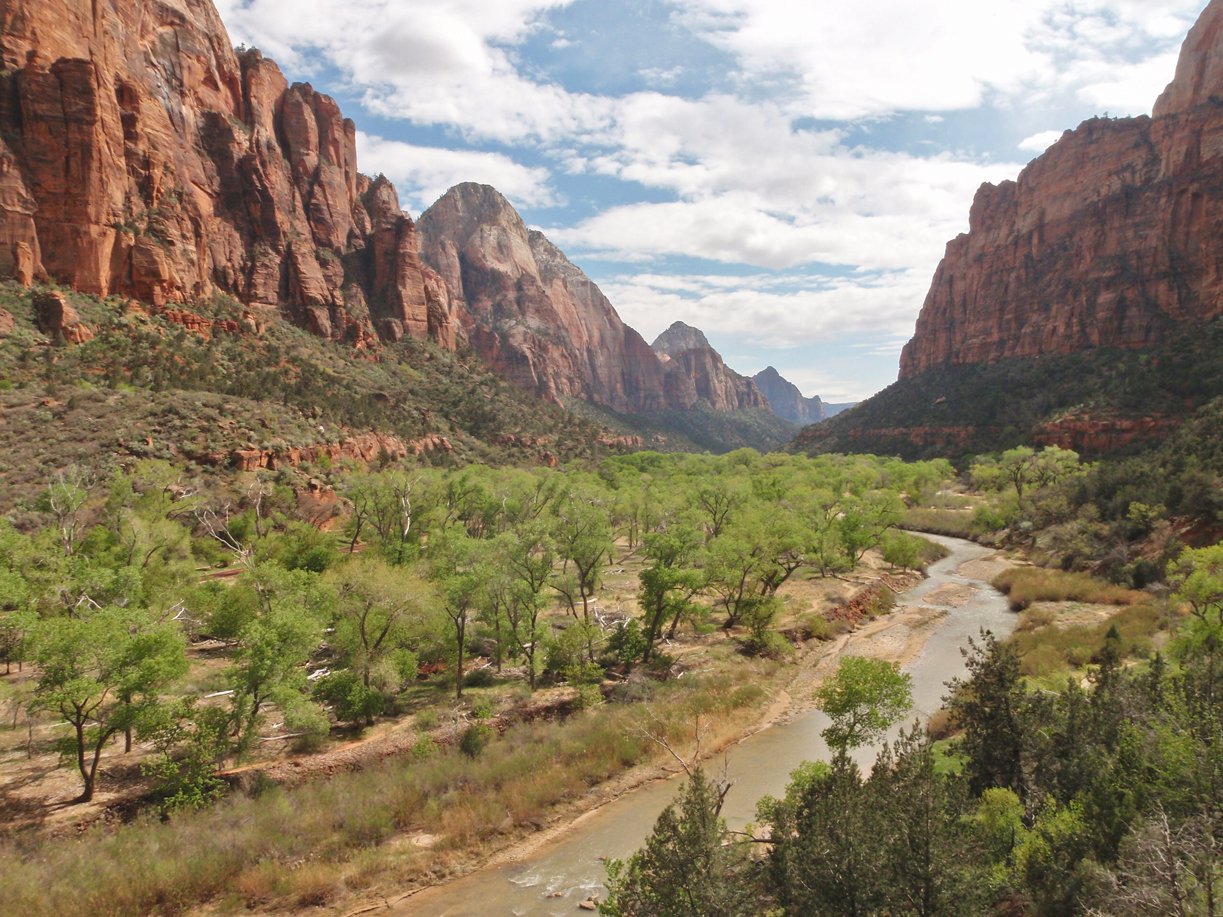
The Pa’rus Trail (pronounced PA-roos, and is a Southern Paiute word meaning “bubbling water”) meanders its way along the banks of the Virgin River in the lower section of Zion Canyon. This area of the park is more open than the upper canyon with great views of iconic features like the West Temple, the Towers of the Virgin, the Altar of Sacrifice, and the Watchman. Easy river access and sandy beaches offer some splashing fun and much-appreciated relief from the summer heat. Being near the parking area and visitor center, this is a great place to begin your Zion trip.
Trip Overview
The Pa’rus trail is mostly flat, paved, and comes in at 1.7 miles one-way. Thanks to Zion’s shuttle service, you can hike one way and then take the shuttle back to the trailhead or to your next destination. The Pa’rus is wheel-chair accessible and pet-friendly; you can even ride bikes on it! If you want to create a learning opportunity for the kids (or history-buff adults), make sure to check out the Human History Museum before jumping on the trail so you can spot historical features such as the abandoned diversion dam and know where the early pioneer farm used to be.
Getting There
If beginning from the Visitor Center, I recommend starting at the trailhead near Shuttle Stop #1. The trailhead is in the South Campground, just across the bridge from the shuttle area. Hike the trail all the way upriver and finish at Shuttle Stop #3 – Canyon Junction. This allows the family to experience the full trail and Canyon Junction is a great starting point for explorations up the canyon. There is also a trailhead at Shuttle Stop #2 – the Human History Museum. If accessing the trail from Canyon Junction, find the trailhead on the west side of the Zion Canyon Scenic Drive.
Best Season
While open year-round, this trail can get very hot in the summer due to a lack of shade. A dunk in the river helps, but be prepared with plenty of water and sunscreen. As such, the best season to hike the Pa’rus Trail is, well, anytime it’s not super hot.
Zion is known for its extreme weather changes. Make sure you plan ahead by being prepared for whatever weather conditions are typical of the season in which you visit.
2. Riverside Walk
Award-Winning Zion Hiking Packages
The Area
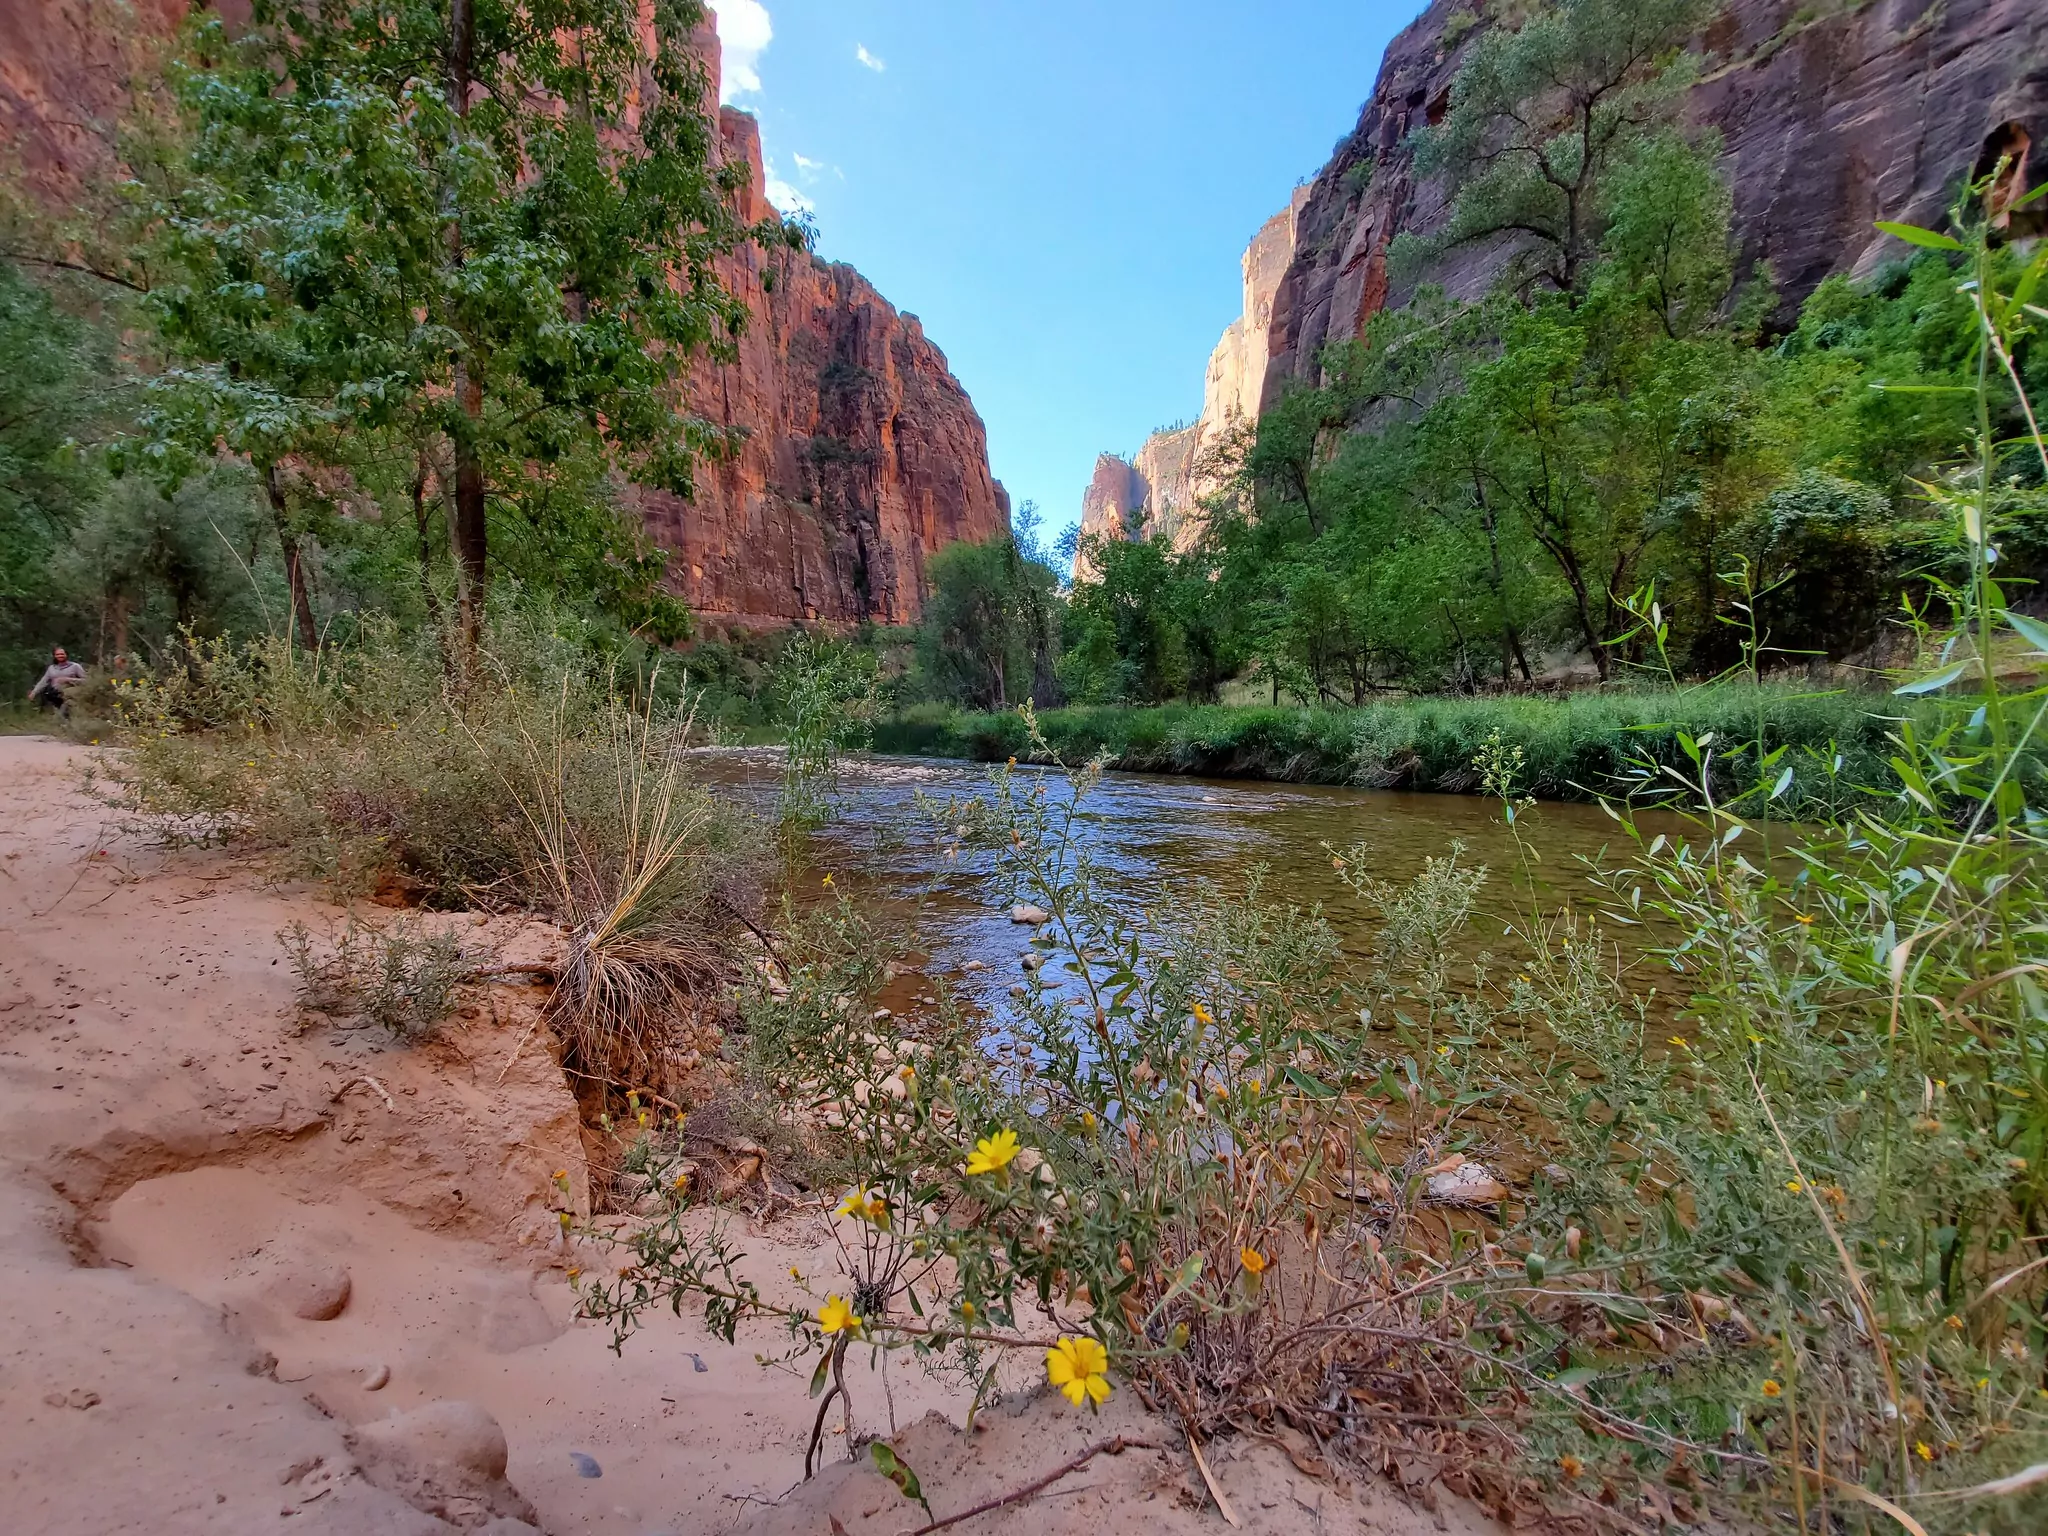
If hiking the Narrows is not on the table just yet, the Riverside Walk is a wonderful alternative. The Riverside Walk is located in the back of Zion Canyon, with the end of the trail actually being the start of the Narrows! Hikers get to experience a lovely, mostly flat walk along the river, with the canyon walls gradually narrowing in as the trail progresses. The trail eventually ends at a rocky little beach where those taking on the Narrows enter the water and continue on. This is a great place to hang out for a while, play in the water, and watch as other hikers navigate their first crossing against the current. No trip to Zion would be complete without at least seeing the mouth of the Narrows via the Riverside Walk!
Trip Overview
Like the Pa’rus trail, the Riverside Walk is mostly flat, paved, and wheel-chair accessible (but not pet-friendly). From the trailhead at the Temple of Sinawava to the end of the trail is one mile, a two-mile round trip hike. For such a short stretch of trail, there is plenty to see before the grand finale at the Narrows. There are several easy river access points with good swimming when the river is not too high*. Easily spotted along the dripping canyon walls are hanging gardens, watered through the porous sandstone walls. Wildflowers are abundant and animal sightings are common: look out for deer, the rare California Condors, and the infamously chubby Riverside squirrels (but please keep wildlife healthy by NOT feeding them!).
* Tip: Pay attention to flash flood and river conditions available from the visitor center. If it isn’t safe to hike the Narrows, it is not safe to swim in the river.
Getting There
Enjoy the scenic shuttle ride all the way to the end of Zion Canyon, passing incredible sights along the way and maybe picking up a fact or two from the shuttles’ informational narration. The trailhead is located at Shuttle Stop # 9 – The Temple of Sinawava, where there are also restrooms and drinking water available. The trail is easy to spot, just keep walking along the paved path deeper into the canyon.
Best Season
Any time is great on the Riverside Walk, although in winter some portions can be closed due to ice. Always check the National Park Service website for current trail conditions. On summer days, retreating into this area of the park means cooler temperatures thanks to lots of shade and the cold river water. Submerging into the river that formed the towering canyon walls above you adds quite a special element to an already mesmerizing place.
3. Canyon Overlook Trail
The Area
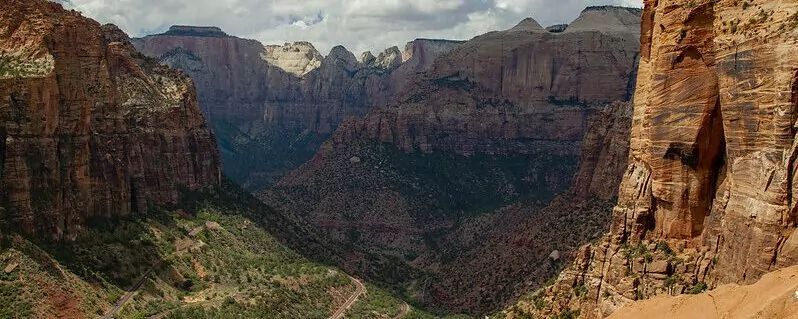
Driving up the switchbacks of scenic Route 9 and through the historic tunnel blasted through sheer sandstone are tick boxes on most Zion itineraries. But there are other great reasons to haul your family up the winding mountain road. While most visiting the east side (the area of the park on the opposite side of the tunnel from Zion Canyon) do so just to drive the incredibly beautiful road, those who get out and explore are definitely rewarded for the effort! Vast expanses of striped and checkered red rock dominate the landscape. Whereas Zion Canyon is about peering up at the looming cliffs above, the east side is about getting in and amongst the desert sandstone, exploring over slick rock, and checking out slot canyons. One of the very few official hiking trails on the east side, the Canyon Overlook Trail is a great way to get a taste of this other-worldly part of the park!
Trip Overview
For such a short hike, only one-mile round-trip, the Canyon Overlook Trail packs quite a punch. Some highlights of the trail are gazing down into winding Pine Creek (a technical slot canyon), crossing a short suspension bridge* into a fern-covered alcove, opportunities to do a little bit of easy rock scrambling if desired, and then the stunning, expansive final viewpoint looking towards Zion Canyon. Keep eyes peeled, bighorn sheep are commonly spotted around this trail!
* Tip: There are a few points of exposure on this trail where a fall would be very dangerous, particularly around the bridge and at the final lookout. Be sure children are supervised closely when there are drop-offs close to the trail.
Getting There
The east side of the park is not accessible via the shuttle system. To get there drive along the Zion Canyon Scenic Drive to Canyon Junction and turn towards Route 9, away from the shuttle route heading into the canyon. The road will very quickly turn into long switchbacks heading upwards (have the kids on the lookout for the Great Arch of Zion on the left). After the switchbacks end, head through the mile-long tunnel (an architectural feat completed in 1930). There is a small parking lot directly to the right after exiting the tunnel or, if that lot is full, there are a few more spots and some street parking just a little bit farther down. Once parked, the signed trailhead is near a small ranger kiosk on the opposite side of the road to the first parking lot.
When to do this Hike
The Canyon Overlook Trail can be hiked during any season. In winter, due to the higher elevation, the east side may have snow even when the canyon floor does not. Be very cautious of slippery conditions and keep children close.
4. Weeping Rock
**At the time of writing, Weeping Rock is CLOSED INDEFINITELY due to significant rockfall in August 2019. For current conditions, check the National Park Service website**
The Area
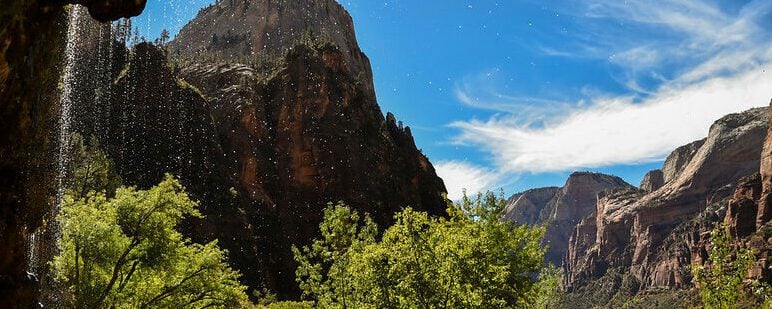
In this rare case, we focus more on the destination than the journey. A short hike from the shuttle bus brings you to the very famous Zion wonder, Weeping Rock. Located in the heart of Zion Canyon, this mystical alcove feels alive. Even in the dry season, water seeps through the rock’s pores and drips down the clinging ferns of hanging gardens along the walls.
This phenomenon is due to the varying densities of Zion’s sandstone formations. As the water slowly makes its way through the upper, more porous layers, it finally hits the (almost) impermeable Kayenta formation. The water is forced out laterally, thus flowing towards the cliff face and dripping out. The most incredible part, the water in Weeping Rock has been dated to be over 1,000 years old!
Trip Overview
Although this is a very short hike, it is steep and uneven, making it unsuitable for a stroller. The rocky trail can be slippery near the top where moss accumulates. Inside the alcove, enjoy the magical scenery and educate the family using the handy informational plaques. On hot days, the kids will love playing in the stream that runs under the footbridge. Look for steps to the stream just to the side of the bridge.
Getting There
The trailhead is very easy to find at Shuttle Stop # 7 – Weeping Rock. Pass over the hiker bridge and follow the well-used path up to the alcove.
When to do this Hike
Again, Weeping Rock can be hiked any time of year. Though being more cautious of footing and slippery ice in winter is definitely necessary, the giant hanging icicles add an extra special element to the Weeping Rock experience. Once ice forms, the park does close the actual entrance into the alcove (it’s much better to gaze at those icicles from a safe distance rather than risk one falling on you!).
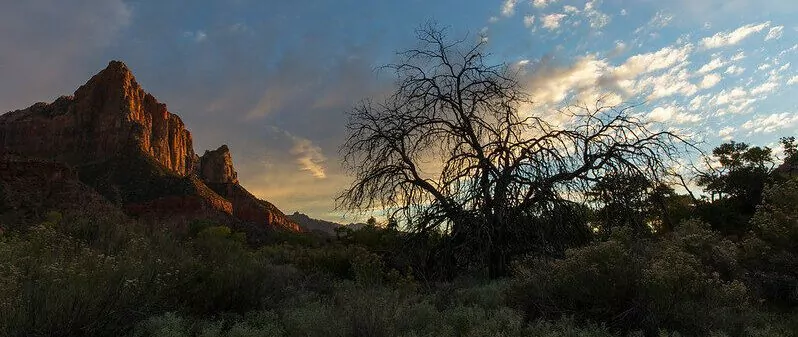
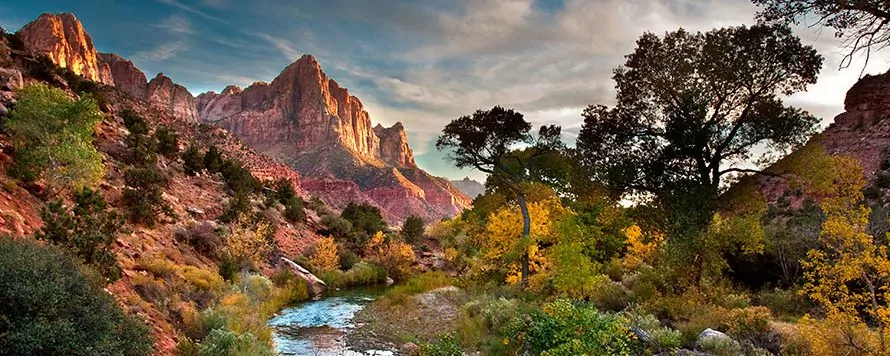
5. The Watchman Trail
The Area
The Watchman is the stoic guardian that looks over the mouth of Zion Canyon. On the Watchman Trail, hikers get to enjoy open vistas, iconic desert flora like prickly pear cactuses, junipers, and pinyon pines. The top portion of the hike turns into a small loop, with great views south towards the visitors center and Springdale, west towards the Towers of the Virgin, the West Temple, the Altar of Sacrifice, and the Painted wall, and finally north into Zion Canyon. From this trail, you can spot Angel’s Landing, Observation Point, and maybe even your car in the parking lot! Plus, while other hikers rush to the Narrows or to Angel’s Landing, a leisurely hike up the Watchman Trail will be a nice break from the other crowded trails.
Trip Overview
The start of the trail follows the Virgin River upstream, crosses the road near the RV and oversized vehicle parking lot, then begins to head uphill. The trail is well maintained and easy to follow. There are a few informational plaques identifying flora along the way. At the top of the climb, the trail turns into a small loop, go either direction and make sure to check out the viewing area at the opposite end of the loop. Keep the kids close as there are some drop-offs along the trail and at the viewing areas.
Getting There
The trailhead is easily spotted at Shuttle Stop #1, just across the road from the visitor center and on the east side of the river.
When to do this Hike
The Watchman Trail is open year-round. In summer, this trail can be very hot, as it provides minimal shade. Try to fit it in in the morning or on a cloudy day, if possible. For an unforgettable experience, drag the kids out of bed for a sunrise summit. It is sure to blow the whole family’s minds and the early morning injustice will be quickly forgiven!
6. Kayenta Trail to the Emerald Pools
The Area
The Emerald Pools are several collections of blue-green water (thanks to the resident algae that thrive in them) that have streamed down from the cliffs above. There is a lower pool, middle pools, and an upper pool. These gems are perfect for experiencing a lush little microclimate “oasis” in the middle of the desert. Taking the time to see all three levels is definitely worth it, as they are in separate areas and have their own feel.
The lower pools are the most accessible and features a small waterfall (during the wet seasons), the middle pools have an incredible sandy beach that feels so wonderfully out of place among the red rock surroundings, and the upper pool is the biggest, most spectacular of the pools themselves. The Kayenta Trail winds up through the sandstone on the west canyon wall, giving hikers birds-eye views of the Virgin River and valley floor below. The trail has some really fun rock features that the kids will love scrambling up and over.
Please note that although tempting, swimming is prohibited in the pools in order to conserve their beauty and keep them safe for the animals who rely on them for water.
Trip Overview
There are two trails that lead to the Emerald Pools. The more popular route is via the Emerald Pools trail that begins at the Zion Lodge. I however strongly recommend opting for the Kayenta Trail instead. While both trails are heavily trafficked, Kayenta is a bit less so, more scenic, and generally a more engaging hike.
Middle Emerald Pools
The hike starts by crossing the Virgin River over a picturesque pedestrian bridge. After the bridge, the trail begins to climb and wind across the sandstone. There is some decent climbing on this hike but never for too long at once. Eventually, the trail will reach a smooth platform with a small creek running through it. The trail continues up the steps on the other side. Once you hit the trail junction, follow the sign to the left, towards Middle Emerald Pool.
The beach is a lovely spot, and if the family is too tired to push on, this would be a great lunch spot. The waterfall that hikers walk under at the lower pools originates here, and you can see it as the little stream tumbles over the edge near your feet.
Upper Emerald Pool
Back at the trail junction, follow the sign, heading up the steps to Upper Emerald Pool. This quarter-mile stretch of trail is sandy with some big steps, so it may be hard on very young hikers. However, the effort is worth it! The upper pool is far bigger than the others, surrounded by giant boulders, vertical cliff walls, and sometimes a long thin waterfall flowing down the cliff and into the water. Pick a boulder, relax in the shade, and enjoy a well-earned lunch or snack.
On the way down, there is a signed side trail on the right that leads to the Lower Pools. You can take this to visit the pools and then exit via the Lower Emerald Pools Trail. This will end at Shuttle Stop # 5- Zion Lodge.
Lower Emerald Pools Trail
If you would prefer to come straight back down the Kayenta Trail, it is also super easy to tack on a stop at the lower pool another time. The trail to Lower Emerald Pool is only 1.2 miles round-trip, paved, wheel-chair accessible, and stroller-friendly. It is a very busy trail in the summer, given its accessibility and proximity to Zion Lodge. With good shade throughout, it is a nice option on hot afternoons.
Getting There
Kayenta Trail
Begin at Shuttle Stop #6 – The Grotto. Walk directly across the road from the shuttle stop and cross the bridge. Directly on the other side of the bridge, turn onto the Kayenta Trail which heads up and to the left (the trail to Angel’s Landing continues straight along the river).
To make the hike a bit longer, or to make a loop with the lower pools, utilize the Grotto Trail which connects the Grotto to Zion Lodge.
Lower Emerald Pool
The Lower Emerald Pool Trail starts and ends at Shuttle Stop #5 – Zion Lodge. Take the sidewalk towards the big cottonwood tree on the lawn and continue across the road to the signed trailhead.
When to do this Hike
Open all year. Spring is an absolutely lovely time to hike the Kayenta Trail! Spring runoff means that the pools will be more full and the waterfalls will be more prominent. If visiting in the summer, keep in mind that the pools can dry out and the waterfalls may not be running anymore. The trail can also be very hot in the summer.
Hike Zion In a Day with a Guide
Guided family-friendly day hikes are available, and are a stress-free, exciting way to do this trip. The tour company handles gear, lunch, snacks, and provides a professional guide so you can focus 100% on enjoying your adventure. Read more…
Wildland Trekking Hiking Adventures
As the world’s premier hiking and trekking company, Wildland believes in connecting people to fantastic environments in amazing ways. Wildland Trekking Company offers an array of incredible hiking and trekking experiences in 9 states and 11 countries. Read more about our world-class destinations.
To learn more about our guided backpacking trips and all of our award-winning hiking vacations, please visit our website or connect with one of our Adventure Consultants: 800-715-HIKE.

